


Table of Contents
- Step 1: Declutter Your Countertop First
- Step 2: Establish Designated Storage Zones Around Your Sink
- Step 3: Organize Under-Sink Storage Ideas for Maximum Space
- Step 4: How to Sanitize Kitchen Sink Surfaces Daily
- Step 5: Maintain Your Sink Strainer and Drain Board
- Step 6: Use Vertical Space and Smart Accessories to Stay Clutter-Free
- Common Mistakes to Avoid When Organizing Your Sink Area
- Frequently Asked Questions
Last Updated: September 3, 2026
Step 1: Declutter Your Countertop First
Start by removing everything from your sink area and counter. Most people accumulate items without realizing how much clutter builds up, old bottles, expired products, and things that migrated there weeks ago. Before organizing, eliminate the non-essentials.
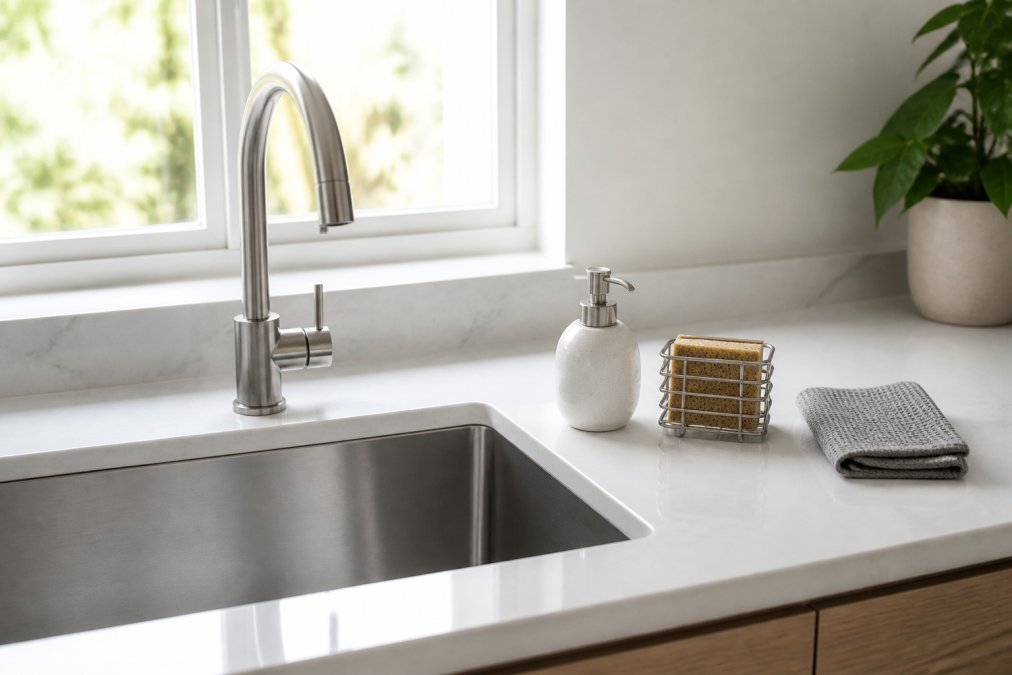
Lay everything out on a nearby surface so you can see what you have. Discard duplicates, expired items, and anything unused for three months.
Sort items into three categories. Keep only what you use daily or weekly, your dish soap, sponge, and perhaps a hand towel. Move seasonal items to under-sink storage or a cabinet. Discard anything broken, dried out, or no longer needed. This single step often frees up more counter real estate than any organizational system can provide.
The minimalist approach eliminates clutter rather than organizing it, making sanitizing easier and keeping your sink area hygienic. SinkElle's design philosophy centers on this principle: a clutter-free sink area is the starting point for everything else.
Step 2: Establish Designated Storage Zones Around Your Sink
Create specific zones for the few items that stay near your sink. Designated spaces prevent items from creeping back across your counter and keep your sink area organized long-term.
Divide your sink area into three zones: immediate (right at the sink), accessible (within arm's reach), and secondary (cabinets or drawers). Your immediate zone holds only active-use items, sponge, soap, and brush, that need to dry quickly to prevent bacterial growth (the CDC).
The accessible zone holds items used several times weekly, dish towels, backup sponges, cleaning supplies. The secondary zone stores specialized products and monthly-use items.
SinkElle's Sink Organization Bundle addresses this exact challenge by creating designated compartments that define where things belong. When each item has a specific spot, you're far more likely to maintain the organization over time. It's not about willpower; it's about making the right choice the easiest choice.

Step 3: Organize Under-Sink Storage Ideas for Maximum Space
Under-sink storage is prime real estate but often chaotic. With the right approach, you can maximize this space and keep your countertop clear.
Take everything out, clean the interior, and evaluate what needs to live there. Items used less than once weekly are candidates for under-sink storage.
Use stackable, flexible bins that fit around plumbing. Choose containers with handles for easy access, forgotten items become wasted space.
Store cleaning supplies in sealed containers, dish towels and sponges in breathable storage to prevent mildew. Use vertical space efficiently while keeping items accessible.
For tight spaces, removable baskets work better than permanent shelving, easier to install, adaptable to plumbing, and simple to remove for pipe access.
Step 4: How to Sanitize Kitchen Sink Surfaces Daily
Your sink area needs regular sanitization to prevent bacterial growth. A clutter-free sink is easier to sanitize and allows you to reach all surfaces.
After washing dishes, rinse your sink with hot water and scrub the basin, drain board, and faucet area, paying attention to corners where bacteria accumulate.
For deeper sanitization, use equal parts white vinegar and water (the EPA). Spray surfaces, let sit a few minutes, then scrub and rinse. Do this at least twice weekly.
Rinse your drain board after each use. Weekly, pour boiling water down your drain to flush debris (the CDC). Use a small brush for stubborn buildup around the drain opening.
Wipe your faucet daily with a dry cloth. Weekly, sanitize the faucet base and handle with vinegar solution, these high-touch areas need frequent attention.
Step 5: Maintain Your Sink Strainer and Drain Board
Your sink strainer and drain board need regular maintenance to function properly and stay hygienic. Neglecting them leads to standing water, odors, and bacterial growth.
Empty your strainer after every use, this takes 10 seconds and prevents buildup that causes odors and attracts bacteria. A clogged strainer means water pools in your sink.
Weekly, rinse your strainer under hot water and use a brush to clean the mesh. Monthly, soak it in vinegar solution for 15 minutes to sanitize and remove mineral deposits.
Check your drain board regularly to ensure water flows properly. If water pools, adjust how dishes are arranged or consider a different design.
The Sinkelle FlowRack Pro solves this problem with an angled design that channels water back into the sink instead of letting it pool. This simple feature prevents bacterial growth and keeps your sponges and brushes drying properly instead of sitting in water. When your drain board works correctly, your entire sink area stays drier and cleaner.

Clean your drain board daily by rinsing it with hot water and wiping it dry. Weekly, sanitize it with your vinegar solution. If you notice mineral deposits or stubborn stains, use a soft scrub brush to gently clean the surface. Most drain boards are stainless steel or silicone, both of which handle regular cleaning without damage.
Step 6: Use Vertical Space and Smart Accessories to Stay Clutter-Free
Vertical space is the secret weapon for keeping your sink area organized without expanding its footprint. When you think vertically instead of horizontally, you can store more while actually reducing the visual clutter on your counter. This is especially critical in small apartments or tight kitchen layouts where counter space is precious.
Use wall space above and beside your sink. Command hooks hold dish towels and brushes; a narrow shelf stores bottles. These vertical solutions keep items accessible without counter space.
Wall-mounted sponge holders and brush organizers use vertical space efficiently. Hanging items dry faster and stay cleaner than sitting in puddles on your counter.
Consider a magnetic strip for storing metal utensils or a tension rod under your sink for hanging cleaning supplies. These vertical storage solutions work around plumbing and adapt to your specific layout. The key is thinking about the walls and unused vertical areas as storage opportunities, not just the counter.
The Sinkelle DryFlow Splash Mat and AquaShield Faucet Guard use smart design to manage water while taking minimal space. They sit flat on your counter but solve the water-pooling problem that forces people to keep towels and absorbent materials nearby. This means fewer items on your counter and a drier sink area overall.

Common Mistakes to Avoid When Organizing Your Sink Area
Even with the best intentions, certain mistakes undermine your organization efforts. Understanding these pitfalls helps you build a system that actually lasts instead of reverting to clutter within weeks.
The biggest mistake is keeping too many backup items. Keep one backup sponge, one backup brush, and one extra bottle of soap, not five of each.
Don't choose storage solutions before decluttering. You'll end up with organized clutter instead of no clutter. Reduce clutter first, then choose storage for what you actually have.
If your sink area stays wet, bacteria and mold thrive. Choose sponge holders that drain properly and avoid placing items where water pools.
Space items to allow air circulation and drying. Cramming everything into a tiny organizer creates damp conditions where bacteria flourish.
Establish a daily maintenance routine. Spending 30 seconds after dishes to put items away and wipe surfaces dry prevents gradual accumulation.
Finally, don't underestimate the importance of actually using your storage system. If your designated storage is inconvenient or unintuitive, you'll stop using it. Your organization system only works if it's easier to put things away properly than to leave them on the counter.
A cluttered, unsanitized sink area drains your energy every time you enter the kitchen. The good news is that reducing kitchen clutter and maintaining proper sanitation doesn't require complicated systems or expensive products. It requires intentional choices about what stays on your counter and commitment to simple daily habits.
The Sinkelle Sink Organization Bundle brings together the essentials you need in one thoughtfully designed solution. With waterproof materials, no-tool installation, and a minimalist Scandinavian aesthetic, it transforms your sink area into a functional space that supports both organization and hygiene. Shop Now to experience how a well-designed system makes daily cleanup easier and keeps your kitchen cleaner.
| Step | Focus Area | Frequency | Result |
|---|---|---|---|
| Declutter | Remove non-essentials | One-time initial | Clear counter space |
| Designate zones | Assign item locations | Ongoing | Organized, predictable system |
| Under-sink storage | Maximize unused space | One-time setup | Hidden storage for supplies |
| Daily sanitize | Clean surfaces and drain | Daily | Hygienic, bacteria-free sink |
| Maintain strainer | Empty and clean | After each use + weekly deep clean | Proper drainage, no odors |
| Use vertical space | Wall-mounted solutions | Ongoing | More storage, less counter clutter |
Frequently Asked Questions
Q: How often should you sanitize your kitchen sink to prevent bacterial growth?
A: Sanitize your kitchen sink daily, especially after handling raw food or washing dishes. A quick wipe-down with a vinegar solution or disinfectant spray takes seconds and prevents bacterial buildup. For a deeper sanitization, use hot water and a cleaning solution weekly. This routine stops odors, mold, and hygiene issues before they start, keeping your sink area fresh and functional.
Q: What are the best under sink storage ideas for small kitchens with limited space?
A: Maximize under-sink space with stackable storage bins, pull-out organizers, and vertical shelving. Install a tension rod to hang spray bottles, use adhesive hooks on cabinet doors for cloths, and add a sliding basket for larger items. The key is going vertical and using every inch. If you have a garbage disposal or unusual plumbing, measure first and choose adjustable systems that fit around your setup. Keeping supplies contained prevents clutter and makes cleaning easier.
Q: How do I keep my sink area clutter-free when I rent and can't install permanent fixtures?
A: Choose tool-free, non-permanent solutions like the Sink Organization Bundle ($43.99) or FlowRack Pro ($29.99), which rest on your sink without drilling or wall damage. Use adhesive command hooks, suction-cup organizers, and free-standing storage bins instead of mounted shelves. These systems work for renters and leave no marks when removed. Pair them with a daily routine of putting items away immediately after use, and your sink stays organized without risking your security deposit.
Q: What's the difference between organizing and sanitizing a kitchen sink area?
A: Organizing reduces visual clutter and improves efficiency by designating spaces for supplies and tools. Sanitizing removes bacteria, mold, and odors by disinfecting surfaces, drains, and sponges. Both matter: a clutter-free sink looks good but won't prevent bacterial growth if not sanitized regularly. Use the DryFlow Splash Mat ($19.99) or AquaShield Faucet Guard ($17.99) to keep surfaces dry and reduce moisture buildup where bacteria thrive. Together, organization and sanitization create a functional, hygienic sink area.
This article was written using GrandRanker