


Table of Contents
- What You'll Need Before You Clean Under the Sink Area
- Step-by-Step: How to Deep Clean Under the Sink Area
- How to Remove Musty Smell Under Sink for Good
- Preventing Mold Under Kitchen Sink: What Actually Works
- Best Under Sink Cabinet Liners to Protect Your Space
- Organizing Under the Kitchen Sink After You Clean
- Common Mistakes to Avoid When Cleaning Under the Sink
- Conclusion
Last Updated: August 9, 2026
What You'll Need Before You Clean Under the Sink Area
Most homeowners open the cabinet under their kitchen sink, take one look at the chaos inside, and quietly close it again. Learning how to clean under sink area doesn't require a full Saturday or professional help, just the right supplies and a clear sequence.

Gather your materials before starting. Going in underprepared is the most common reason the job takes twice as long as it should.
Cleaning supplies:
- All-purpose cleaner or diluted dish soap solution
- Disinfecting spray (one that kills mold spores)
- Hydrogen peroxide (3% solution)
- Non-abrasive scrub brush or old toothbrush
- Damp cloth and paper towels
- Baking soda for odor absorption
Protective gear:
- Protective gloves (rubber or nitrile)
- Dust mask, especially if you suspect mold
- Safety glasses for older plumbing pipes
Organization tools:
- Trash bags for decluttering
- Storage containers or bins
- Shelf liner to protect the cabinet bottom
Check your ventilation before you start. Open a window or run the exhaust fan. The U.S. Consumer Product Safety Commission guidance on household chemical safety recommends adequate airflow whenever using cleaning agents indoors.
Step-by-Step: How to Deep Clean Under the Sink Area
A proper deep clean follows a specific order: remove, clean, treat, disinfect, dry. Doing these steps out of sequence wastes effort.
Step 1: Remove Everything and Declutter
Pull everything out of the cabinet completely. Be ruthless: expired products, half-empty bottles, mystery items. Declutter before you clean. Fewer items mean better airflow, which reduces moisture buildup and mildew risk.
While the cabinet is empty, use a flashlight to inspect the interior. Look for water stains, soft spots, discoloration, or visible mold growth. This tells you what cleaning approach you need.
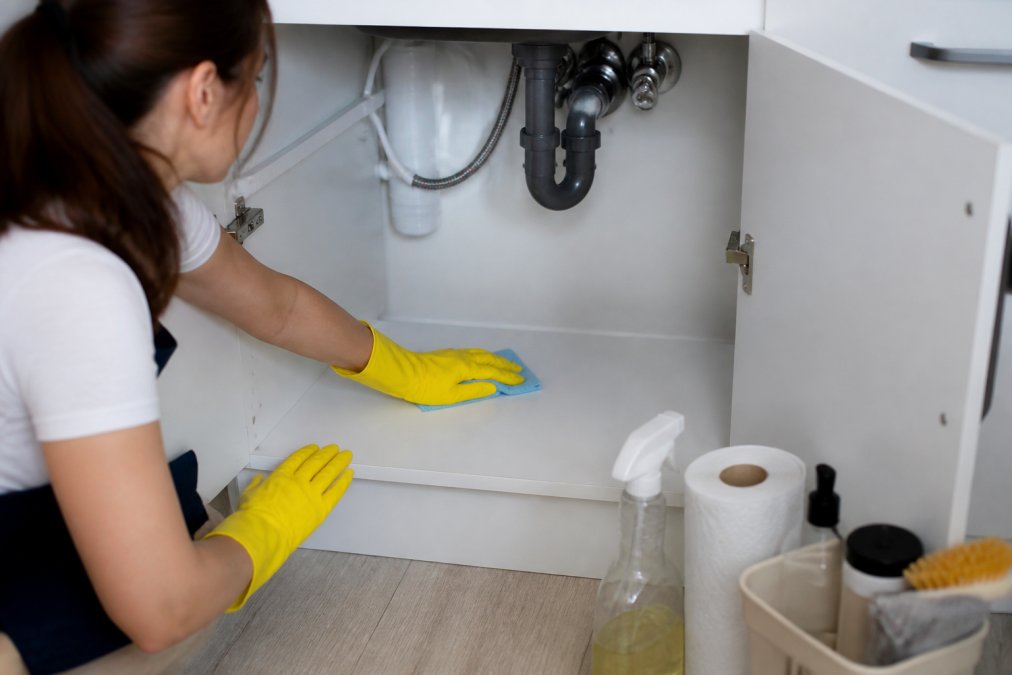
Step 2: Clean the Cabinet Interior and Pipes
Start with dry removal. Use a dry cloth to wipe out loose dust, grime, and debris from every surface, including corners and the back wall. A dry pass prevents dust from turning into muddy streaks when you apply cleaner.
Spray all-purpose cleaner on the cabinet interior walls, floor, and ceiling. Let it sit for two to three minutes before wiping with a damp cloth. Use a non-abrasive scrub brush for joints and tight spots around plumbing pipes.
Wipe down the exposed plumbing pipes themselves. Pay attention to joints where pipes connect, these are where corrosion starts and slow drips go unnoticed. A damp cloth with all-purpose cleaner handles most surface buildup.
Step 3: Remove Stains and Water Damage
Water stains and mildew are the most common problems. They require targeted treatment.
For mildew and light mold stains, hydrogen peroxide is more effective than bleach for most cabinet materials. Apply 3% hydrogen peroxide directly to the stained area, let it sit for ten minutes, then scrub with a non-abrasive brush and wipe clean.
For persistent water stains on wood or particle board, a paste of baking soda and water applied with a damp cloth lifts many stains without damage. Work in small circular motions and rinse with a clean damp cloth.
If the cabinet floor feels soft, spongy, or shows visible warping, that's structural damage. See the section below on repairing water-damaged cabinet bottoms before proceeding.
Step 4: Disinfect Surfaces and Dry Thoroughly
Spray a disinfecting spray across all interior surfaces. Follow the dwell time listed on the product label (typically one to three minutes) before wiping. The dwell time is when the product actually works.
Drying thoroughly is just as important as disinfecting. Use dry paper towels to absorb surface moisture, then leave the cabinet doors open for at least two hours. A small fan directed into the cabinet speeds this up.
Once fully dry, lay down a fresh shelf liner before returning any items.
How to Remove Musty Smell Under Sink for Good
A musty smell under the sink is almost always a moisture problem, not a cleaning problem. Cleaning treats the symptom; eliminating moisture treats the cause.
After your deep clean and disinfection, place an open container of baking soda at the back of the cabinet. Baking soda absorbs ambient moisture and neutralizes odor-causing compounds. Replace it every 30 days. Activated charcoal works even better for persistent odors.
If the smell returns within a week of cleaning, that signals an active moisture source, typically a slow drip from a pipe joint or failing drain seal. Check the pipes carefully, run water in the sink, and watch for any dripping. Even a minor drip can saturate particle board over months.
According to EPA guidance on mold and moisture in homes, mold can begin growing on damp surfaces within 24 to 48 hours. Eliminating the moisture source is the only reliable long-term solution.
Preventing Mold Under Kitchen Sink: What Actually Works
Preventing mold under kitchen sink requires consistency. Most homeowners treat it reactively, cleaning after mold appears rather than maintaining conditions that prevent it. A simple monthly routine takes less than five minutes.
Leak Detection and Moisture Monitoring
The biggest source of under-sink mold is slow leaks that go undetected for weeks or months.
Run the sink at full pressure for 30 seconds, then open the cabinet and look at every pipe joint, the drain connection, and the area below the garbage disposal. Look for water droplets, mineral deposits, or dark staining on the cabinet floor.
Place a small moisture indicator strip or water sensor on the cabinet floor near the drain pipe. These are inexpensive and alert you to moisture before it becomes a problem. The American Society of Home Inspectors resource on plumbing leak detection notes that slow plumbing leaks are among the most underreported sources of household water damage because they're hidden from view.
A simple monthly check takes 60 seconds and can prevent hundreds of dollars in cabinet repair.
Repairing Water-Damaged Cabinet Bottoms
If the cabinet floor is soft or warped, cleaning the surface won't solve the structural problem.
For minor water damage on particle board:
- Dry the area completely using a fan and open cabinet doors for 24 to 48 hours.
- Apply a wood hardener product to the softened area.
- Sand lightly once the hardener cures.
- Apply a waterproof sealant or primer.
- Install a waterproof shelf liner over the repaired area.
For severe damage where the board has completely delaminated, replacement is more practical than repair.
Best Under Sink Cabinet Liners to Protect Your Space
Choose a liner based on whether it's waterproof or just water-resistant. Most shelf liners sold in stores are water-resistant, they slow moisture absorption but don't stop it. A genuine waterproof liner creates a barrier between drips and the cabinet floor. For under-sink use, waterproof is the only specification that matters.
| Liner Type | Material | Best For | Durability |
|---|---|---|---|
| Solid vinyl | PVC | Heavy moisture exposure | High |
| Foam-backed vinyl | PVC + foam | Cushioning fragile items | Medium-High |
| Ribbed rubber mat | Rubber | Easy cleaning, grip | High |
| Cut-to-fit adhesive liner | Adhesive vinyl | Permanent installation | Medium |
| Non-adhesive flat liner | Polyethylene | Renters, easy removal | Medium |
For renters, a non-adhesive waterproof liner is most practical. It installs in seconds, leaves no marks, and protects the cabinet floor. Cut it to size with scissors to fit around plumbing pipes.
Replace your liner whenever you do a deep clean, or at minimum once a year.
Organizing Under the Kitchen Sink After You Clean
A freshly cleaned cabinet is the best starting point for a smarter organization system. The mistake most people make is putting everything back the way it was.
Categorize what you're returning: daily cleaning supplies, occasional-use products, trash bags, and maintenance tools. Items used daily should be at the front and accessible without moving anything else.
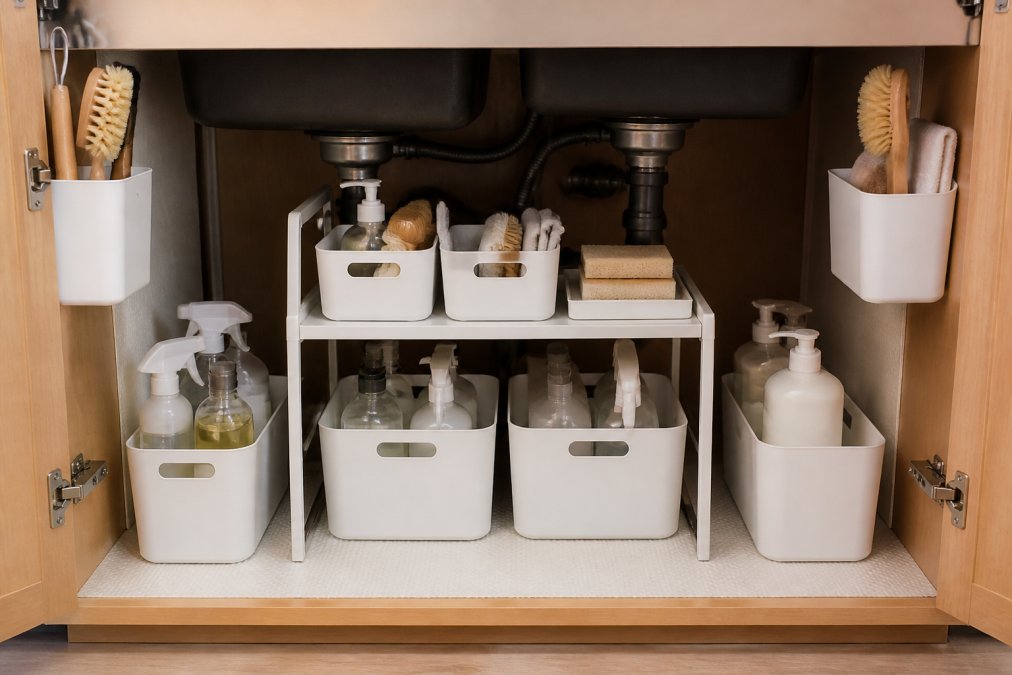
Vertical space is consistently underused in under-sink cabinets. A two-tier organizer like the Sinkelle 2 SlideNest Organizer doubles usable storage without drilling or permanent modifications, fitting around plumbing pipes and garbage disposal units. Its waterproof materials mean future drips won't warp or damage the organizer.

For cabinets with awkward plumbing, a hanging organizer that mounts to the cabinet door reclaims space. The Sinkelle CabinetFlow Hanging Organizer attaches tool-free and keeps frequently used items visible without taking up floor space.
The Sink Organization Bundle covers the full setup: liner protection, vertical storage, and door-mounted organization in a single purchase.

Common Mistakes to Avoid When Cleaning Under the Sink
Skipping the inspection step. Cleaning a cabinet with an active leak means you'll be cleaning it again in two weeks. Always inspect before you clean.
Using abrasive cleaners on particle board. Abrasive scrubbers damage the surface coating, accelerating moisture absorption. Use non-abrasive cloths and brushes.
Not drying thoroughly. This is the single most common reason mold returns quickly. Leaving even minor moisture creates ideal conditions for mold growth within 48 hours. Leave doors open and use a fan.
Putting items back immediately. The cabinet needs to be completely dry before anything goes back in.
Ignoring the pipes. Pipe joints are where corrosion, mineral buildup, and slow drips originate. Include them in every clean.
Using scented products to mask odors. A musty smell is a symptom, not the problem. Covering it up delays finding the actual moisture source.
As noted in CDC guidance on household mold prevention, controlling moisture is the most effective way to prevent mold growth. Surface cleaning alone is insufficient when the underlying moisture source remains.
A 30-minute deep clean done correctly, followed by a five-minute monthly check, keeps the under-sink area in better condition than quarterly panic-cleans that skip the drying and inspection steps.
Keeping the space under your kitchen sink clean and organized prevents water damage, persistent mold, and cabinet clutter. SinkElle's waterproof, tool-free organization systems are designed specifically for this space. The Sinkelle 2 SlideNest Organizer and Sink Organization Bundle offer complete solutions that install in minutes and hold up against daily sink use moisture. Shop Now and turn your under-sink cabinet into a space that stays clean between cleans.
Frequently Asked Questions
How often should I clean under my kitchen sink?
A thorough deep clean every one to three months is a practical target for most households. Between those sessions, do a quick visual check monthly for moisture, drips from plumbing pipes, or early signs of mildew. If you keep a shelf liner in place and store items in closed containers, the cabinet interior stays cleaner longer and full deep cleans become far less time-consuming.
Can I use bleach to clean mold under the sink?
Bleach works on non-porous surfaces like painted wood or plastic, but it doesn't penetrate particle board or raw wood grain, so mold roots can survive. Hydrogen peroxide or a white vinegar solution are gentler, less corrosive alternatives that handle surface mold effectively without damaging wood finishes or corroding pipe joints. Always wear a dust mask and ensure good ventilation whichever product you use. If mold covers an area larger than 10 square feet, the EPA recommends professional remediation.
How do I get rid of the musty smell under my kitchen sink?
The smell almost always traces back to trapped moisture or a slow drip on the plumbing pipes. After cleaning and drying the cabinet interior completely, place an open box of baking soda or activated charcoal inside to absorb residual odors. Check all pipe joints and the garbage disposal connection for minor leaks. A shelf liner with drainage holes improves airflow along the cabinet bottom, which discourages the damp conditions that cause musty odors to return.
What should I keep under my kitchen sink for easy cleaning?
Store only what you use regularly: an all-purpose cleaner, disinfecting spray, a few rolls of paper towels, and dish soap. Use storage containers or a two-tier organizer so everything has a fixed spot and you can see the cabinet floor at a glance. Keeping the space minimal makes weekly wipe-downs fast and makes early leak detection much easier, since you're not moving items around to find the source of moisture.
This article was written using GrandRanker