


Last Updated: October 28, 2026
Quick Summary
A faucet upgrade starts with checking compatibility: count your sink holes, measure the center-to-center spread and deck thickness, and confirm hole diameter before buying. Shut off the water, remove the old faucet, clean the deck, then install the new one and test every fitting for leaks.
- Most faucet shanks fit a 1 3/8-inch sink hole, so measure any enlarged or odd hole.
- A basin wrench reaches the mounting nut behind the sink bowl.
- For a stuck nut, a heat gun on low for 30 to 60 seconds can break the corrosion bond.
- Low flow after a swap usually means a clogged aerator or a half-open valve.
Table of Contents
- Before You Start: Compatibility and Sink Hole Checks
- The Best Tools for Faucet Installation
- Step 1: Shut Off the Water and Clear the Cabinet
- Step 2: Remove the Old Faucet, Including Stuck Mounting Nuts
- Step 3: Clean the Sink Deck and Install the New Faucet
- Step 4: Connect Supply Lines, Flush, and Test for Leaks
- How Long Does It Take to Replace a Kitchen Faucet?
- Kitchen Faucet Replacement Cost: DIY vs. Hiring a Pro
- Frequently Asked Questions
Before You Start: Compatibility and Sink Hole Checks
A faucet upgrade can change how a kitchen looks and works. Skip the compatibility check, though, and you may need to make a second trip to the store.
Faucet compatibility is the match between your sink deck and the faucet you buy. Four things decide it: hole count, hole spacing (the center-to-center distance between the outer holes), deck thickness, and hole diameter.
Counting Your Sink Holes and Measuring the Spread
Look under the faucet and count the holes in the sink deck, then measure the spread, the distance from the center of the leftmost hole to the center of the rightmost hole.
- One hole: a single-handle or pull-down faucet fits directly. No deck plate needed.
- Three holes, 8-inch spread: a two-handle or bridge faucet works, or a one-hole model with a deck plate. Eight inches is the standard spread; measure to confirm, because older sinks can be 6 or 10 inches.
- Three holes, 4-inch spread: common on older drop-in sinks. A one-hole faucet with a 4-inch deck plate is usually the cleanest fit.
- Four holes: the fourth hole usually holds a side sprayer or soap dispenser. If your new faucet has no side sprayer, cap the extra hole with a hole cover or add a soap dispenser.
Hole diameter matters too. Most faucet shanks fit a 1 3/8-inch hole, and most sinks are drilled to that size. If a hole was enlarged or the sink has an odd punch, measure the actual diameter before you buy.
Measuring Deck Thickness and Shank Length
Deck thickness is the distance from the top of the sink deck to the underside where the mounting nut tightens. Measure it top to bottom and compare it to the faucet's stated range.
Checking Supply Line and Valve Compatibility
Compatibility is not only about the deck.
If the hole configuration or deck thickness does not match the faucet you want, you have three options: choose a different faucet, add a deck plate to cover extra holes, or, for stone counters, have a fabricator enlarge a hole. The first two are DIY; the third is not.
The Best Tools for Faucet Installation
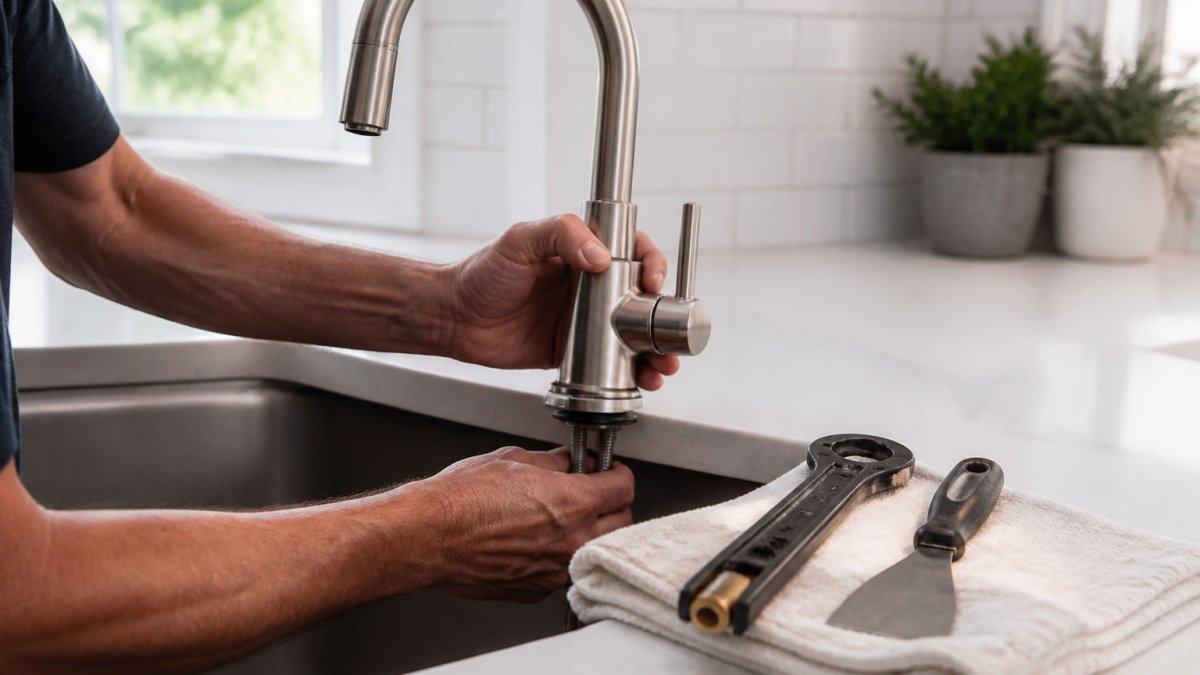
A basin wrench can reach the mounting nut behind the sink bowl.
Here is what we recommend having on hand:
- Basin wrench for the hard-to-reach mounting nut
- Adjustable wrench for supply lines and compression fittings
- Phillips and flathead screwdrivers
- Plumber's putty or silicone caulk for sealing the deck plate
- Teflon tape for threaded connections
- Bucket and towels for the water left in the old lines
- Flashlight or headlamp for the dark cabinet
Step 1: Shut Off the Water and Clear the Cabinet
Open the faucet to release pressure and drain the line, then empty the cabinet. For guidance on how plumbing affects under-sink storage and organizers, see our under sink storage vs cabinet organizers plumbing guide.
Step 2: Remove the Old Faucet, Including Stuck Mounting Nuts
Disconnect the supply lines first, then loosen the mounting nut underneath. Expect some water to spill, so keep the bucket close. Once the nut is free, lift the old faucet out and scrape away the old putty or gasket. On a faucet that has been in place for a decade or more, the mounting nut is often the hardest part of the job. Corrosion, hard water scale, and old thread sealant can lock the nut to the shank, and forcing it can crack the sink or strip the nut.
Diagnosing Why the Nut Is Stuck
- **
- **
- **
- **
Chemical Methods for Seized Hardware
For mineral scale, a mild descaler such as white vinegar or a citric-acid solution applied to the threads can soften the deposit. Wipe it on, let it sit, and rinse before you put a wrench on the nut. Avoid strong acids on chrome or brushed finishes.
Mechanical Methods That Actually Work
- Basin wrench with steady pressure. Set the jaws squarely on the nut and pull or push smoothly. Jerking rounds the nut.
- Penetrating oil plus a light tap. After the oil soaks, tap the nut with the handle of a wrench or a small mallet. The vibration helps the oil migrate into the threads.
- Two-tool approach. Hold the faucet body steady from above with one hand or a strap wrench while turning the nut from below. This prevents the whole assembly from spinning.
- Heat gun on low. Warm the nut, not the shank, for 30 to 60 seconds, then try again. Metal expands slightly and can break the corrosion bond.
- Nut splitter or mini hacksaw. If the nut is truly seized, cut it. A nut splitter cracks it in place; a mini hacksaw with a metal blade cuts through the nut without damaging the shank. Replacement mounting nuts and washers cost very little, and cutting is faster than fighting a rusted fitting for an hour.
What to Do If the Shank Spins or the Nut Is Inside a Blind Space
If the shank itself spins, hold it from above with locking pliers wrapped in a cloth to protect the finish, then turn the nut below. Once the nut is off, lift the old faucet out, scrape away the old putty or gasket, and clean the deck before the new faucet goes in.
Step 3: Clean the Sink Deck and Install the New Faucet
Once the faucet is seated, consider the Sinkelle DryFlow Splash Mat. Its sloped surface channels water back into the sink.

Step 4: Connect Supply Lines, Flush, and Test for Leaks
If you spot moisture, our guide on how to prevent water damage under sink covers the fixes before a small drip becomes a cabinet repair.
Resetting Water Pressure After the Swap
Low flow after a swap almost always traces to a clogged aerator or a half-open valve. Before committing to a faucet swap, you can explore the benefits of installing touchless kitchen faucets. If you are weighing the time investment, explore ways to upgrade your kitchen sink area without renovations. Unscrew the aerator tip, rinse the screen, and screw it back on. Then open both shut-off valves fully. If pressure still feels weak, check that the supply line is not kinked behind the cabinet.
How Long Does It Take to Replace a Kitchen Faucet?
| Step | Time | Notes |
|---|---|---|
| Shut off water and clear cabinet | 10 min | Includes draining the lines |
| Remove old faucet | 15-30 min | Longer if the nut is stuck |
| Clean deck and install new faucet | 20 min | Putty needs a clean, dry surface |
| Connect lines, flush, test | 10 min | Check every fitting twice |
| Cleanup | 10 min | Dry the cabinet floor |
Kitchen Faucet Replacement Cost: DIY vs. Hiring a Pro
Consider the Sinkelle AquaShield Faucet Guard, a flexible, waterproof silicone guard designed to fit around a faucet and help prevent splashes and drips from spreading across countertops. It is simple to install and easy to remove.

Frequently Asked Questions
Can I replace my kitchen faucet myself?
Yes. A standard faucet swap is a beginner-friendly DIY job if your shut-off valves work and your sink holes match the new faucet. The main tools are a basin wrench, an adjustable wrench, and plumber's putty. Allow two hours for your first attempt. The job gets harder if the old mounting nut is corroded or the supply lines are seized, so check those before you buy the replacement.
What tools do I need to replace a kitchen sink faucet?
The best tools for faucet installation are a basin wrench for the mounting nut, an adjustable wrench for supply lines, a putty knife, and a bucket with towels. Add Teflon tape for threaded connections and a flashlight for under-sink work. A basin wrench matters most because the mounting nut sits behind the sink bowl where a standard wrench cannot reach.
How much should a plumber charge to replace a kitchen faucet?
Professional installation runs $162 to $364, according to 2026 Angi pricing, with touchless and bridge models at the higher end. The faucet itself adds $160 to $365, so an all-in replacement typically lands between $250 and $600. Doing the swap yourself removes the labor line entirely and leaves only the fixture cost.
Are kitchen sink faucets a standard size?
No. Faucets mount through 1, 2, 3, or 4 holes, and hole spacing varies between centerset and widespread layouts. Measure your sink deck holes and thickness before ordering, and confirm the new faucet's threaded shank fits. A deck plate can cover unused holes, but it cannot fix a hole pattern the new faucet was not built for.
A faucet upgrade rewards preparation more than skill. Count your holes, buy the right wrench, and give yourself a clear hour. SinkElle makes the finishing touch simple with waterproof, tool-free sink accessories designed to keep the area around your new faucet dry and clutter-free. Explore the AquaShield Faucet Guard and DryFlow Splash Mat, and get started with SinkElle to protect your counter and keep your sink area looking sharp.
