


Table of Contents
- Why Your Sink Area Deserves an Upgrade
- Step 1: Replace Your Faucet and Fixtures
- Step 2: Install Under Sink Storage Solutions
- Step 3: Apply Fresh Caulk and Sealant
- Step 4: Add Task Lighting and LED Strips
- Minimalist Kitchen Sink Organization Ideas
- How to Hide Kitchen Sink Clutter Effectively
- Common Mistakes to Avoid
Last Updated: August 28, 2026
Why Your Sink Area Deserves an Upgrade
Your kitchen sink handles water splashes, soap residue, and daily overflow from dishes. Yet most people treat it as an afterthought. When you upgrade your sink area without renovations, you reclaim counter space, eliminate daily frustrations, and transform one of the most-used zones in your kitchen into something you actually enjoy.
At SinkElle, we empower modern homeowners to maximize precious counter real estate and effortlessly reduce clutter with our durable, waterproof systems, ensuring a beautifully organized kitchen in minutes thanks to tool-free installation. This guide walks you through the upgrades that matter most.
Step 1: Replace Your Faucet and Fixtures
Replacing your faucet is the single most impactful upgrade you can make. It's visible, used dozens of times daily, and sets the tone for everything around it.
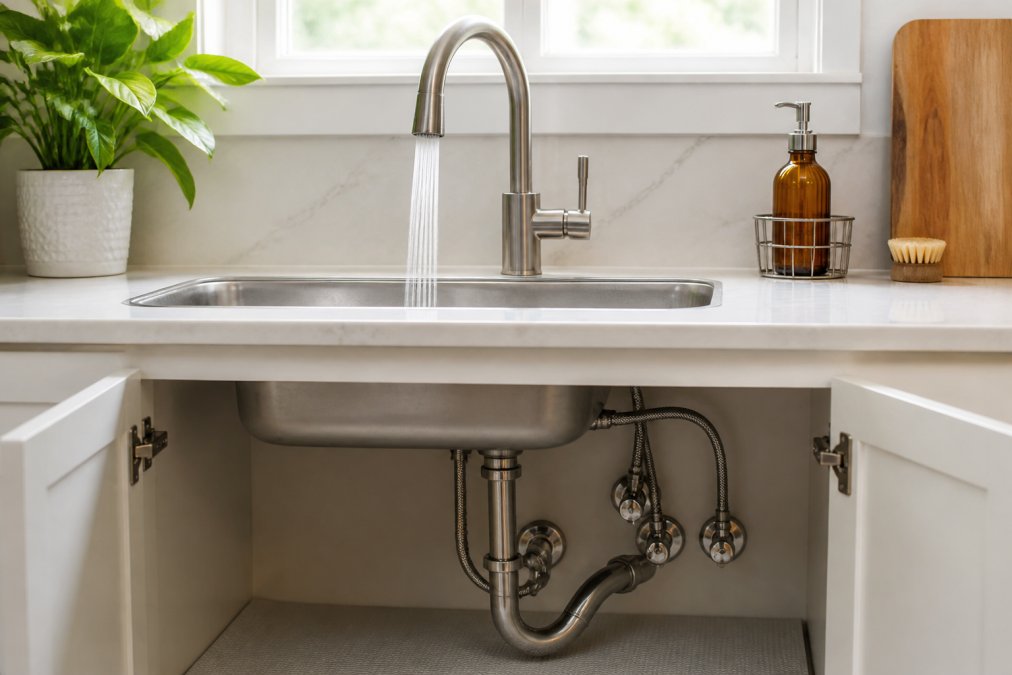
Start by assessing your current setup. Count the holes in your countertop or sink deck, most use either one hole (single-handle) or three holes (separate hot, cold, and spray controls). Check your under-sink plumbing, specifically the P-trap and supply lines. If you have a garbage disposal, note its position; some faucet designs won't clear it.
When selecting a replacement, prioritize water pressure and spray pattern over flashy features. Look for brushed nickel or matte black finishes; they hide water spots and fingerprints far better than polished chrome. The aerator should be removable so you can clean mineral buildup.
Installation typically takes 30-45 minutes (the American Dental Association). Turn off the water supply under the sink, disconnect the old faucet by unbolting it from below and unscrewing the supply lines, then install the new one in reverse. Hand-tight plus a quarter turn with a wrench is enough, over-tightening can crack the faucet base or strip threads.
If you're renting or want something temporary, consider a faucet aerator upgrade instead. These screw onto your existing faucet and improve water flow without any installation, costing under $20.
Step 2: Install Under Sink Storage Solutions
The space under your sink is prime real estate for organization. Most people leave it as a cleaning supply disaster, but it can become your secret weapon.
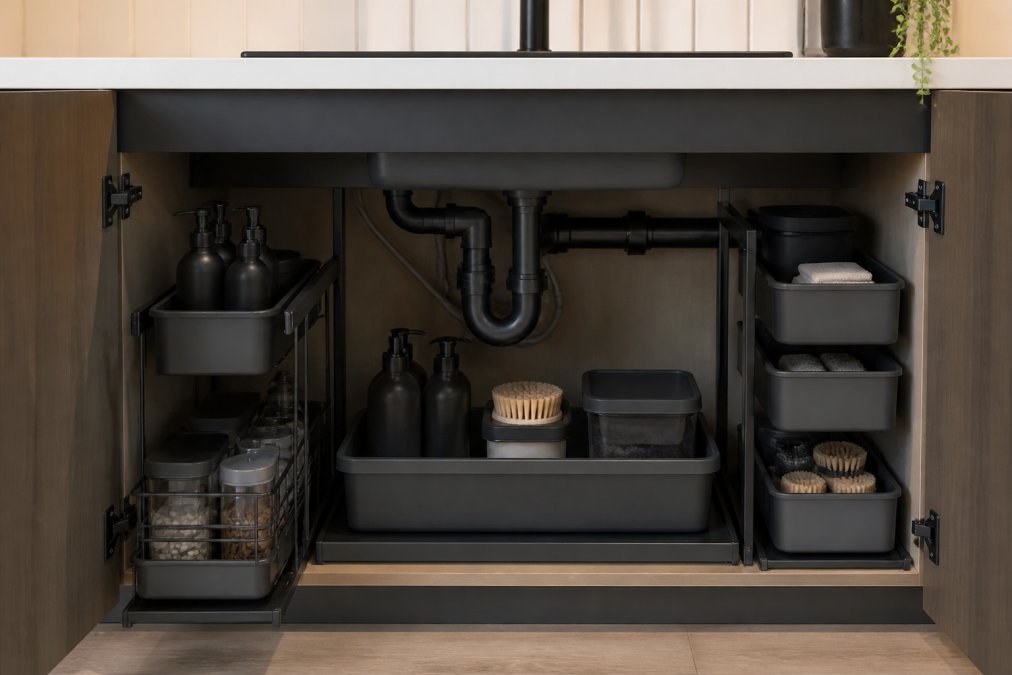
Measure your under-sink cabinet carefully: height from floor to underside of the sink basin, width at the narrowest point (often constrained by the P-trap), and depth front to back. Account for the drain assembly and any plumbing angles. The P-trap sits directly under the drain and eats up usable space, measure around it, not through it.
Use waterproof storage containers with sealed lids and reinforced bottoms. Stack them vertically to maximize space and use pull-out organizers so you can access items at the back without removing everything in front.
Group similar items together: sprays in one container, scrubbing tools in another, sponges and cloths in a third. This prevents cross-contamination and makes restocking obvious.
The SinkElle Sink Organization Bundle combines three essentials: a splash mat that redirects water back into the sink, a faucet guard that catches drips before they pool on your counter, and a drying rack that keeps sponges elevated so they actually dry. At $43.99, it handles the most common pain points in one go.

For tight spaces, use tension rods or adhesive hooks mounted inside cabinet doors to hold cleaning cloths, spray bottles, or small organizers without taking up floor space.
Step 3: Apply Fresh Caulk and Sealant
Old, cracked, or discolored caulk makes everything look neglected. Fresh caulk transforms the aesthetic in 10 minutes.
Recaulk where the countertop meets the sink rim, where the backsplash meets the countertop, and anywhere water pools. Remove old caulk with a caulk removal tool or plastic putty knife, scraping gently to avoid scratching. Wipe the joint clean with a damp cloth and let it dry completely.
Choose silicone sealant over acrylic caulk for kitchen sinks. Silicone is waterproof, flexible, and lasts 10+ years without cracking (astm.org). Acrylic caulk dries hard and cracks within a few years around a sink.
Apply caulk with steady, even pressure at a 45-degree angle, moving smoothly along the joint. A thin, clean bead looks professional; thick globs look messy. Smooth mistakes with a wet finger before it sets. Most silicone caulk takes 24 hours to cure fully.
Step 4: Add Task Lighting and LED Strips
Poor lighting makes your sink area feel cramped and dingy. Adding focused task lighting instantly makes the space feel larger and more intentional.
Under-cabinet LED strips are the easiest upgrade. These stick-on strips mount to the underside of upper cabinets and shine downward onto your countertop. They're battery-powered or plug-in, require no wiring, and cost $15-40. Warm white (2700K) light is more flattering than cool white for kitchens (ies.org).
If you don't have upper cabinets above your sink, a pendant light or track light mounted on the ceiling works. Position it directly above the sink so shadows don't fall across the basin when you're working. Mount LED strips 6-8 inches from the front edge of the cabinet so light spreads evenly across the counter below.
Minimalist Kitchen Sink Organization Ideas
Minimalism around your sink means intentional placement of only items you use daily. Everything else lives under the sink or in cabinets.
Keep three things on your counter: a faucet, a soap dispenser, and a drying rack. Your soap dispenser should match your faucet finish for a curated look.
The drying rack is essential because it keeps sponges and dishcloths dry and ready. Choose a rack that drains directly into the sink. The Sinkelle FlowRack Pro is designed specifically for this: its angled drain tray channels water back into the sink instead of pooling on your counter. At $29.99, sponges dry in hours instead of days, and you never deal with soggy, smelly sponges.
Use the Sinkelle DryFlow Splash Mat ($19.99) to catch splashes and water drips around the faucet base. Its sloped surface channels water back into the sink, preventing wet countertops. Pair it with the Sinkelle AquaShield Faucet Guard ($17.99), which catches splashes before they spread. Together with the drying rack, these three pieces create a system where water stays contained and everything dries quickly.

Group your under-sink storage by category: all cleaning sprays together, all scrubbing tools together, all rags and cloths together. This makes restocking obvious and prevents duplicate purchases.
How to Hide Kitchen Sink Clutter Effectively
The goal isn't perfection; it's having a system that makes cleanup fast and clutter invisible when you're not actively using the sink.
Use cabinet doors as your primary hiding spot. Install adhesive hooks on the inside of cabinet doors to hang spray bottles, cloths, or small organizers. For items you use constantly, keep them in a caddy that sits on your counter during the day but stores in the cabinet at night.
Drawer dividers prevent the "junk drawer" feeling. Divide drawers near your sink into sections for dishcloths, sponges, and small tools, making it obvious when something needs restocking.
The SinkElle Sink Organization Bundle handles three major clutter sources: water splashes, sponge clutter, and supply overflow. At $43.99, it's the most efficient way to address multiple pain points without buying separate solutions.
If you're renting, adhesive organizers and tension rods are your friends. They require no drilling, leave no marks, and can be removed in seconds.
Common Mistakes to Avoid
Ignoring plumbing constraints. Measure twice before buying storage or fixtures. Account for the P-trap, garbage disposal, and angled pipes.
Using the wrong caulk. Acrylic caulk cracks within a few years. Silicone sealant lasts 10+ years and stays flexible.
Over-organizing. Start with three to five containers, not ten. Add more only if you need them.
Forgetting about drainage. Any storage system under your sink must account for water. Sealed containers are non-negotiable.
Choosing aesthetics over function. A beautiful drying rack that doesn't actually dry sponges is worse than a functional one that works.
Installing fixtures too tight. Hand-tight plus a quarter turn is the rule. Over-tightening creates leaks and stripped threads.
Skipping task lighting. Poor lighting makes your organized sink area look worse. A $20 LED strip transforms the space and motivates you to keep it clean.
Summary Table: Upgrade Priority and Impact
| Upgrade | Effort Level | Time Required | Visual Impact | Functional Impact | Cost Range |
|---|---|---|---|---|---|
| Faucet replacement | Medium | 30-45 min | High | High | $80-300 |
| Under-sink storage | Low | 15-30 min | Medium | High | $40-150 |
| Fresh caulk | Low | 10-20 min | Medium | Medium | $5-15 |
| Task lighting | Low | 10-15 min | High | Medium | $15-40 |
| Splash mat + guards | Low | 5 min | High | High | $37-48 |
| Drying rack | Low | 5 min | Medium | High | $20-35 |
Ready to upgrade your sink area? Start with upgrades that address your specific pain points. If water splashes frustrate you, begin with the splash mat and faucet guard. If clutter is the issue, focus on under-sink storage first. If your sink area feels dated, a new faucet and fresh caulk deliver the biggest visual transformation.

The SinkElle Sink Organization Bundle ($43.99) solves three problems at once: water management, sponge storage, and supply organization. Combined with fresh caulk and task lighting, it transforms your sink area from a functional necessity into a space you actually enjoy maintaining. Get started with SinkElle and experience how small upgrades create lasting change.
Frequently Asked Questions
Q: Can I upgrade my kitchen sink area if I rent my apartment?
A: Yes. Tool-free installation systems like splash mats, drying racks, and under-sink organizers require no drilling or permanent damage. These renter-friendly upgrades attach with adhesive backing or sit freely on countertops and under sinks. Check your lease for counter modifications, but most temporary storage solutions are landlord-approved. Avoid drilling into walls or plumbing fixtures.
Q: What's the best way to organize under the kitchen sink with a garbage disposal?
A: Work around plumbing fixtures by using vertical organizers and pull-out drawers that fit between pipes. Store cleaning supplies in waterproof containers on shelves above the P-trap. Keep frequently used items in front-accessible spots. Avoid blocking access to the disposal or drain assembly. Measure your space first to ensure organizers fit without interfering with plumbing maintenance.
Q: How do minimalist kitchen sink organization ideas differ from standard storage methods?
A: Minimalist approaches prioritize function over quantity, using fewer, higher-quality pieces with clean lines and neutral finishes. Instead of multiple small bins, minimalist systems use one or two well-designed organizers. This reduces visual clutter, makes cleaning easier, and creates a sophisticated aesthetic. Scandinavian-inspired designs emphasize waterproof materials and space-optimized layouts that maximize counter real estate.
Q: How long do waterproof kitchen organizers actually last?
A: Quality waterproof materials like silicone and premium plastics last 3-5 years with proper care. Avoid leaving standing water inside containers and dry them regularly. Lower-quality organizers may warp or develop mold within months if exposed to constant moisture. Choose products with reinforced seams and drainage systems designed to channel water back into the sink rather than pooling on shelves.
This article was written using GrandRanker