


Table of Contents
- Signs of Water Damage Under Kitchen Sink
- Common Causes of Water Damage Under Sink
- How to Seal Under Sink Cabinet: Step-by-Step
- Choosing the Right Under Sink Cabinet Protector
- Preventative Maintenance to Prevent Water Damage Under Sink
- Smart Leak Detection and Long-Term Moisture Monitoring
- Conclusion
- Frequently Asked Questions
Last Updated: October 6, 2026
Signs of Water Damage Under Kitchen Sink
Water damage under the sink almost always starts small: a dark ring on the cabinet floor, a musty smell, or particleboard that gives under your thumb. By the time a puddle is visible, moisture has usually been sitting there for weeks.
The signs worth checking for weekly:
- Soft or swollen cabinet floor near the drain assembly
- White or black speckling on wood (mildew versus mold growth)
- Warped cabinet liner or bubbling shelf paper
- Rust on pipe fittings or the P-trap
- A persistent damp smell when you open the doors
Common Causes of Water Damage Under Sink
Most under-sink leaks trace back to five failure points, and only one is a burst pipe. The rest are slow, chronic drips that go unnoticed for months.
Supply lines are the usual suspect: braided hoses degrade at the crimp fitting, and a loose connection at the shut-off valve drips behind the cabinet wall. Pipe fittings and the P-trap loosen with vibration and thermal expansion. Caulking and sealant at the sink rim fail with age, letting water run down the cabinet back. Condensation on cold supply lines adds constant moisture even without a leak. And overflow from a clogged drain or overfilled basin sends water over the rim faster than any drip.
The EPA's guidance on moisture control treats uncontrolled indoor moisture as a key driver of mold and indoor air quality problems, which is why chronic drips matter more than the occasional spill.
How to Seal Under Sink Cabinet: Step-by-Step
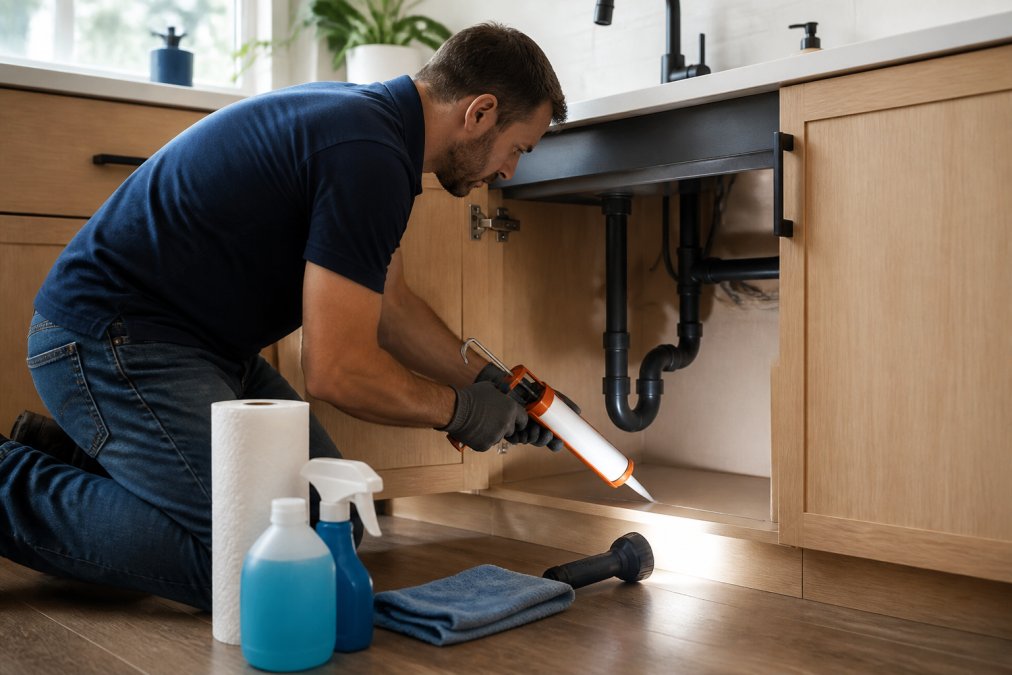
Sealing the cabinet is the single most effective preventative step, and it takes about 45 minutes.
Total Time: 45 minutes
Difficulty: Beginner
What You'll Need:
- Silicone sealant (kitchen-grade, mold-resistant)
- Caulking gun
- Cabinet liner or under-sink mat
- Cleaning cloth and mild detergent
- Flashlight
Step 1: Empty and inspect [Time: 5 minutes]
Pull everything out and run a flashlight along the cabinet floor, back wall, and pipe penetrations. Look for soft spots, staining, and cracked caulk.
Step 2: Clean and dry the surfaces [Time: 10 minutes]
Wipe down the cabinet floor and the perimeter where it meets the wall. Sealant will not bond to a damp or dusty surface.
Step 3: Apply silicone along seams [Time: 15 minutes]
Run a continuous bead of silicone along the floor-to-wall joint, around pipe penetrations, and along the sink rim underneath. Smooth it with a wet finger.
Step 4: Install a moisture barrier [Time: 10 minutes]
Lay a waterproof cabinet liner or under-sink mat over the sealed floor. This catches drips before they reach the wood.
Step 5: Reassemble and test [Time: 5 minutes]
Return your supplies, run the faucet and disposal for a minute, and check the seams for seepage.
Choosing the Right Under Sink Cabinet Protector
An under sink cabinet protector is a waterproof barrier on the cabinet floor that catches drips, condensation, and small overflow before they reach the wood. The right one depends on your cabinet material: particle board, plywood, and metal fail in completely different ways, so a protector that saves one can trap moisture against another. (For storage that holds up to moisture, see our guide to waterproof under-sink storage bins.)
Match the protector to your cabinet material
Particle board (most common in production cabinets). Compressed wood chips held together with resin, with no grain and no water resistance. A single slow drip swells the edges and the board crumbles instead of warping. Once it swells, it does not return to shape. Use a rigid drip tray with a raised lip rather than an adhesive liner: a peel-and-stick liner traps moisture underneath and accelerates breakdown, while a rigid tray contains spills and lifts out for drying.
Plywood. Cross-grain layers tolerate brief moisture better than particle board, but the edges are the weak point: water wicks into exposed plies and delaminates them. Plywood can often be saved if caught early, so an adhesive waterproof liner works here: run it up the side walls a few inches and seal the edges with silicone.
Metal cabinets. Metal does not rot, but it rusts at scratches and cut edges around pipe penetrations. Use a raised drip tray or a modular organizer with a waterproof base rather than a flat adhesive liner, which traps a film of moisture against the steel. Check the pipe grommets annually; that is where rust starts.
Laminate or melamine over particle board. The laminate resists water, but any chip or seam exposes the particle board underneath. Inspect the edges and pipe cutouts, seal exposed core with silicone, and use a rigid tray so standing water never sits on a compromised edge.
| Protector Type | Best For | Key Trait |
|---|---|---|
| Rigid drip tray with raised lip | Particle board, metal, disposal setups | Lifts out, contains overflow, no adhesive |
| Adhesive waterproof liner | Plywood, laminate in good condition | Seals floor and seams, low profile |
| Modular organizer with waterproof base | Cluttered cabinets, any material | Lifts supplies off floor, airflow underneath |
Why airflow matters as much as waterproofing
A protector that seals the floor but traps humid air can cause the same mold problem it was meant to prevent. The best setups leave a small air gap under stored items so the cabinet dries between uses. That is why a modular organizer with a waterproof base often outperforms a flat liner: supplies sit on a raised platform, the floor stays visible, and any drip announces itself instead of hiding behind bottles.
For most apartments with a garbage disposal and angled plumbing, a rigid drip tray plus a modular organizer works best: the tray handles moisture, and the organizer lifts supplies off the floor so you can see a leak forming.
This is where SinkElle's approach makes sense. The Sinkelle 2 SlideNest Organizer uses a durable metal frame that keeps cleaning supplies off the cabinet floor, so drips and seepage are visible instead of hidden behind bottles. Pair it with the Sinkelle CabinetFlow Hanging Organizer to move storage off the floor entirely, and you have a setup where any water intrusion announces itself immediately.


Shop the SlideNest Organizer →
Preventative Maintenance to Prevent Water Damage Under Sink
Preventing water damage under the sink comes down to a short monthly routine. Most failures are visible weeks before they cause real damage. (For the rest of your cabinets, see how to protect kitchen cabinets from water damage.)
- Check supply lines monthly. Run a finger along each hose and fitting. A dry paper towel pressed against the connection will show even a slow drip.
- Test the shut-off valve quarterly. Turn it a quarter-turn and back. A valve that won't move is a valve that will fail when you need it.
- Re-caulk the sink rim annually. Old caulking cracks and lets water seep under the rim.
- Inspect the P-trap and drain assembly. Tighten slip nuts by hand; over-tightening cracks the plastic.
- Watch for condensation. Insulate cold supply lines in humid months to stop constant moisture.
Smart Leak Detection and Long-Term Moisture Monitoring
A water sensor on the cabinet floor is the cheapest insurance for an under-sink area, catching leaks you would never notice on a weekly check. Traditional DIY guides stop at "check for drips"; modern leak detection works whether you are home or not.
The three tiers of leak detection
Tier 1: Standalone battery water sensors. Small pucks that sit on the cabinet floor and sound a loud alarm the moment moisture bridges their contacts. They cost roughly the price of a takeout dinner, need no wiring or Wi-Fi, and last years on a coin cell. Place one under the P-trap and one near the supply line connections, the two failure points that produce the most slow leaks.
Tier 2: Wi-Fi and smart-home sensors. These do everything a standalone sensor does but push an alert to your phone, useful when the cabinet is behind a closed door, when you travel, or when a leak starts at 2 a.m. Many integrate with smart-home hubs and can trigger a routine. If you already run a smart-home system, this is the tier to buy.
Tier 3: Automatic shut-off valves. A motorized valve installs on the supply line and closes automatically when a paired sensor detects water, stopping flow at the source instead of just alerting you. Some systems use a main-line flow meter to detect the signature of a running leak and shut off the whole house. Highest cost, may need a licensed plumber, but the only tier that stops damage while you are away.
Placement logic that actually catches leaks
One sensor in the middle of the cabinet floor is not enough. Water follows the low point, and the low point is usually not the center. Place sensors:
- Directly beneath the P-trap and drain assembly
- At the base of each supply line where it meets the shut-off valve
- Under the garbage disposal, if you have one
- At the lowest corner of the cabinet floor, where water pools first
If you only buy one sensor, put it under the P-trap. If you buy two, add the supply line base.
Long-term moisture monitoring
A water sensor only fires when liquid water is present. Condensation, high ambient humidity, and slow seepage that evaporates before it pools will never trip it, and that is where a humidity sensor earns its place. A small hygrometer logs relative humidity over time: humidity that climbs and stays elevated after faucet use, or a slow upward trend over weeks, signals a moisture problem even without a visible drip.
A practical baseline: log the cabinet humidity weekly for a month to learn its normal range. If it drifts upward and stays there, investigate the supply lines, the P-trap, and the cabinet seams before you see damage. Pair this with the monthly paper-towel check on fittings and you have both a real-time alarm and a slow-trend early warning.
What this costs versus what it saves
Standalone sensors are cheap enough to buy several; Wi-Fi sensors cost a bit more per unit. Automatic shut-off systems are the real investment, and some insurers offer premium discounts for whole-home leak detection, so it's worth asking your agent. Set against replacing a rotted cabinet floor, subfloor repair, and possible mold remediation, the sensor tier pays for itself the first time it catches a leak you would have missed.
Conclusion
The hardest part of preventing under-sink water damage is not the repair but the discipline of checking a space you never look at. Most cabinets fail quietly for months before anyone notices.
SinkElle makes that space easier to manage. Our minimalist organizers lift supplies off the cabinet floor with tool-free installation, so leaks become visible and moisture never hides behind clutter. The SlideNest Organizer and the CabinetFlow Hanging Organizer both keep your under-sink area dry, organized, and easy to inspect. Browse our cabinet organizers and turn a forgotten cabinet into a space you can actually keep an eye on.
Frequently Asked Questions
What should I put under my sink to absorb moisture?
Place a waterproof under-sink mat or drip tray lined with a moisture-absorbing material directly beneath pipes and supply lines. This catches condensation and small drips before they reach the cabinet floor. An under sink cabinet protector with raised edges adds a second barrier against standing water. Empty and dry the mat weekly, and replace absorbent liners monthly to prevent mildew growth.
Why is there moisture under my sink but no visible leak?
Condensation on cold supply lines is the most common cause when no drip is visible. Warm kitchen air meets cold pipes and forms droplets that pool on the cabinet floor. Poor ventilation in the cabinet makes this worse. Check pipe fittings for slow seepage, inspect the P-trap and drain assembly, and add a moisture barrier or drip tray to manage condensation before it damages the wood.
Is there a waterproof under sink liner available?
Yes. Waterproof liners and cabinet protectors made from silicone, rubber, or coated materials are widely available. Look for options with raised edges to contain spills and a snug fit for your cabinet dimensions. A waterproof under sink cabinet protector prevents water from reaching the cabinet floor and makes cleanup simple. Measure your cabinet interior before buying to ensure full coverage around plumbing.
How do you fix a rotted sink cabinet floor?
Remove everything from the cabinet and dry the area completely. Cut out soft, crumbled sections of the cabinet floor with a utility knife or oscillating tool. Treat surrounding wood with a wood hardener, then patch with epoxy wood filler or replace the section with plywood cut to fit. Seal the repaired area with a waterproof coating before reinstalling an under sink mat or cabinet protector.