


Table of Contents
- Start With a Blank Slate: Empty and Clean Every Cabinet
- Measure First: How to Plan a Cabinet Layout That Fits
- Kitchen Cabinet Organization by Zones: Put Items Where You Use Them
- How to Organize Dishes in Kitchen Cabinets
- How to Organize Pots and Pans in Cabinets Without the Avalanche
- Kitchen Cabinet Storage Solutions That Actually Earn Their Space
- Small Kitchens, Corner Cabinets, and Awkward Under-Sink Spaces
- Keep It Efficient: A 10-Minute Monthly Reset
- Frequently Asked Questions
Last Updated: October 18, 2026
Start With a Blank Slate: Empty and Clean Every Cabinet
Learning how to organize kitchen cabinets efficiently starts with a hard truth: to organize kitchen cabinets, you cannot sort what you cannot see. Empty every cabinet, shelf, and drawer onto your counters or table.
It feels chaotic, but you need a blank slate to make good decisions.
As you unload, sort items into four piles:
- Keep, used weekly or monthly
- Relocate, belongs in another room
- Donate, unused for a year or more
Next, wipe down the empty shelves with warm soapy water, dry them fully, and check corners for crumbs or sticky residue.
The USDA food safety guidance on pantry storage is worth a quick read while you sort food items. It explains which goods belong in cool, dry cabinet space and which need refrigeration after opening.
Measure First: How to Plan a Cabinet Layout That Fits
Measure before you buy a single organizer. This step, which most guides skip, saves money and returns.
Grab a tape measure and record these numbers for every cabinet:
- Interior width, height, and depth
- Distance between shelf holes, if your shelves are adjustable
- Door clearance and hinge position
Write the numbers on painter's tape inside each cabinet door; you will reference them constantly when shopping.
Turn Measurements Into a Usable Shelf Plan
Convert raw numbers into the space you can actually fill. Do this for every shelf:
- Subtract the door swing. A shelf that sits behind a door hinge loses 2 to 4 inches of usable width on the hinge side. Mark that strip as dead space before you place anything.
- Subtract the pull-out clearance. A sliding drawer needs roughly 1 inch of clearance on each side and 2 inches at the back for the track. A 24-inch-deep cabinet with a pull-out leaves about 22 inches of usable depth.
- Subtract the riser footprint. A two-tier riser eats 10 to 12 inches of shelf depth at its base. Only install one where the shelf is at least 12 inches deep, or the top tier will overhang the front edge.
- Count the vertical gaps. With adjustable shelving, the distance between holes (often 1 inch on American cabinetry) tells you how finely you can tune shelf height. If your holes are 2 inches apart, plan for taller items on the top shelf and shorter items below.
A shelf riser 2 cm too tall is a return waiting to happen, as is a bin that clears the shelf but not the door swing.
A Simple Sizing Worksheet
For each cabinet, write four lines on the tape:
- Width: interior width minus hinge-side dead strip
- Depth: interior depth minus pull-out clearance
- Height: tallest item you plan to store, plus 1 inch of breathing room
When you shop, match the organizer's listed dimensions to those four lines, not the cabinet's nominal size. A "24-inch" cabinet rarely has 24 inches of usable interior width once frame and hinges are counted.
Here is how we plan zones using those numbers:
| Cabinet Type | Typical Best Use | Planning Note |
|---|---|---|
| Upper cabinets | Daily dishes, glassware, spices | Keep heavy items on lower shelves; cap shelf height at 12 to 15 inches for plates |
| Lower cabinets | Pots, pans, small appliances | Add pull-out drawers for deep reach; leave 2 inches of track clearance at the back |
| Corner cabinets | Rarely used appliances, bulk goods | Lazy Susans beat fixed shelves; measure the corner opening before buying a diameter |
| Under-sink | Cleaning supplies, bins | Plan around plumbing and disposal; photograph the pipes before shopping |
| Pantry | Dry goods, backup stock | Use shelf risers for vertical space; keep the deepest shelves for bulk |
If your cabinets have fixed shelves, measure the clear height under each one and write it on the tape. The organizer must fit the gap you have, not the one you wish you had.
Kitchen Cabinet Organization by Zones: Put Items Where You Use Them
Zone-based storage is the core of kitchen cabinet organization: every item gets stored within arm's reach of where you use it. This habit does more for efficiency than any product you can buy.
The Five Zones Every Kitchen Needs
- Prep zone, cutting boards, knives, mixing bowls near the main counter
- Cooking zone, pots, pans, and utensils beside the stove
- Cleaning zone, soap, sponges, and bins under the sink
Start with the cooking zone. Pull out every pot and pan, then return each one to the cabinet closest to the stove. Repeat for each zone in turn.
How to Organize Dishes in Kitchen Cabinets
Organizing dishes in kitchen cabinets comes down to three rules: stack less, reach easier, and protect the edges.
Deep stacks look tidy but work badly.
Try this arrangement for upper cabinets:
- Eye level, everyday plates, bowls, and mugs
- Below eye level, heavier serving pieces and stacks
- Above eye level, seasonal or occasional dishes
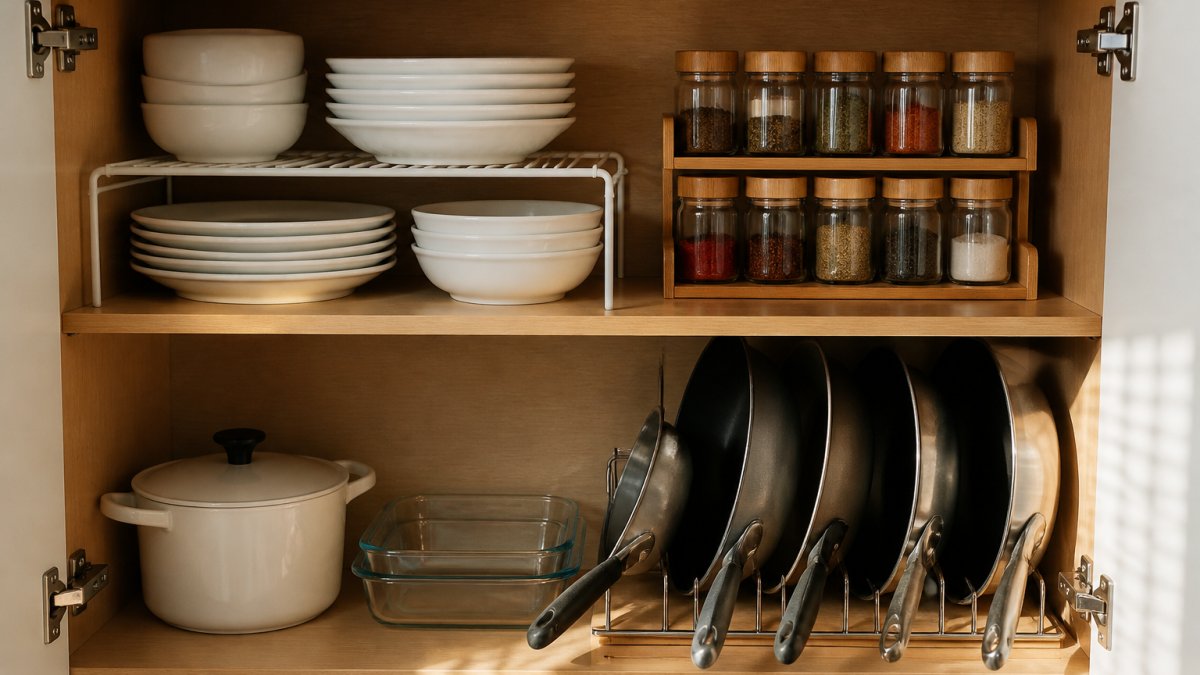
Add a shelf riser to double your usable shelf space, lifting a second tier of dishes so bowls and plates stop competing for the same footprint.
For glassware, keep like with like. Group wine glasses, tumblers, and mugs in separate rows so you grab without searching.
How to Organize Pots and Pans in Cabinets Without the Avalanche
Organizing pots and pans in cabinets fails for one reason: vertical stacking. Pans nest into a leaning tower, and pulling out the bottom one brings the whole stack down.
The fix is a rack that holds cookware on its edge. Our pick is the Sinkelle PanNest Adjustable Pot Organizer ($38.99).

Set it inside a lower cabinet or on the counter, and each pan slides out on its own. No avalanche, no scratched nonstick surfaces.
Sinkelle PanNest Adjustable Pot Organizer →
A few more habits that keep cookware usable:
- Store lids in a separate rack or bin so they stop sliding behind pans
- Keep the heaviest skillet at the front of the cabinet
- Reserve one shelf for bakeware only
Kitchen Cabinet Storage Solutions That Actually Earn Their Space
Kitchen cabinet storage solutions should solve a measured problem, not fill a shelf. Match the product to the gap you found in your planning step, and decide which budget tier the fix belongs in.
Three Budget Tiers, and When Each Is Worth It
Tier 1: Under $20, DIY and household items. Tension rods, wire baskets, clear plastic bins, magazine files, and adhesive hooks.
Tier 2: $20 to $60, dedicated organizers. Drawer inserts, shelf risers, lazy Susans, stackable bins, and hanging racks.
Tier 3: $60 and up, installed or heavy-duty systems. Pull-out drawers, two-tier slide-out frames, and adjustable metal racks.
A short list of organizers that hold up over time, sorted by tier:
- Tier 1: tension rods, magazine files, clear plastic bins, adhesive hooks
- Tier 2: drawer inserts, shelf risers, lazy Susans, stackable bins, hanging racks
- Tier 3: pull-out drawers, two-tier slide-out frames, adjustable metal racks
One more that earns its place: the Sinkelle CabinetFlow Hanging Organizer ($44.99).

Renter-Friendly and No-Drill Options
Renters face a real constraint: no holes, no permanent changes, no damage to cabinets.
For under-sink storage, the Sinkelle 2 SlideNest Organizer ($55.99) uses a two-tier pull-out frame that slides around plumbing instead of fighting it.

For pantry shelves, the Sinkelle 2-Tier Pantry Storage Rack ($71.99) is made from bamboo and adjusts to different layouts. It works on countertops, inside cabinets, or on pantry shelves.
Small Kitchens, Corner Cabinets, and Awkward Under-Sink Spaces
Small kitchens reward vertical space. When floor and counter room run out, cabinet walls and the space under shelves are still available.
Three moves that work in tight layouts:
- Hang it, mount a rack under a shelf for mugs, lids, or wraps
- Stack up, use a two-tier rack to turn one shelf into two
- Go deep, add a pull-out drawer so the back of a lower cabinet becomes reachable
Corner cabinets are the classic dead zone.
Under-sink cabinets bring their own puzzle. Garbage disposals and angled plumbing eat the center, so plan around them. Short bins fit beside the disposal, and a two-tier slide-out frame uses the height above the pipes.
Photograph your under-sink plumbing before shopping for organizers. Bring the photo with you, and you will avoid buying anything that cannot clear the disposal.
Keep It Efficient: A 10-Minute Monthly Reset
Efficiency is a habit, not a one-time project. A short monthly reset keeps the system from sliding back into clutter.
Set a recurring reminder and run this routine:
- Pull out anything that drifted into the wrong zone
- Wipe one shelf or drawer
- Check food storage for expired items
Ten minutes, once a month, is the whole maintenance plan.
The FDA guidance on food storage and shelf life is a useful reference during the expired-items check, and the EPA guidance on household product disposal covers what to do with old cleaning supplies found under the sink.
Frequently Asked Questions
How do you organize kitchen cabinets efficiently when you have very little time?
Work one cabinet at a time instead of pulling everything out at once. Empty a single cabinet, wipe the shelf, measure the interior height and depth, then put back only what belongs in that zone. A 20-minute session per cabinet gets a standard kitchen done over a weekend. Keep a donate box and a trash bag beside you so decisions happen once, not three times. The measurement step matters most: knowing your shelf height before you buy organizers stops you from returning bins that do not fit.
How should you group items in kitchen cabinets?
Group by task and frequency, not by category alone. Daily-use items go at eye level and easy-reach height, heavy items like stand mixers and stockpots go on the bottom shelf, and once-a-year items go on the top shelf or in a hall closet. Within a zone, keep similar items together: all baking sheets vertical in one slot, all spices on one riser. This is the core of kitchen cabinet organization by zones, and it means you reach for a shelf because you are cooking, not because you are searching.
What should not be stored in kitchen cabinets?
Skip the cabinet above the stove for oils, spices, and anything in open packaging. Heat and steam degrade spices and turn oils rancid faster, and grease film coats jars. Keep potatoes, onions, and garlic out of closed cabinets too: they need airflow and dark, dry conditions, and in a sealed cabinet they sprout or rot and can affect nearby food. Cleaning chemicals belong away from food storage, ideally in a lower cabinet with a latch or in a utility area, never above the dishes.
How do you organize a small kitchen with limited cabinet space?
Use vertical space before you buy anything. Shelf risers double a shelf's usable height for dishes and pantry goods, and a hanging organizer under an upper cabinet holds paper towels, cutting boards, and pot lids without touching counter space. For under-sink areas with a disposal and angled plumbing, a two-tier pull-out organizer works around the pipes and makes the back of the cabinet reachable. Move infrequently used appliances out of the kitchen entirely, and keep only one of each tool on the counter.
Most kitchens drift back into clutter because the system was never built around measurements, zones, and a reset habit. SinkElle designs minimalist Scandinavian-inspired organizers that make the fix simple: waterproof materials, tool-free installation, and space-optimized pieces built for the sink area and beyond. Browse the PanNest, CabinetFlow, and SlideNest collections to turn your cabinets into storage that works every day. Get started with SinkElle and build a kitchen that stays organized.