


Table of Contents
- Step 1: Measure Your Cabinet Depth and Layout
- Step 2: Empty and Assess Your Cabinet Contents
- Step 3: Group Items by Category and Frequency of Use
- Step 4: Install Pull-Out Organizers for Deep Cabinets
- Step 5: Use Kitchen Cabinet Bins and Baskets for Grouping
- Step 6: How to Organize Pots and Pans in Cabinets
- Deep Kitchen Cabinet Storage Ideas for Long-Term Success
- Common Mistakes to Avoid When Organizing Deep Cabinets
- Frequently Asked Questions
Last Updated: October 15, 2026
Step 1: Measure Your Cabinet Depth and Layout
The first step to organize deep kitchen cabinets is measuring the exact depth, width, and height of each cabinet. Write down every dimension, five minutes now saves hours of frustration later.
Deep cabinets create dead zones: items at the back become invisible, so you buy duplicates and stack things precariously. The result is a cluttered mess that defeats the purpose of having storage.
Measure for fit, not just for size
Most people measure the opening once and buy the first organizer that looks close, that is how returns happen. A pull-out shelf needs clearance on every side, a clear path for the slide, and enough vertical room for your tallest item plus the shelf thickness.
Measure these five things in every cabinet before you shop:
- Interior width at the narrowest point. Cabinet boxes are rarely square. Measure front, middle, and back; the smallest number is your true usable width.
- Interior depth from the back wall to the inside face of the door frame. The frame is the real limit, not the shelf's front edge.
- Interior height between shelves, and total height if you plan to remove a shelf. A two-tier pull-out needs roughly double the height of a single-tier unit, plus the upper tier's thickness.
- Door swing and hinge clearance. A door swinging inward past 90 degrees can collide with a pull-out. Concealed and butt hinges leave different usable space near the frame.
- Obstructions inside the box. Note center stiles, plumbing and shutoffs, gas lines, conduit, and protruding shelf pins. Measure from each obstruction to the nearest wall to find your largest uninterrupted rectangle.
Do the fit math before you buy
A pull-out needs a small gap on each side so the slides don't bind. A common pattern is about 1/4 inch per side, but check the manufacturer's stated minimum.
Depth works the same way. A 22-inch pull-out in a 22-inch cabinet will rub the door frame.
Height is the measurement people forget. Add your tallest pot, the shelf thickness above it, and a small gap for lifting. If that exceeds the space between shelves, remove a shelf or choose a shorter organizer.
Check the cabinet's construction, not just its dimensions
Dimensions tell you what fits; construction tells you what the cabinet can hold. Before planning a heavy pull-out:
- Shelf thickness and material. Particleboard sags under sustained load, especially in humid kitchens; plywood and solid wood hold up better. If a shelf flexes when pressed, skip the heavy pull-out.
- Shelf support method. Adjustable shelves rest on four pins and can pop out under the torque of a sliding pull-out. Fixed shelves are safer for heavy cookware.
- Cabinet side panels. Thin, stapled-together boxes flex more than glued-and-screwed construction.
Document the layout so the plan survives the shopping trip
Sketch a rectangle for each cabinet and label its measurements, obstructions, and door-swing direction. Note center bars, inward-swinging doors, plumbing, clearance above shelves, and which shelves are fixed versus adjustable. Keep this sheet handy when shopping, the right fit prevents wasted purchases.
Step 2: Empty and Assess Your Cabinet Contents
Remove everything from your cabinets and lay it on the counter so you can see what you own. Toss broken lids, cracked containers, and damaged cookware, and question anything unused for a year. Wipe the empty interior with a damp cloth for a clean slate.
Group similar items on the counter as you assess: pots and pans, lids, food storage containers, small appliances, baking trays, and serving dishes. Sorting reveals patterns, five lids for containers you no longer own, duplicates you forgot about, that guide your organizing decisions.
Step 3: Group Items by Category and Frequency of Use
Daily items belong at eye level and within arm's reach; occasional items can go deeper; rarely used items belong in the hardest-to-reach spots. Create three categories:
Frequently used (several times per week): everyday pots and pans, regularly used containers, daily utensils.
Occasionally used (a few times per month): special serving dishes, seasonal cookware, backup containers.
Rarely used (once or twice per year): holiday baking pans, large platters, specialty equipment.
This frequency-based system means less reaching and digging. Group by type too, all pot lids in one spot, all food containers together, so a lid never ends up three shelves from its pot.
Step 4: Install Pull-Out Organizers for Deep Cabinets
Pull-out shelves and sliding drawers transform deep cabinets by bringing items at the back forward without reaching into the darkness, the single biggest accessibility upgrade. You pull the shelf toward you and everything on it comes forward, visible and easy to grab.
Match the mounting method to your cabinet and your lease
There are three broad ways to install a pull-out, and the right one depends on whether you own the cabinet and how much weight you plan to store.
Screw-mounted slides (permanent). Attached with screws to the floor, sides, or shelf. Most stable, handles the most weight, but leaves holes, usually avoid if you rent.
Adhesive-mounted slides (semi-permanent). Heavy-duty tape or strips instead of screws. Install in minutes and remove with a scraper and adhesive remover.
Freestanding and tension-based organizers (no installation). Sit on the shelf or wedge between walls. No drilling, no adhesive, safest for renters.
Understand load limits before you load the shelf
Every pull-out has a weight capacity printed on the box or in the guide, and it applies to the organizer, not your cabinet. Respect the weaker of the two limits.
Sinkelle PanNest Adjustable Pot Organizer →
- Distribute weight evenly. A heavy stockpot in one corner stresses one slide more than the same weight spread out.
- Keep the heaviest items on the lowest pull-out, closest to the cabinet floor.
- Do not exceed the cabinet's own rating. A pull-out concentrates load on the slides and mounting points. If the shelf flexes or the cabinet creaks, it's overloaded.
- Check the slides. Ball-bearing slides handle more weight than roller slides. If they bind or the shelf wobbles, stop loading.
Install a screw-mounted pull-out in six steps
- Confirm the fit. Recheck width, depth, and height against the organizer's dimensions, including slide clearance.
- Mark the mounting holes. Slide the organizer fully in and out to confirm no contact with the door frame or obstructions, then mark the holes.
- Drill pilot holes with a bit slightly smaller than the screw diameter to prevent splitting, especially in particleboard.
- Fasten the slides or base. Drive screws snug, not so tight you strip the hole. If a screw spins, use a larger screw or fill the hole with a matchstick and re-drive.
- Test with no load. Slide it fully out and in several times; it should move smoothly without rubbing.
- Load gradually, testing after each addition. Stop when the slide feels heavy or the shelf sags.
Anchor and stabilize anything that could tip
A fully extended pull-out shifts the center of gravity forward, which can tip an unstable cabinet, especially freestanding units and carts.
- Anchor freestanding cabinets to the wall with the manufacturer's anti-tip bracket or a furniture strap.
- Do not lean on a fully extended loaded shelf. Slides carry load when the shelf is supported by the cabinet, not cantilevered in midair.
- Keep the cabinet level. A forward lean strains the front slides and lets the shelf drift out on its own.
Renter-friendly alternatives that still work
If you cannot drill, you still have good options:
- Freestanding tiered racks that stack items vertically.
- Adhesive pull-out trays for lightweight items on a clean, dry surface.
- Bins with handles you pull forward like a drawer, then reach into from the top.
- Lazy Susans that rotate items to the front with no installation.
- Stackable clear containers that turn a deep shelf into two lift-out layers.
These won't match a screw-mounted pull-out's capacity, but they solve the reach problem without touching the cabinet. For renters, adhesive-based organizers leave no marks and pull off cleanly when you move.
The Sinkelle 2 SlideNest Organizer features a smooth pull-out sliding system that maximizes under-cabinet storage space. Its two-tier design fits perfectly in deep cabinets and keeps items neatly arranged and easy to access.

Step 5: Use Kitchen Cabinet Bins and Baskets for Grouping
Bins and baskets contain items and create visual order, preventing loose items from sliding to the back and getting lost.
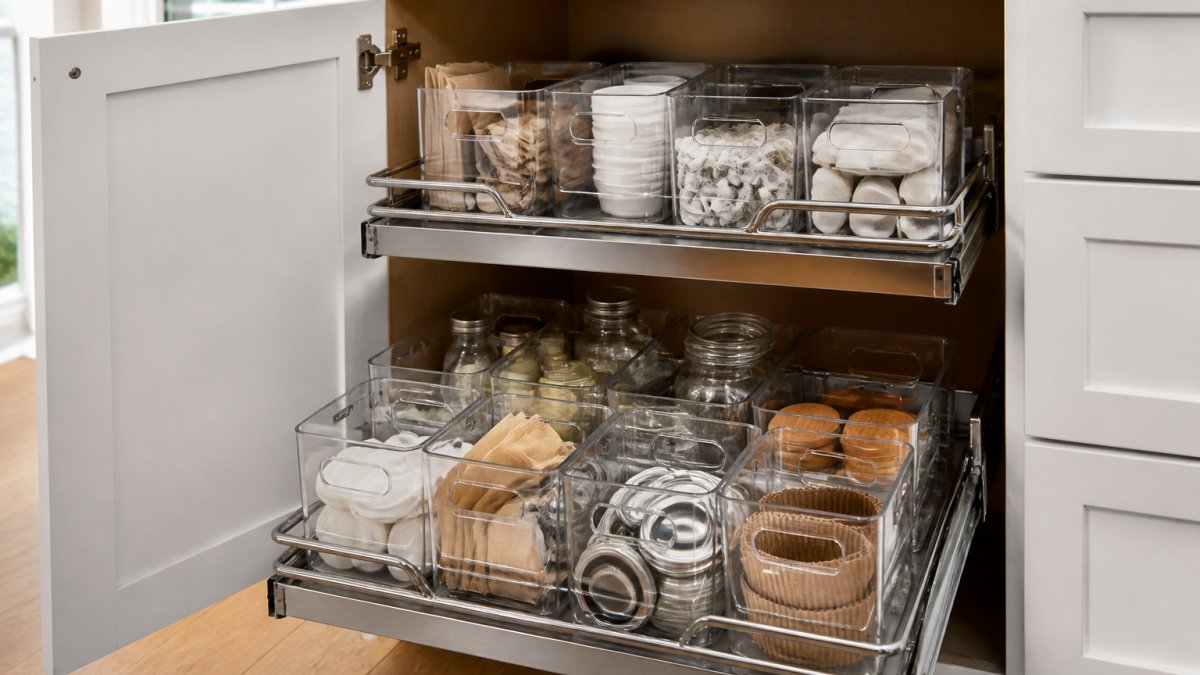
Measure shelf width and depth before buying bins. Clear plastic lets you see contents; opaque bins work if labeled clearly. Label every bin with a label maker or permanent marker to prevent the "where is that thing?" moment.
Step 6: How to Organize Pots and Pans in Cabinets
Pots and pans are bulky and heavy, and stacking them causes scratches and makes finding the right size difficult.
The Sinkelle PanNest Adjustable Pot Organizer keeps pots, pans, lids, and baking trays organized and protected. Its adjustable design accommodates cookware of different sizes. Heavy-duty carbon steel and stainless steel construction supports substantial weight.

Store lids separately in a dedicated bin or divider rack, they take up enormous space stacked with pots, and upright storage means you can find matching lids.
Deep Kitchen Cabinet Storage Ideas for Long-Term Success
A good system stays organized only if you maintain it. Return items to their spots immediately after use, and do a five-minute reset each evening, it takes less time than a full reorganization. Review your system every three months and move anything whose frequency category no longer matches reality. Avoid over-purchasing organizers; start with essentials and add only for specific needs.
The Sinkelle CabinetFlow Hanging Organizer creates additional storage without using cabinet space. It hangs beneath cabinets and holds paper towels, dishcloths, cutting boards, and pot lids. The space-saving design keeps frequently used items within easy reach.

Common Mistakes to Avoid When Organizing Deep Cabinets
Most people make the same errors with deep cabinets.
Buying before measuring. Measure twice, buy once, and take the measurements to the store.
Ignoring weight limits. Heavy cast iron can exceed cabinet capacity. Distribute weight evenly.
Overcrowding shelves. Leave breathing room so you can pull items out easily.
Using opaque bins without labels. Clear bins or clear labeling prevents forgotten contents.
Neglecting maintenance. Set a monthly reminder to assess and reset.
Organizing deep kitchen cabinets transforms how you cook and live.
The Sinkelle collection of kitchen organizers makes this process easier.
Frequently Asked Questions
How do pull-out organizers help when organizing deep kitchen cabinets?
Pull-out organizers slide out smoothly, bringing items stored at the back within easy reach without forcing you to dig or reach deep into the cabinet. The Sinkelle 2 SlideNest Organizer ($55.99) features a smooth sliding system that reduces strain and saves time finding what you need. This eliminates the frustration of items disappearing into dark corners and prevents you from forgetting what you have stored.
What's the best way to organize pots and pans in deep cabinets?
Group pots and pans by size and use frequency, then use an adjustable organizer to keep them upright and accessible. The Sinkelle PanNest Adjustable Pot Organizer ($38.99) lets you customize the layout for different cookware sizes and prevents stacking damage. Store your most-used cookware toward the front and less frequent items deeper inside, making daily cooking more efficient.
Can I use these organization solutions if I rent and cannot drill or damage walls?
Yes. Many deep kitchen cabinet storage solutions, such as adhesive organizers and hanging systems, work on cabinet surfaces without permanent installation. Always check your lease and confirm with your landlord that no-drill solutions are acceptable, but most renter-friendly options deliver the same organization benefits without wall damage.
How do I prevent my organized cabinets from becoming cluttered again?
Establish a maintenance routine by returning items to their designated spots immediately after use and reviewing your system monthly. Assign specific zones for frequently used versus rarely used items, making it natural to maintain the layout. Document your system with photos or labels so household members know where everything belongs, keeping your organization consistent over time.