


Table of Contents
- What You’ll Need to Clean Sink Organizers
- Step 1: Empty and Rinse Your Stainless Steel Sink Organizers
- Step 2: Choose the Best Stainless Steel Cleaner for Kitchen Accessories
- Step 3: Scrub, Rinse, and Dry to Prevent Water Spots
- Step 4: Preventing Rust on Stainless Steel Sink Caddy Surfaces
- Step 5: How to Declutter Kitchen Sink Area for Easier Maintenance
- What to Avoid: Cleaning Mistakes That Damage the Finish
- Conclusion: Keep Organizers Spotless With a Daily Routine
- Frequently Asked Questions
Last Updated: September 6, 2026
Stainless steel sink organizers keep sponges, brushes, and soap within arm’s reach, but they also collect soap scum, hard water spots, and grime faster than almost anything else on your counter. A sink caddy that looks pristine for the first week can develop a dull film and rust spots within a month without the right care. In this guide, we break down how to clean and maintain stainless steel sink organizers so they stay looking new for years, not weeks.

The process comes down to a simple daily habit and a weekly deep clean. This guide will show you exactly which tools and cleaners protect the surface finish, which mistakes cause corrosion, and how to keep the area around your sink organized.
What You’ll Need to Clean Sink Organizers
Gather these supplies before you start so the job takes under ten minutes:
- Mild dish soap or a gentle all-purpose cleaner
- White vinegar for mineral deposits and hard water stains
- Baking soda for stubborn grime and light rust spots
- A soft microfiber cloth for drying and polishing
- A non-scratch sponge or soft-bristle brush
- A toothbrush for crevices and corners
Skip abrasive sponges, steel wool, and harsh chemical cleaners. They scratch the surface finish and strip the protective layer, which makes the stainless steel sink organizer more vulnerable to corrosion. The American Cleaning Institute’s guidance on metal care recommends starting with the mildest product that will do the job, which is exactly the approach that protects the grain direction of your caddy.
Step 1: Empty and Rinse Your Stainless Steel Sink Organizers
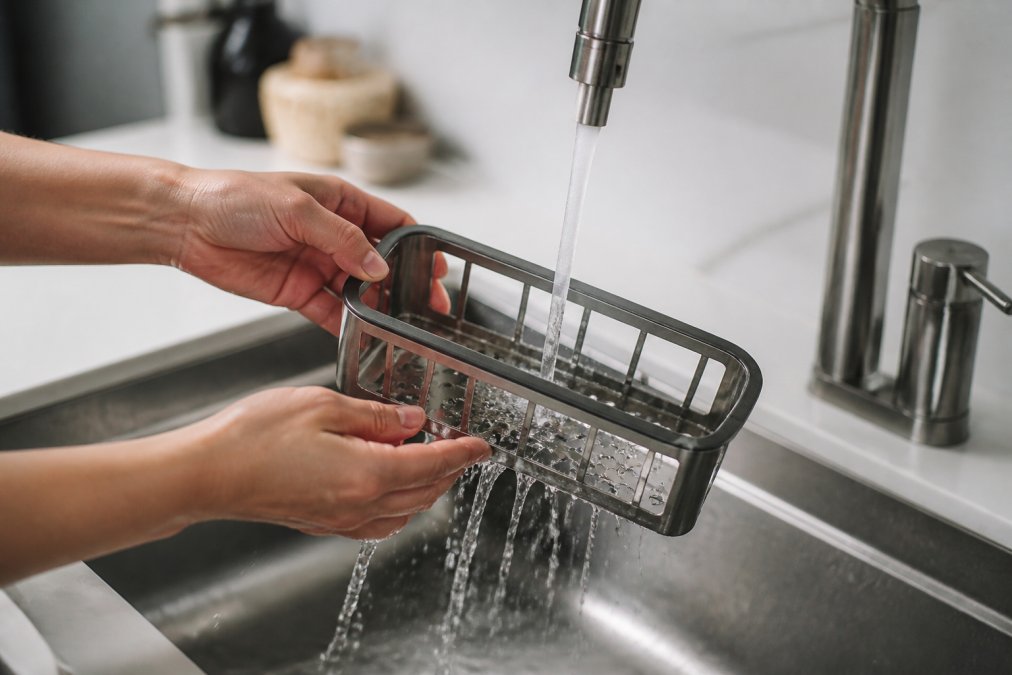
Start by removing everything from the caddy, including sponges, brushes, and any removable inserts or drain trays. Shake off loose debris over the trash, then hold the organizer under warm running water to remove surface residue.
For a caddy with a drain tray or grid, separate the pieces if they detach. Grime accumulates in the seams where water pools, and cleaning the assembled unit leaves those crevices untouched. Rinse both parts thoroughly, paying attention to the underside where mineral deposits collect first.
Step 2: Choose the Best Stainless Steel Cleaner for Kitchen Accessories
The best stainless steel cleaner for kitchen accessories is one that is ammonia-free and chloride-free. Ammonia and chlorine-based products can pit the surface and cause discoloration over time, even when diluted. But the cleaner you choose also depends on what your organizer is actually made of, and most sink caddies are not 100% stainless steel.
Many organizers combine a stainless steel frame with silicone sleeves, plastic inserts, or a wire grid. Each material reacts differently to the same cleaner:
- Stainless steel frame: Use warm water with a few drops of mild dish soap for daily cleaning. For hard water spots, white vinegar breaks down mineral deposits without damaging the finish. Apply vinegar with a soft cloth, let it sit for no more than one minute, then rinse thoroughly. Prolonged contact with acid can dull the protective chromium oxide layer.
- Silicone grips or sleeves: Silicone is non-porous and resists staining, but it attracts grease and soap scum. Clean it with the same mild dish soap solution. Avoid oil-based stainless steel polishes, they leave a film on silicone that feels sticky and collects dust. If silicone develops a cloudy film, wipe it with a 1:1 water and white vinegar solution, then rinse.
- Plastic inserts or drain trays: Many plastic organizers are polypropylene or ABS. These are dishwasher-safe on the top rack, but check for a recycling code or manufacturer stamp first. If washing by hand, use mild dish soap and avoid citrus-based degreasers, which can cloud some plastics over time.
- Wire grids with a chrome or epoxy coating: These are common in over-sink caddies. The coating is more fragile than stainless steel. Never use abrasive pads or powdered cleansers on coated wire, they scratch through the protective layer, and the underlying metal will rust quickly. Use only a soft sponge and liquid soap.
One common mistake is using a dedicated stainless steel polish as a daily cleaner. Polishes contain mineral oils that leave a residue, which attracts more dust and grime. Reserve polish for occasional buffing, not routine maintenance.
For hard water buildup specifically, the white, chalky film that forms where water pools in the organizer’s tray or around the base, use this protocol once a week if you have hard tap water (above 7 grains per gallon):
- Rinse the organizer with warm water to remove loose debris.
- Spray or wipe undiluted white vinegar over the affected areas.
- Let it sit for 30 to 60 seconds. Do not let it dry on the surface.
- Scrub gently with a non-scratch sponge, working with the grain of the metal.
- Rinse thoroughly and dry immediately with a microfiber cloth.
If the mineral deposits are thick and crusty, make a paste of baking soda and white vinegar. Apply it to the deposit, let it bubble for a few minutes, then scrub with a soft toothbrush. This lifts scale without harsh descalers that can damage the finish.
For organizers with a brushed stainless finish, always wipe in the direction of the grain. Going against the grain creates micro-scratches that are visible under kitchen lighting and become collection points for grime. If you are unsure which direction the grain runs, look at the surface under a bright light at a low angle.
A final note on cleaning products: avoid any cleaner labeled "chloride-free" but containing hydrochloric or phosphoric acid. These are common in bathroom descalers and will etch stainless steel. Stick to products specifically labeled for stainless steel or food-contact surfaces, and test any new cleaner on a small, hidden area first.
Step 3: Scrub, Rinse, and Dry to Prevent Water Spots
Scrub the organizer using a non-scratch pad or soft sponge, working in the direction of the grain rather than in circles. Scrubbing against the grain leaves fine scratches that become visible over time.
For stubborn buildup in corners and around the drain flange, use a toothbrush dipped in a paste of baking soda and water. The mild abrasiveness lifts grime without scratching the surface finish.
Rinse thoroughly with warm water to remove all soap or vinegar residue. Leftover cleaner can leave a film that dulls the metal. Then dry the organizer immediately with a microfiber cloth. This final step is the one most people skip, and it is the difference between a spotless caddy and one covered in water spots.
Step 4: Preventing Rust on Stainless Steel Sink Caddy Surfaces
Preventing rust on stainless steel sink caddy surfaces comes down to controlling moisture and avoiding cross-contamination. Stainless steel resists corrosion, but it is not rust-proof, especially if the protective chromium oxide layer gets damaged.
The most common cause of rust spots is leaving wet steel in contact with other metals. A cast iron pan resting on a damp caddy, or steel wool fibers left behind from scrubbing, can transfer particles that oxidize and create brown spots. If you see rust, remove it early with a baking soda paste applied in the direction of the grain, then rinse and dry.
Daily airflow matters as much as cleaning. A caddy that stays wet for hours is far more likely to develop corrosion than one that drains and dries quickly. The Specialty Steel Industry of North America’s care recommendations notes that routine cleaning and drying are the most effective ways to preserve stainless steel’s protective layer.
But here is what most sink cleaning guides miss: the organizer itself has a lifespan, and knowing when to stop cleaning and start replacing prevents both rust contamination and bacterial buildup. The degradation timeline depends on the material:
- Stainless steel wire or frame: With proper care, this should last 5 to 10 years. The first sign of trouble is small brown dots that appear after cleaning, these are often embedded iron particles from tap water or nearby cookware, not actual rust in the steel itself. A baking soda paste usually removes them. If the dots return within a week, the chromium oxide layer has been compromised, and the metal will continue to corrode.
- Epoxy-coated wire: The black or white coating on many over-sink caddies protects the underlying steel. Once the coating chips, which happens when metal utensils scrape against it, rust spreads quickly underneath. Inspect the coating monthly. If you see chips larger than a pencil point, the organizer is nearing the end of its useful life. The exposed rust will stain your sponge and countertop.
- Silicone-coated or silicone-insert organizers: Silicone does not rust, but it can harbor bacteria in micro-tears that develop over time. If the silicone becomes sticky, discolored, or develops a permanent film that cleaning does not remove, replace it. Silicone degrades faster than metal, typically 2 to 3 years with daily use.
- Plastic drain trays and inserts: Polypropylene and ABS plastic become brittle after repeated exposure to hot water and UV light from kitchen windows. Cracks and crazing (fine spider-web lines) create crevices where bacteria hide. If you see crazing, replace the insert, no amount of cleaning will fully sanitize a cracked plastic surface.
A practical replacement protocol: mark your calendar when you buy a new organizer. At the 12-month mark, do a full inspection. Check for coating chips, rust dots, silicone stickiness, and plastic crazing. Most organizers will pass this first inspection. At the 24-month mark, check again. If you are cleaning rust spots more than once a month, or if the organizer has any cracked plastic or peeling coating, replace it.
The Environmental Protection Agency’s guidance on reducing waste encourages repairing and reusing items where possible. When replacement is necessary, choose a design that minimizes future problems: look for fully welded stainless steel (not coated wire), removable drain trays that are dishwasher-safe, and designs with fewer crevices where water pools. A well-drained organizer with open slots or angled trays will dry faster and resist corrosion longer than a solid-bottom caddy.
For organizers that are still in good shape, one additional preventive step makes a measurable difference: apply a thin coat of food-grade mineral oil to the stainless steel surface once a month. This is the same product used on cutting boards. Wipe it on with a soft cloth, let it sit for five minutes, then buff off the excess. The oil fills microscopic pores in the metal, creating a barrier that repels water and makes future cleaning easier. This is especially effective in homes with hard water.
Step 5: How to Declutter Kitchen Sink Area for Easier Maintenance
How to declutter kitchen sink area starts with reducing the number of items that sit on your counter. Every extra bottle, brush, or tool is another surface that collects grime and another object to move when you clean.
A practical approach is to keep only three categories within reach: the sponge or brush you use daily, the soap you use most often, and a drying tool. Everything else belongs in a cabinet or drawer. This makes the space look cleaner and means your organizer gets rinsed and wiped regularly instead of being buried under clutter.
Sanitization is a separate step from cleaning. While soap and water remove dirt and residue, they do not kill all bacteria. To sanitize your organizer, wipe it down with a diluted bleach solution or a food-safe sanitizer, then rinse thoroughly. Check the manufacturer’s guidance for your specific organizer, since some finishes respond better to certain sanitizers than others.
What to Avoid: Cleaning Mistakes That Damage the Finish
Several well-intentioned cleaning habits cause more harm than good. Avoid these to protect your organizer’s appearance and lifespan:
- Steel wool or abrasive scrubbers. These leave microscopic scratches that trap dirt and invite corrosion.
- Bleach soaks on the finish. While bleach sanitizes, prolonged contact can discolor and pit stainless steel.
- Leaving acidic foods or cleaners on the surface. Vinegar and lemon juice are effective cleaners, but they should always be rinsed off promptly.
- Using the dishwasher for non-dishwasher-safe organizers. The heat and detergent can damage the finish and warp thin metal.
If you are replacing an organizer that has become heavily pitted or rusted beyond repair, consider the material and design of the next one. The Environmental Protection Agency’s guidance on reducing waste encourages repairing and reusing items where possible, but when replacement is necessary, choosing a durable, well-drained design reduces how often you need to buy again.
Conclusion: Keep Organizers Spotless With a Daily Routine
Stainless steel sink organizers do not require elaborate care, but they do require consistency. A thirty-second rinse and dry after each dishwashing session prevents most buildup, and a weekly deep clean with mild soap and vinegar handles the rest. The payoff is a sink area that looks as polished as the day you installed it.
SinkElle designs its organizers with this maintenance reality in mind, using waterproof materials and tool-free installation so you can spend less time scrubbing and more time enjoying a clean, minimalist kitchen. The angled drain trays and space-optimized designs reduce the crevices where grime hides, making daily upkeep noticeably easier. Shop now and keep your sink area organized and spotless with minimal effort.
Frequently Asked Questions
What should you not use on a stainless steel sink organizer?
Avoid abrasive sponges, steel wool, and harsh chemical cleaners containing chlorine bleach or ammonia. These can scratch the surface finish and cause corrosion. Stick to a soft microfiber cloth, mild dish soap, or a cleaner made for stainless steel. Always scrub in the direction of the grain to prevent visible scratches.
How do you remove hard water stains from stainless steel sink accessories?
For hard water stains and mineral deposits, wipe the surface with a cloth dampened with white vinegar. Rinse thoroughly with water afterward to remove the acidic residue. For stubborn limescale, make a paste with baking soda and water, apply it gently, and rinse. Dry the organizer completely to prevent new spots.
Is it safe to put stainless steel sink organizers in the dishwasher?
Check the manufacturer's instructions first. While many are dishwasher-safe, the high heat and harsh detergents can dull the finish over time. Hand washing with mild detergent is the safer method for preserving the grain and preventing rust spots. If you use the dishwasher, place items on the top rack and remove them promptly to air dry.
How often should I clean my stainless steel sink caddy?
Incorporate a quick rinse and wipe-down into your daily routine to prevent grime buildup and water spots. A deeper clean with a dedicated stainless steel cleaner should happen once a week. This preventative care stops food residue from hardening and keeps mineral deposits from etching the surface.