


Table of Contents
- The Scandinavian Storage Formula for Compact Kitchens
- How to Maximize Kitchen Counter Space with a Nordic Minimalist Approach
- Vertical Storage: The Backbone of Scandinavian Kitchen Storage
- Small Apartment Kitchen Storage Hacks That Preserve Clean Lines
- Drawer and Cabinet Interiors: Organizing the Chaos
- Lighting and Palette: Making a Small Kitchen Feel Larger
- Sustainable Materials and Budget-Friendly DIY Hacks
- Conclusion: Build a Kitchen That Works as Hard as You Do
- Frequently Asked Questions
Last Updated: September 5, 2026
Scandinavian kitchen storage for small spaces is not about cramming more into less. It is about the quiet discipline of keeping only what earns its place, then giving each item a home that is both visible and calm. At SinkElle, we have studied how compact layouts perform under real daily pressure, and the most effective solutions combine smart vertical thinking with honest materials.
The core tension in any small kitchen is between what you need to store and the visual space you need to breathe. Most guides tell you to buy more containers or install a giant pantry unit. The Scandinavian answer is different: reduce the volume of stuff, then build upward.
The Scandinavian Storage Formula for Compact Kitchens
Scandinavian kitchen storage pairs strict reduction of countertop items with a heavy reliance on vertical and concealed spaces to preserve an open, airy feel. The formula rests on three commitments: a neutral palette to reduce visual noise, open shelving used sparingly for curated display, and everything else hidden behind clean cabinet fronts. When these three elements work together, even a 100-square-foot kitchen can feel twice its size.
Start by removing every appliance and utensil you have not touched in the last month. This single act of decluttering does more for the space than any organizer you can buy.
How to Maximize Kitchen Counter Space with a Nordic Minimalist Approach
The fastest way to maximize kitchen counter space is to audit what sits on it right now and relocate everything not used daily to a cabinet or wall-mounted home. Coffee machines, toasters, and utensil crocks are the usual culprits.
A common mistake is buying a larger countertop organizer to corral the clutter. That just gives the clutter a bigger home. Instead, think in layers. Use a slim 2-tier shelf, like the SinkElle CounterRise 2-Tier Shelf, to double the usable height for daily items.

Vertical Storage: The Backbone of Scandinavian Kitchen Storage
Vertical storage is the single highest-use upgrade for a compact kitchen because it converts unused wall and cabinet height into functional real estate without consuming floor space.
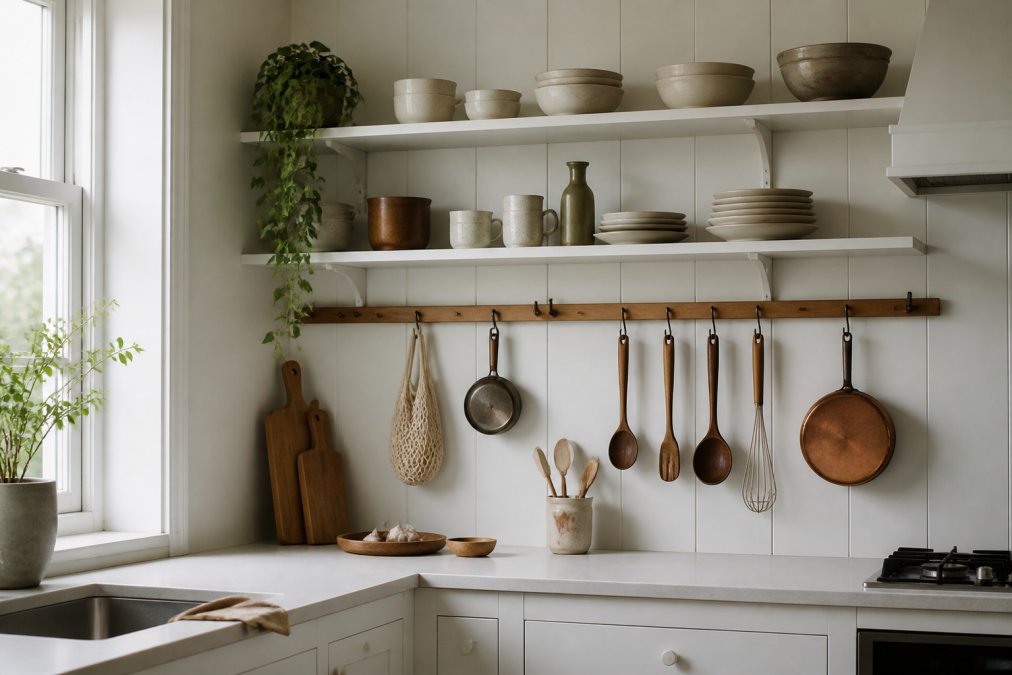
Hanging Rails and Wall-Mounted Systems
Hanging rails are the workhorse of the Scandinavian kitchen. A single stainless steel or oak rail mounted above the backsplash can hold utensils, pots, and even cutting boards, keeping them within arm's reach of your main prep zone.
Installation matters more than the rail itself. For renters, adhesive strips or clamp-style mounts avoid drilling and leave no marks. For homeowners, a properly anchored rail into a stud will hold years of daily use.
Ergonomic reach zones. In a micro-kitchen, the placement of a rail is biomechanical. The ideal vertical zone for frequently used tools is between your hip and shoulder height, roughly 36 to 54 inches from the floor (the CDC). Test the height by mimicking a cooking motion before committing to the drill.
Weight and anchoring specifics. A wall-mounted rail is only as good as its anchors. For a rail holding a full set of cast-iron pans, you need a stud finder and 2-inch wood screws rated for at least 50 pounds per stud (hud.gov). If you are mounting into drywall without a stud, toggle bolts with a 75-pound rating are the minimum safe choice. Adhesive strips are suitable only for lightweight items, utensils, measuring spoons, or a single cutting board, never for a full cookware set.
Open Shelving vs. Concealed Cabinets
Open shelving and concealed cabinets serve opposite purposes in a Scandinavian kitchen, and the best layouts use both deliberately. Open shelves are for display; concealed cabinets are for everything else, especially items that look messy.
The rule of thumb is the 80/20 split. Keep 20 percent of your storage open for curated display and 80 percent closed to hide the daily reality of a working kitchen. For the overflow, a hanging cabinet shelf like the SinkElle CabinetFlow Hanging Organizer creates an extra tier inside a standard cabinet.
The ergonomic case for closed storage. Beyond aesthetics, closed cabinets reduce visual noise, which lowers cognitive load during cooking. When you see fewer items, you make faster decisions about what to grab next.
Shelf depth and weight limits. Open shelves in a Scandinavian kitchen are typically 10 to 12 inches deep, which is enough for dinner plates but not for large mixing bowls. If you plan to display heavy ceramic pieces, choose solid oak or powder-coated steel brackets rated for at least 30 pounds per shelf. Floating shelves require a hidden bracket system that must be anchored into a stud or reinforced drywall.
The unique angle: vertical zones for workflow. Instead of thinking of vertical storage as a single wall, divide it into three horizontal bands. The lowest band, from the counter to 18 inches up, is for prep items. The middle band, from 18 to 54 inches, is for cooking tools and pots. The highest band, above 54 inches, is for rarely used platters and decorative ceramics.
Small Apartment Kitchen Storage Hacks That Preserve Clean Lines
Small apartment kitchen storage hacks work best when they exploit dead space that most layouts ignore, such as the gap above the fridge, the back of cabinet doors, and the vertical band between the counter and upper cabinets.
- Use the inside of cabinet doors for measuring spoons, foil, and cling wrap with adhesive hooks.
- Install a slim, pull-out rack in the gap beside the fridge or stove for spices and oils.
- Mount a magnetic strip on the side of the cabinet to hold knives, keeping them off the counter.
- Use the space above the fridge for a shallow basket holding rarely used platters or a step stool.
The trick is to make sure every hack you add is easy to reverse. Tool-free, clamp-based organizers are the safest bet for preserving both your security deposit and the clean lines of your design.
Drawer and Cabinet Interiors: Organizing the Chaos
The inside of your drawers and cabinets determines whether your kitchen stays organized for more than a week. Scandinavian design demands that every item has a designated home, using drawer organizers, tiered racks, and dividers to separate the chaos into defined zones.
Start with the drawer next to the sink. This is your primary utensil zone. Use a bamboo or metal divider to separate cooking utensils from serving pieces, and keep a small tray for frequently used tools. For pots and pans, an adjustable pot organizer like the SinkElle PanNest Adjustable Pot Organizer lets you stack cookware vertically and store lids on their side. Most cabinets waste 40 percent of their height on air above a single stack of pans (energy.gov).

The mechanism of drawer depth. Standard kitchen drawers are typically 3 to 4 inches deep for utensils and 6 to 8 inches deep for pots. Before buying any divider, measure the interior width and depth of the drawer, not the exterior face. A flexible bamboo expandable divider fits odd-sized drawers, adjustable from 12 to 20 inches without cutting.
Material trade-offs for drawer interiors. The material of your drawer organizers matters as much as the layout. Bamboo is the Scandinavian default because it is lightweight, moisture-resistant when sealed, and sustainable. However, bamboo can warp if it sits in a drawer that gets wet frequently, such as the one under the sink. For that location, powder-coated steel or food-grade polypropylene is a better choice because it will not absorb moisture or harbor mold.
The unique angle: sustainable, moisture-proof layering. Instead of treating drawer organization as a one-time purchase, build a layered system that can be adjusted as your needs change. Start with a non-slip liner made from recycled rubber or cork, then add a base layer of dividers for large items, and finish with a top tray for small tools.
Cabinet door and interior dead space. The back of cabinet doors is a high-value zone that most guides overlook. Adhesive-mounted wire racks on the inside of a cabinet door can hold foil, cling wrap, and measuring spoons. For deep cabinets, a pull-out wire basket on a gliding track turns a dark, inaccessible corner into a usable pantry.
Budget-friendly DIY interior hack. For a low-cost upgrade, use small, clear plastic bins from a dollar store to separate categories inside a drawer. Label each bin. This approach costs under $10 and is fully reversible, making it ideal for renters.
Lighting and Palette: Making a Small Kitchen Feel Larger
Lighting and color do more to expand a small kitchen than any storage gadget. The Scandinavian palette leans on white walls, light wood tones, and matte black or brass accents. This combination reflects natural light and reduces contrast between surfaces, making the room read as more spacious.
For lighting, the goal is to eliminate shadows in your work zones. Under-cabinet LED strips are the single best upgrade because they illuminate the counter without taking up space or casting a shadow from your own body. Inside cabinets, a simple battery-operated puck light makes deep shelves usable.
Sustainable Materials and Budget-Friendly DIY Hacks
Sustainable materials in a Scandinavian kitchen are not a luxury add-on; they are the default. Bamboo, solid oak, and powder-coated steel are durable, repairable, and free of the volatile compounds found in some cheaper plastics.
For budget-friendly DIY, you do not need a carpenter. A common approach is to repurpose a simple wooden shelf and mount it with adhesive brackets, or to use a tension rod inside a cabinet to hang spray bottles. The SinkElle 2-Tier Pantry Storage Rack, crafted from natural bamboo, brings this eco-friendly look without any installation work.
If you are skeptical about waterproof claims, look for materials that are inherently moisture-resistant rather than coated. Powder-coated metal and sealed bamboo handle the humidity of a sink area far better than raw wood or standard plastic.
Conclusion: Build a Kitchen That Works as Hard as You Do
A small kitchen asks you to make peace with limits, but the Scandinavian approach turns that constraint into a design strength. By clearing your counters, building upward with rails and shelves, and organizing the chaos inside your drawers, you create a space that is efficient and calm.
SinkElle is built for exactly this kind of kitchen. Our organizers, from the CabinetFlow Hanging Organizer to the CounterRise 2-Tier Shelf, are designed with waterproof materials and tool-free installation, so you can maximize your space in minutes without a drill or a permanent commitment. Get started with SinkElle and give every item a clear, beautiful home.
Frequently Asked Questions
How do you organize a small Scandinavian kitchen?
Start by clearing the counters. Scandinavian design relies on visible restraint, so store daily-use items vertically on hanging rails or open shelves. Use drawer organizers for utensils and cutlery to keep interiors tidy. Maximize cabinet space with tiered shelves or pot racks. The goal is a functional design where every item has a designated spot, keeping the space clutter-free and visually calm.
Are open shelves good for small kitchens?
Yes, when used deliberately. Open shelving removes the visual weight of upper cabinets, making a small kitchen feel larger. It also forces a curated display, which aligns with the minimalist aesthetic. Limit them to items used weekly, like plates and glasses. Reserve closed cabinetry for food and appliances to avoid visual clutter. This balance creates depth without sacrificing storage capacity.
How can I maximize counter space in a tiny kitchen?
Use vertical space first. Install a hanging rail for tools and a wall-mounted rack for cutting boards. Add a 2-tier countertop shelf, like the Sinkelle CounterRise, to stack coffee mugs or spices upward. Store infrequent appliances in cabinets. This frees the primary work zone for food prep, improving kitchen workflow and making the room feel less cramped.
What materials are best for minimalist kitchen storage?
Choose natural, durable materials that age well. Bamboo is a sustainable choice that adds warmth without visual noise. Powder-coated steel or rust-resistant metal offers strength and a clean profile. These materials support a neutral color palette and resist moisture near the sink. They also avoid the warping and mold issues common with cheaper plastic bins.
This article was written using GrandRanker