


Table of Contents
- Why Kitchen Sink Organizers Get Moldy
- Step 1: Choose Mold-Resistant Materials for Your Sink Caddy
- Step 2: How to Clean Kitchen Sink Organizers Weekly
- Step 3: How to Dry Kitchen Sponges Properly
- Step 4: Maintain Proper Ventilation and Air Circulation
- Step 5: Install Drainage Solutions and Prevent Water Pooling
- Step 6: Monitor Humidity Levels Under Your Sink
- Step 7: Seal and Maintain Caulking Around Your Sink
Last Updated: August 15, 2026
Why Kitchen Sink Organizers Get Moldy
The space under and around your sink is a perfect breeding ground for mold. Moisture sits there constantly, air circulation is minimal, and organic material from sponges accumulates. These three conditions create exactly what mold needs to thrive. Most organizers are designed for aesthetics, not for the hostile, wet environment they occupy. Standard plastic caddies absorb water into their porous surfaces. Fabric-based organizers trap moisture against the cabinet. Even stainless steel can develop black stains when water pools underneath.
Mold prevention isn't about cleaning harder, it's about controlling the three variables that allow mold to grow: moisture, air circulation, and material choice. Remove one of those three, and mold struggles to establish itself.
At SinkElle, we've engineered our organizers to interrupt this cycle at every point. Waterproof materials prevent absorption. Drainage design keeps water from pooling. Smart spacing allows air to move.
Step 1: Choose Mold-Resistant Materials for Your Sink Caddy
The material of your sink organizer determines whether moisture becomes your enemy or passes through. Non-porous materials are non-negotiable. Silicone, stainless steel, and solid plastic resins don't absorb water the way fabric, wicker, or porous ceramics do. When water can't soak into the surface, mold loses its foothold.
Silicone caddies represent the sweet spot between function and durability. They're completely waterproof, flexible enough to fit tight spaces, and easy to sanitize. Stainless steel organizers offer a premium aesthetic and superior durability, though they require attention to drainage holes to prevent water pooling underneath.
Avoid materials that trap moisture. Wooden organizers absorb water and develop mold within weeks. Fabric-lined caddies create a damp microclimate that accelerates fungal growth. Wicker baskets are porous by design, essentially mold hotels.
The Sinkelle FlowRack Pro exemplifies the right approach. Its waterproof silicone construction keeps sponges and dishcloths elevated and separated, allowing water to drain freely rather than pool. At $34.99, it's designed specifically to prevent the wet-sponge mess that leads to mold formation.

Step 2: How to Clean Kitchen Sink Organizers Weekly
Weekly cleaning removes the organic material that mold uses as food and eliminates dormant spores before they germinate. The process takes five minutes. Remove the organizer and empty any standing water. Use a soft scouring pad with warm water and dish soap to wipe down every surface, paying attention to crevices and drainage holes. For stubborn stains or early-stage mold, use equal parts white vinegar and water.
Rinse thoroughly under running water to remove all soap residue, soap left behind traps moisture and feeds mold. Dry the organizer completely with a clean cloth before returning it to your sink. This last step matters: moisture remaining on the surface invites fungal growth.
If you notice black stains or musty odors, increase cleaning to twice weekly. This signals that moisture is accumulating faster than your setup can handle.
Step 3: How to Dry Kitchen Sponges Properly
A wet sponge sitting in a puddle is the single most common source of mold in the sink area. The sponge becomes a mold colony within 24-48 hours of use, then transfers that mold to every dish and surface it touches.
Sponges must dry completely between uses. This requires elevation and air exposure. A sponge resting flat on a wet counter stays wet. A sponge suspended where air reaches all sides dries within hours.
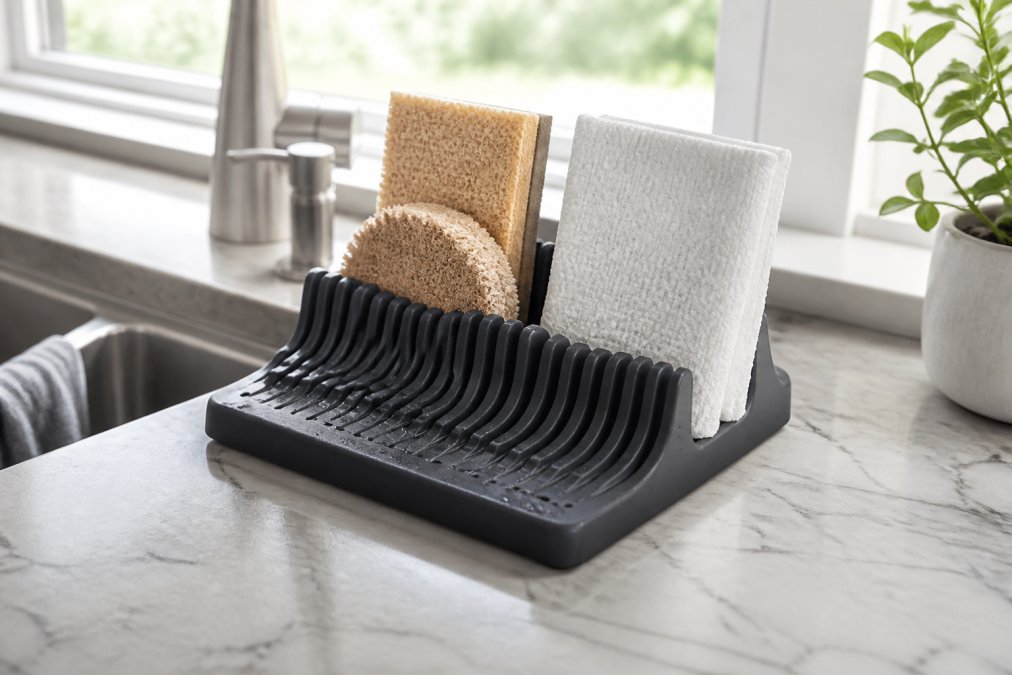
The Sinkelle FlowRack Pro solves this by design. Its elevated tiers separate sponges and dishcloths so air circulates around each item. Water drains downward rather than pooling underneath.
If using a standard caddy: After using your sponge, rinse it completely under hot running water. Squeeze out excess water. Place it on the edge of your sink or a dish rack where it's elevated and exposed to air on all sides. Never store a wet sponge in an enclosed caddy or under the sink.
For dishcloths, hang them on a rack or towel bar where they can dry completely. Replace sponges every two to three weeks, or sooner if they develop odors.
Step 4: Maintain Proper Ventilation and Air Circulation
Mold thrives in still, humid air. Improving ventilation removes one of mold's three essential conditions. Air movement prevents moisture from accumulating on surfaces and keeps humidity levels low enough that spores can't germinate.
Use your range hood while cooking and for 10-15 minutes afterward. If your hood vents indoors rather than outside, it recirculates humid air back into your kitchen. Check whether your hood vents to the outside.
For the area around your sink, create air movement. Open cabinet doors under the sink for 30 minutes daily if your plumbing allows it. If you have a window near your sink, open it during the day. A small oscillating fan pointed toward your sink area accelerates drying, 20-30 minutes after washing dishes is enough to evaporate standing moisture.
The goal is simple: air should move across your sink organizer regularly. Still air allows moisture to linger. Moving air evaporates it before mold establishes itself.
Step 5: Install Drainage Solutions and Prevent Water Pooling
Water pooling under or around your sink organizer is the fastest path to mold. Standing water creates a perpetually damp surface where mold colonies explode in growth.
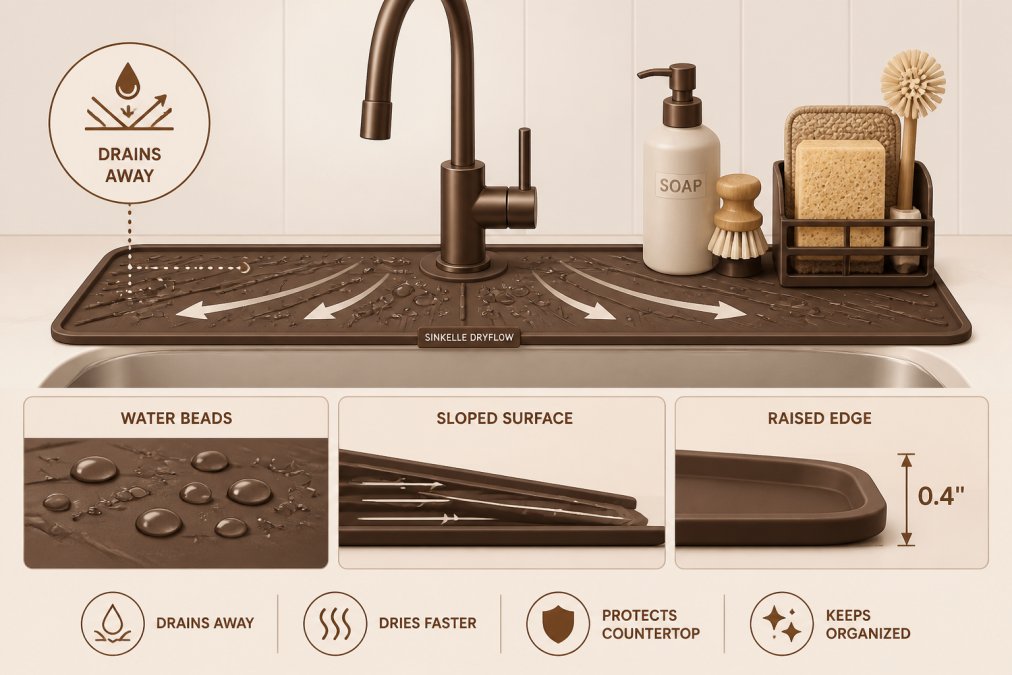
Evaluate your current setup. Does water pool on top of your organizer? Does it collect underneath? If water pools on top, your organizer lacks proper drainage holes or they're positioned wrong. If water collects underneath, your sink basin has low spots or your organizer sits directly on a flat surface.
The Sinkelle DryFlow Splash Mat ($19.99) redirects water away from your sink area before it pools. It sits under your faucet and channels water toward your sink basin instead of spreading across the counter.
Ensure there's a gap between your organizer and the sink basin so water can drain. If your organizer sits flush against the sink, water gets trapped underneath. Check your sink's drainage holes regularly, debris can clog them, causing water to back up under your organizer.
Prevention of water pooling is about designing your setup so water flows downward and outward, not inward and underneath.
Step 6: Monitor Humidity Levels Under Your Sink
Even if you're cleaning regularly and managing water pooling, if humidity under your sink stays above 60%, mold will find a way. A basic humidity meter costs $10-15 and gives you real data. Most kitchens show humidity levels between 50-70% under the sink. Anything above 60% is mold-friendly.
If your humidity readings are high, the fix depends on the moisture source. Is it from your sink itself, leaks, splashing, or condensation? Is it from your dishwasher? Is it ambient kitchen humidity concentrated there? The source determines your solution.
The Sinkelle AquaShield Faucet Guard ($17.99) reduces splashing and splash-related moisture accumulation. By reducing the moisture source, you lower overall humidity in that cabinet space.

Once a month, place your meter under the sink for a day. If humidity creeps above 60%, adjust your ventilation or drying practices. If it's stable below 55%, your current setup is working.
Step 7: Seal and Maintain Caulking Around Your Sink
Caulking integrity matters because gaps and cracks allow water to seep behind surfaces where you can't see or clean it. That hidden moisture becomes a mold colony factory.
Inspect your sink's caulking monthly. Look for cracks, gaps, or areas where caulk has separated from the sink basin or countertop. Silicone caulk is superior to acrylic for wet environments because it stays flexible and resists mold better.
If you find damaged caulking, remove the old material completely. Clean the gap thoroughly with a disinfectant to remove any existing mold spores. Allow it to dry completely, this might take 24 hours in a humid kitchen. Apply new silicone caulk using a caulking gun, filling the entire gap. Allow it to cure for 24-48 hours before exposing it to water.
Caulking maintenance is preventative. It stops water from reaching the spaces where mold thrives in darkness.
Preventing moldy kitchen sink organizers comes down to controlling moisture, improving air circulation, and choosing materials that resist fungal growth. The process requires consistency: weekly cleaning, proper sponge drying, functional ventilation, and attention to drainage and caulking integrity together create an environment where mold can't establish itself.
SinkElle's organizers are engineered with these principles built in. The FlowRack Pro ($34.99) elevates sponges for proper drying. The DryFlow Splash Mat ($19.99) prevents water pooling at the source. The AquaShield Faucet Guard ($17.99) reduces splashing. Together, they transform your sink area from a mold incubator into a space where mold struggles to survive.

| Prevention Strategy | Frequency | Primary Benefit |
|---|---|---|
| Weekly organizer cleaning | Every 7 days | Removes mold food sources |
| Sponge air drying | After each use | Prevents sponge colonization |
| Humidity monitoring | Monthly | Identifies high-risk conditions |
| Caulking inspection | Monthly | Stops hidden water infiltration |
| Drain clearing | Weekly | Maintains water flow away from cabinet |
| Ventilation use | Daily | Reduces ambient humidity |
According to the EPA's guidance on moisture control in homes, maintaining humidity below 60% is essential for preventing mold growth in any indoor space. Kitchen sinks present a unique challenge because they're constantly exposed to water, but the same principle applies: control moisture, and you control mold.
Research from the CDC's recommendations on kitchen hygiene emphasizes that sponges and dishcloths are among the most contaminated items in a kitchen, making proper drying and storage critical to food safety.
Frequently Asked Questions
What is the best material for a mold-resistant sink organizer?
Stainless steel and non-porous silicone are the top choices for preventing mold growth. Unlike porous plastic or wood, these materials don't absorb moisture and resist fungal growth. Stainless steel is durable and easy to sanitize with disinfectant, while silicone caddies like the Sinkelle FlowRack Pro ($34.99) offer flexibility and drain quickly. Avoid organizers with deep crevices or porous surfaces where moisture can trap and create conditions for black stains and mildew.
How often should I clean my kitchen sink caddy to prevent mold?
Clean your sink organizer at least once weekly with hot water and a disinfectant or scouring pad. If your kitchen has high humidity or your caddy frequently holds wet sponges, increase cleaning to twice weekly. Empty the organizer completely, wipe down all surfaces including drainage holes and hard-to-reach areas, and allow it to air dry fully before restocking. This preventative maintenance stops black stains and mildew before they develop.
Why does my sink organizer get slimy even after cleaning?
Slime (biofilm) forms when sponges and cloths stay wet in poor air circulation. Moisture creates an ideal environment for fungal growth and mildew. The solution is twofold: use a quick-dry caddy like the FlowRack Pro that elevates sponges away from pooling water, and ensure your under-sink cabinet has adequate ventilation. Leave cabinet doors slightly open or install a small fan to improve air circulation. Additionally, store only dry items in the organizer and squeeze sponges thoroughly before placing them in the caddy.
Can I put my sink organizer in the dishwasher to sanitize it?
Check your organizer's material first. Stainless steel caddies can typically handle dishwasher heat, but silicone organizers may warp at high temperatures. For silicone products like the Sinkelle FlowRack Pro, hand wash with hot water and disinfectant instead. For both materials, ensure all drainage holes are clear and the caddy dries completely before use. Deep cleaning monthly with a stronger disinfectant solution helps prevent mold buildup in hard-to-reach areas.
This article was written using GrandRanker