


Table of Contents
- Why Sink Storage Accessories Make or Break a Small Kitchen
- How to Measure Your Sink and Cabinet Before You Buy
- Under-Sink Organization Ideas That Work Around Plumbing
- How to Organize Under the Kitchen Sink Step by Step
- Material Durability: Stainless Steel vs. Plastic vs. Silicone
- Drainage, Hygiene, and Moisture Resistance
- Installation Methods and Rental-Friendly Options
- Frequently Asked Questions
Last Updated: October 1, 2026
Why Sink Storage Accessories Make or Break a Small Kitchen
Choosing kitchen sink storage accessories comes down to one measurement problem: the sink area is the hardest-working, smallest footprint in the kitchen, and most organizers are built for open layouts that don't exist in apartments. Measure first, then buy.
How to Measure Your Sink and Cabinet Before You Buy
Measure the sink surround and the under-sink cabinet interior before buying anything. Skipping this step is the top reason organizers get returned.
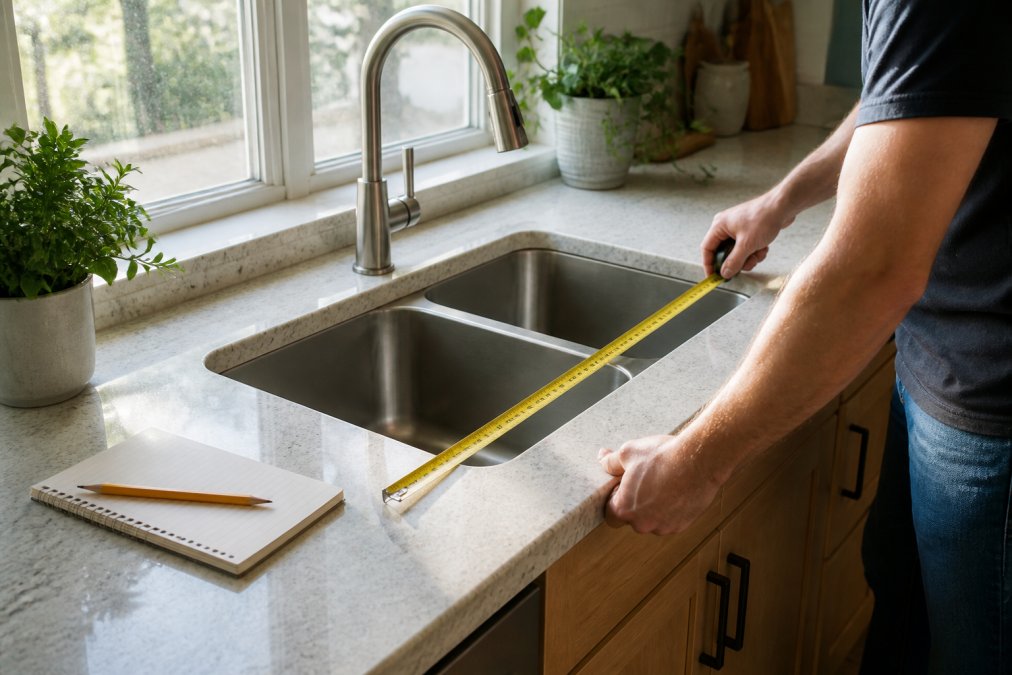
Measuring Countertop and Sink Surroundings
Start with three numbers: counter width on each side of the sink, depth from backsplash to counter edge, and height from counter to the bottom of your upper cabinets. That third number decides whether a tall caddy or a low-profile rack fits.
Checking Under-Sink Cabinet Dimensions
Open the cabinet and measure interior width at the widest point, depth from door to back wall, and height from cabinet floor to the sink basin's underside. Note where plumbing interrupts each dimension.
| Measurement | Where to Take It | Why It Matters |
|---|---|---|
| Counter width each side | Sink edge to wall or stove | Determines caddy footprint |
| Counter depth | Backsplash to front edge | Prevents overhang over basin |
| Cabinet height | Floor to sink underside | Caps stackable bin height |
| Pipe clearance | Around disposal and P-trap | Defines usable shelf width |
Under-Sink Organization Ideas That Work Around Plumbing
Work around plumbing by treating the cabinet as zones rather than one open box. The area directly under the disposal is usually wasted; the areas flanking it are not. Map the obstacles before the storage.
Map the Obstacles First
Every under-sink cabinet has the same cast of characters, each blocking a different dimension:
- Garbage disposal: hangs from the sink underside, usually 12 to 15 inches deep and 6 to 8 inches wide. It kills vertical stacking directly beneath it.
- P-trap: the curved pipe that drops below the drain. It eats depth in the center-back of the cabinet and is the reason a full-width shelf rarely fits.
- Supply lines and shut-off valves: thin but sharp-edged, usually against the back wall. They limit how far back a bin can slide.
- Dishwasher drain hose (if present): loops high near the back, so anything tall in that corner may pinch it.
Zone Layouts That Actually Fit
A three-zone layout works in most cabinets:
- Flanking zones (left and right of the disposal): tall bottles, spray cleaners, and upright items. These are the only spots with full cabinet height.
- Front zone (in front of the P-trap): a low pull-out drawer or shallow bin. This is where dish soap refills, sponges, and scrubbers live because the drawer slides under the trap.
- Deep corner: a lazy susan or a two-tier riser. Your hand can't reach the back, so rotation is the only way to use it.
Expandable organizers earn their keep here because they flex around pipe angles instead of fighting them. Look for adjustable width and a P-trap cutout.
- Tall bottles and cleaning supplies: flanking zone, away from pipes
- Sponges and scrubbers: sink caddy above, not in the cabinet
- Dish soap refills: front zone, low pull-out drawer
- Rarely used items: deep corner on a lazy susan
- Trash bags and liners: flat, against the cabinet door on a door-mounted rack
Ergonomics: Reachability Matters More Than Capacity
Most guides ignore this, but the people who struggle most with under-sink storage have limited mobility, back problems, or shorter reach. If bending and crouching is painful, capacity is the wrong goal.
A few adjustments that help:
- Put daily-use items in the front zone at counter-adjacent height, not on the cabinet floor.
- Use a pull-out drawer or a rolling caddy so you never have to reach past the P-trap.
- Keep the heaviest items (bulk refills) on a low shelf you can slide out, not lift.
- Avoid stacking bins more than two high if the user has limited grip strength.
Smart-Home and Plumbing Integration
If you have a reverse-osmosis system, an instant hot water tank, or a disposal with a power cord, plan around them before buying bins:
- Instant hot water tank: usually a small cylinder in the back corner. Leave 2 to 3 inches of air gap around it; don't box it in.
- Reverse-osmosis tank: a larger pressure tank that often occupies an entire side. Measure it as a fixed obstacle, not a movable one.
- Disposal power cord: runs from the disposal to an outlet, often along the back wall. A bin that pinches it is a fire risk.
- Water filtration lines: thin tubing that kinks easily. Route bins so they don't press against it.
Budget-Friendly DIY Alternatives
You don't need a specialty organizer to fix an awkward cabinet. A few repurposing ideas that hold up:
- A plastic dishpan with a hole cut in one side slides around a P-trap and corrals bottles.
- A wire cooling rack set on two bricks creates a raised shelf above the cabinet floor.
- A lazy susan from a thrift store costs a fraction of a cabinet-specific turntable.
- A tension rod across the cabinet width holds spray bottles by their triggers.
How to Organize Under the Kitchen Sink Step by Step
Organize under the kitchen sink in five steps: empty everything, clean and dry the cabinet floor, map the pipe zones, place the largest items first, then fill gaps with stackable bins.
- Pull everything out and wipe the cabinet floor dry.
- Group items by use: daily, weekly, rarely.
- Mark the zones the plumbing blocks with painter's tape.
- Place the tallest bottles in the flanking zones.
- Add stackable bins and a lazy susan last, sized to the gaps.
Working Around the Garbage Disposal and Pipes
The garbage disposal and P-trap create a fixed obstacle you plan around, not through. Measure clearance on each side of the disposal before buying any bin.
Material Durability: Stainless Steel vs. Plastic vs. Silicone
Stainless steel lasts longest in wet sink areas, silicone handles splashes and drain mats best, and plastic works for dry storage but warps near heat and standing water. Match the material to how much water and heat the piece sees.
Sinkelle FlexiDrain Sink Caddy →
Stainless Steel: The Wet-Zone Standard
Stainless steel is the default for sink caddies, dish racks, and over-sink racks because it resists rust, wipes clean, and doesn't absorb odors. But not all stainless is equal:
- Grade matters. 304 stainless is the common food-grade choice; 201 is cheaper and more prone to spotting in wet, salty environments.
- Coating matters. Powder-coated steel looks good but chips at edges, and chips are where rust starts.
- Welds matter. Cheap racks fail at the weld joints, not the bars. Look for smooth, continuous welds.
- Weight matters. Heavier-gauge wire holds shape; thin wire bends under a full dish rack.
Silicone: Best for Splash and Heat
Silicone is waterproof, flexible, and heat-resistant, making it right for splash mats, faucet guards, drain covers, and sink liners. It doesn't crack like plastic or rust.
Trade-offs:
- It attracts lint and dust. Rinse and dry before storing.
- It can discolor with repeated contact from tomato sauce, turmeric, or hard water.
- Food-grade vs. industrial-grade matters if the silicone touches dishes or produce. Look for "food-grade" on the label.
- Thin silicone mats curl at the edges over time. Thicker mats hold their shape.
Plastic: Fine for Dry, Risky Near Heat
Plastic is the lightest, cheapest option, fine for dry under-sink bins, drawer dividers, and caddies that never sit in standing water. It's the wrong choice near the disposal, hot pipes, or a dishwasher discharge line.
Trade-offs:
- Warping: most consumer plastics soften well below the temperature of a hot water pipe or a running disposal.
- Cracking: cold plastic gets brittle; a bin that gets bumped in winter can split.
- Staining and odor: porous plastics absorb grease and smells over time.
- Recycling: check the resin code. Many sink-area plastics are not curbside-recyclable.
Sustainable and Recycled Options
If plastic-free matters to you, the sink area is hard to make fully plastic-free because water and heat rule out paper and untreated wood. Realistic options:
- Recycled stainless: some caddies and racks use post-consumer steel. Same performance, lower footprint.
- Bamboo: works for dry countertop caddies if it's sealed and kept off standing water. It will mold if it stays wet.
- Recycled ocean-bound plastic: increasingly common in sink accessories; still plastic, but diverted waste.
- Silicone over plastic: silicone lasts longer, so the per-year footprint is often lower even if the upfront cost is higher.
Matching Material to Accessory
A quick rule of thumb:
| Accessory | Best material | Why |
|---|---|---|
| Sink caddy | Stainless steel | Constant splash, needs to drain |
| Splash mat | Silicone | Waterproof, flexible, heat-tolerant |
| Faucet guard | Silicone | Conforms to the base, resists drips |
| Under-sink bin | Plastic or coated steel | Dry zone, no heat exposure |
| Over-sink rack | Stainless steel | Holds weight, drains, resists rust |
| Utensil holder | Stainless or silicone | Wet utensils, needs drainage |
For a sink caddy in the splash zone, stainless steel is the honest answer. The Sinkelle FlexiDrain Sink Caddy uses an open PET structure that lets water and air move around sponges and soap, so nothing sits in standing water between uses.


Drainage, Hygiene, and Moisture Resistance
Drainage is the single feature that separates an organizer you keep from one you throw out. Water that can't escape pools under sponges, and pooled water is where mildew starts.
If a sink accessory has no drainage path, it will hold water. Prioritize open structures and removable trays over sealed containers for anything that touches the sink.
Installation Methods and Rental-Friendly Options
Rental-friendly installation means no drilling, no adhesive that marks walls, and no plumbing changes. Freestanding and over-sink designs meet all three, which is why they dominate apartment kitchens.
- Freestanding: sits on the counter, zero commitment, easiest to reposition
- Over-sink: rests on the sink edge or divider, uses space you weren't using anyway
- Suction cup mounting: works for lightweight guards, check the surface is smooth and clean
- Adhesive strips: avoid in rentals, residue and paint damage are common
- Drilled brackets: permanent, skip unless you own the property
Frequently Asked Questions
What are the best materials for kitchen sink storage accessories?
Stainless steel and waterproof silicone are the most durable options for sink storage. Stainless steel resists rust and handles daily water contact, while silicone stays flexible and won't warp. The Sinkelle FlowRack Pro uses sturdy coated steel, and the DryFlow Splash Mat is made from waterproof silicone, both built for wet environments.
How do I maximize space under my kitchen sink?
Start by measuring your cabinet dimensions and noting where the garbage disposal and pipes sit. Use stackable bins and expandable organizers that fit around plumbing rather than fighting it. Pull-out drawers and lazy susans make the back of the cabinet reachable. Keep cleaning supplies in a caddy you can lift out, and reserve the front area for items you use daily. Moisture-resistant materials prevent warping in this damp zone.
Are tool-free sink organizers durable?
Tool-free organizers can be just as durable as mounted ones when they use quality materials and stable designs. The Sinkelle FlowRack Pro, for example, rests over the sink divider using the weight of the frame to stay put, with no drilling required. Look for rust-resistant stainless steel or waterproof silicone, and check that contact points are designed to grip without sliding. Freestanding designs also mean no damage to counters or cabinets.
How do I keep my kitchen sink area looking minimalist?
Limit what sits on the counter to items you use daily: sponge, soap, and maybe a dish brush. Everything else goes under the sink or in a cabinet. Choose accessories with clean lines and neutral colors that blend with your countertop. The Sinkelle FlexiDrain Sink Caddy keeps sponges and scrubbers contained in one compact spot, and the DryFlow Splash Mat adds a sleek black silicone layer that protects the counter without visual clutter.
How can I prevent water damage under the kitchen sink?
Line the cabinet floor with a waterproof mat or tray to catch drips from pipes or stored items. Use drainage-friendly organizers that let water evaporate instead of pooling. Check pipes periodically for slow leaks, and avoid storing paper products directly on the cabinet floor. The Sinkelle DryStand Utensil Holder has a removable drain tray that catches excess water, and the DryFlow Splash Mat channels water back into the sink to keep countertops dry.