


Table of Contents
- Why Water Stains Form Around Your Kitchen Sink
- How to Stop Water Splashing Around a Kitchen Sink
- Daily Prevention Steps to Prevent Water Stains
- How to Clean Water Stains From a Kitchen Sink
- How to Remove Hard Water Stains From a Sink
- Kitchen Sink Organization Ideas for Small Counters
- Weekly and Monthly Maintenance Routine
- When Water Stains Signal a Deeper Problem
- Frequently Asked Questions
Last Updated: October 19, 2026
Why Water Stains Form Around Your Kitchen Sink
Water stains around your kitchen sink mean moisture is pooling where it shouldn't. Understanding why they form is the first step to preventing them.
Hard Water and Mineral Deposits
Hard water contains dissolved minerals like calcium and magnesium (Hardness of Water). When water evaporates on your sink or countertop, these minerals stay behind as white, chalky deposits or orange-tinged stains.
The residue is harmless but makes your sink area look dingy, and in hard-water areas it can build up within days.
Splashing and Pooling Water
Washing dishes or rinsing vegetables sends water splashing outward onto the surrounding surface, where it pools in low spots or near the sink rim.
Pooling water is the real culprit: it gives minerals time to accumulate, and the longer it sits, the more visible the stain.
How to Stop Water Splashing Around a Kitchen Sink
Stopping splashes before they happen is far easier than cleaning stains later. A few simple changes to your sink setup can dramatically reduce escaping water.
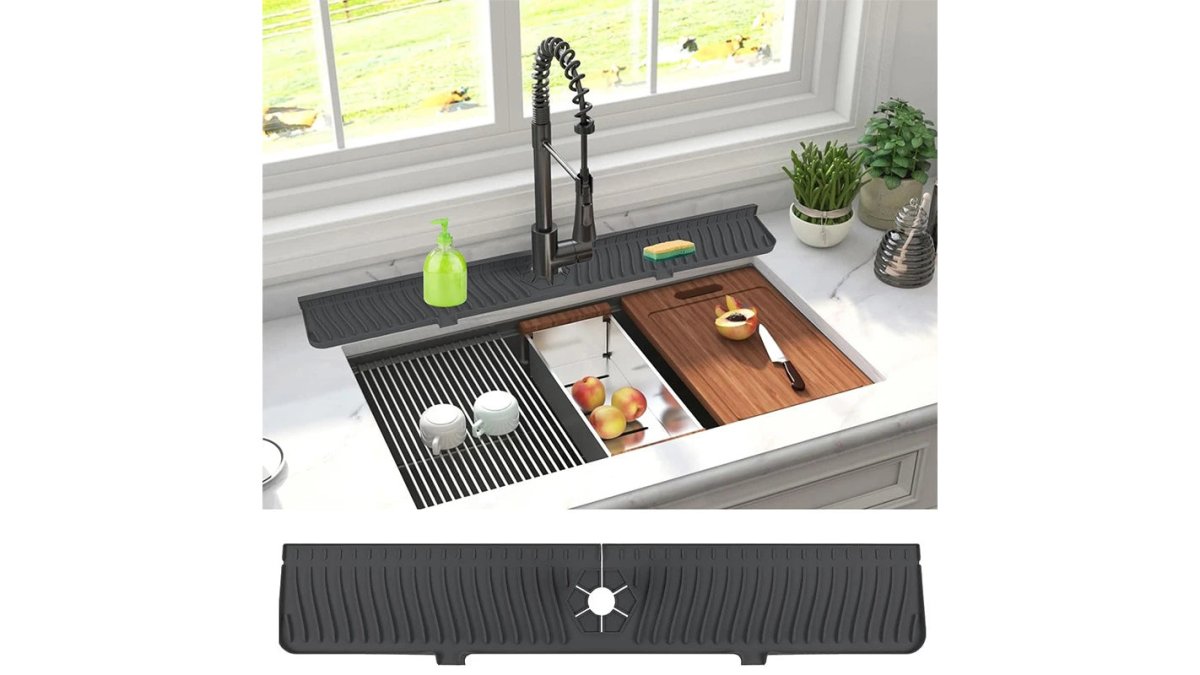
Install a Splash Guard or Faucet Mat
A splash guard catches water droplets and channels them back into the sink. The Sinkelle DryFlow Splash Mat uses an advanced sloped surface design that directs water straight back where it belongs.

The mat sits flat on your counter next to the sink. No tools, no installation hassle. Just place it and start using it immediately.
Another solid option is the Sinkelle AquaShield Faucet Guard, which fits neatly around your faucet base.
Adjust Your Faucet and Washing Habits
How you use your faucet matters. A few small changes can cut splashing in half:
- Adjust the water pressure to medium instead of full blast
- Angle dishes at 45 degrees when rinsing, this reduces splash angles
- Fill the sink partially before washing larger items
Daily Prevention Steps to Prevent Water Stains
The easiest way to prevent water stains is to stop water from sitting on your counter. Daily habits are your best defense against mineral buildup.
Dry Your Sink After Each Use
This is the single most effective prevention step. Water can't form stains if it's not there.
After washing dishes or rinsing produce, wipe down your sink with a soft cloth, especially the counter-to-sink boundary where water pools. Dry the faucet base and handles too, they collect the most droplets.
Drying takes 30 seconds and prevents hours of scrubbing later.
Wipe Down Faucets and Surrounding Surfaces
Your faucet is a stain magnet. Water drips from the spout, collects on the handle, and pools around the base.
Extend your wipe to the countertop around the faucet, especially low spots where water collects, to prevent mineral deposits.
Keep a soft cloth or paper towel right next to your sink, the closer it is, the more likely you'll use it.
How to Clean Water Stains From a Kitchen Sink
If stains have already formed, household cleaners can remove them. The key is matching your cleaning method to your sink material.

Vinegar-Water Solution for Mineral Residue
Vinegar's acid dissolves mineral deposits. Mix equal parts white vinegar and water in a spray bottle.
Spray the stained area generously and let it sit 30 minutes so the acid can break down the buildup. Wipe with a soft cloth in gentle circular motions, rinse thoroughly, and dry immediately.
For stubborn stains, spray again and let it soak for another 30 minutes. Repeat as needed.
Baking Soda for Gentle Scrubbing
Baking soda is mild enough for most sink surfaces but abrasive enough to lift stains.
Apply the paste to the stain and gently scrub in circular motions with a soft cloth or soft-bristled brush.
Never use a scouring stick or pumice stone on delicate finishes, these can scratch porcelain or stainless steel.
How to Remove Hard Water Stains From a Sink
Hard water stains are tougher than regular water marks. They need a more aggressive approach, but you can still remove them safely by matching the method to the surface.
Removing Stubborn Mineral Buildup
For heavy mineral deposits, start with the least aggressive method and escalate only if needed:
- Soak, don't scrub first. Lay a vinegar-soaked cloth over the stain for 15-30 minutes. This softens the mineral crust so it lifts instead of being ground into the finish.
- Add baking soda only after the soak. Sprinkle baking soda over the vinegar-dampened area. The fizzing reaction helps break up the deposit mechanically, but it does not replace the soak time.
- Use a soft cloth or soft-bristled brush. Scrub in small circles with light pressure. If the stain does not budge, repeat the soak rather than pressing harder.
- Rinse and dry completely. Residual acid left on the surface can etch some finishes over time, so rinse with clean water and dry with a soft cloth.
If a white ring persists after two rounds, the deposit may have etched the surface rather than sitting on top of it. In that case, stop cleaning and consult the sink or countertop manufacturer's care guide before trying anything stronger.
Material-Safe Cleaning for Different Sink Surfaces
Different sink and countertop materials tolerate different cleaners and tools. The wrong combination can dull, scratch, or etch a surface permanently.
- Stainless steel: Vinegar solution and baking soda paste are both safe. Scrub with the grain, not across it, and dry immediately to avoid new water spots. Avoid chlorine bleach and abrasive pads, which can pit or scratch the finish.
- Porcelain and enamel: Baking soda paste is the safest choice. Avoid acidic cleaners on older or worn porcelain, because acid can dull the glaze. Skip pumice stones and metal scouring pads entirely.
- Composite and solid-surface sinks: Most accept vinegar and baking soda, but some finishes are acid-sensitive. Check the manufacturer's documentation first and test on a hidden spot.
Safe Cleaner Combinations and Cautions
- Never mix vinegar and chlorine bleach (the CDC). The combination releases chlorine gas, which is a serious respiratory hazard.
- Do not mix baking soda and bleach into a paste. It can produce a caustic solution and damage surfaces.
- Avoid pumice stones and scouring sticks on porcelain, stainless steel, and composite sinks. They remove the finish along with the stain.
Kitchen Sink Organization Ideas for Small Counters
In small kitchens, counter space is precious. Water stains around your sink area become more visible when space is tight. Smart organization reduces clutter and makes prevention easier.
Maximize Space While Preventing Water Damage
Keep items off the counter near your sink. The fewer objects around the basin, the easier it is to dry your sink and prevent water stains.
Use vertical storage instead: wall-mounted racks and shelves keep essentials accessible without eating counter space. Store dish soap, sponges, and cloths in organized containers.
The Sinkelle FlowRack Pro Caddy holds your sponges, brushes, and dishcloths in one compact unit.
| Prevention Method | Time Required | Frequency | Best For |
|---|---|---|---|
| Drying sink surface | 30 seconds | After each use | Immediate stain prevention |
| Wiping faucet and counter | 1 minute | After each use | Mineral buildup prevention |
| Vinegar-water spray | 30 minutes | Weekly or as needed | Removing light mineral deposits |
| Baking soda paste | 15-30 minutes | Weekly or as needed | Gentle stain removal |
| Splash guard installation | 2 minutes | One-time | Reducing water splashing |
Weekly and Monthly Maintenance Routine
Consistent maintenance prevents stains from building up. A simple weekly and monthly routine keeps your sink area pristine.
Weekly routine (15 minutes):
- Wipe down your sink and faucet daily as mentioned above
- Once per week, spray the entire sink area with vinegar solution
- Let it sit for 10 minutes, then wipe and rinse
Monthly routine (30 minutes):
- Deep clean with baking soda paste on any stubborn spots
- Inspect your splash guard or faucet mat for mineral buildup
- Clean those items if needed
This routine takes minimal time but prevents major stain problems, far easier than intensive scrubbing later.
When Water Stains Signal a Deeper Problem
Most water stains are cosmetic. But some patterns point to a plumbing, drainage, or water-quality issue that wiping and drying will never fix. Knowing the difference saves you from scrubbing the same spot every week.
Reading the Stain: Ordinary Minerals vs. a Real Problem
| What you see | Likely cause | What to do |
|---|---|---|
| White, chalky rings that wipe away with vinegar | Calcium and magnesium from hard water | Continue daily drying and weekly vinegar maintenance |
| Orange or rust-colored film near the faucet or drain | Iron in the water supply or a corroding fitting | Test the water; inspect older galvanized or iron plumbing |
| Green or blue-green tint on fixtures | Copper corrosion, often from acidic water | Have the water tested and check copper piping |
| Stains that return within a day of cleaning | An active drip, leak, or constant condensation | Check the faucet, supply lines, and under-sink connections |
| Stains spreading far from the sink | Water pooling from a countertop slope, failed caulk, or an under-counter leak | Inspect the caulk line and the cabinet below the sink |
| Dark or musty staining at the sink rim | Trapped moisture feeding mold or mildew in the caulk | Remove and replace the caulk; dry the seam thoroughly |
Distinguishing Mineral Spots From Water-Quality Issues
A simple test helps separate a cleaning problem from a water problem:
- Clean one spot thoroughly and dry it. If the stain stays gone for several days, it was surface mineral residue.
- Watch how fast it returns. Stains that reappear within hours or a day suggest an active water source, not just hard water.
- Check the color. White and chalky points to hardness; orange, red, or brown points to iron; green or blue points to copper.
- Look beyond the sink. Stains on dishes, showerheads, or glassware suggest a whole-home water-quality issue rather than a localized splash problem.
If you suspect iron, copper, or acidic water, a water test is the next step. Many municipal water utilities publish annual water quality reports, and EPA water quality information explains how to interpret test results and choose treatment options.
When to Call a Plumber
Contact a licensed plumber if you notice any of the following:
- Water pooling under the sink or in the cabinet
- A drip from the faucet base, supply line, or drain that continues after tightening
- Caulk that stays wet, pulls away from the counter, or shows dark staining
For water quality concerns, test your water or contact your local utility. Fixing the source is the only permanent way to stop recurring stains.
Frequently Asked Questions
Why do water stains form around my kitchen sink?
Water stains form from hard water mineral deposits, calcium and magnesium, that remain on surfaces after water evaporates. Splashing, pooling water, and infrequent drying all accelerate stain buildup. The area around your faucet and sink edge is most vulnerable because water sits there longer and minerals concentrate as it dries.
How often should I clean the area around a kitchen sink to prevent water stains?
Wipe your sink and faucet dry after each use to stop stains before they form. Run a weekly deep clean with vinegar or baking soda on mineral deposits. For hard water areas, a quick wipe-down twice daily, morning and evening, prevents visible buildup. Monthly maintenance keeps the sink edge and counter boundary spotless.
Can I prevent water stains without using harsh chemicals?
Yes. Vinegar-water solutions and baking soda are effective for both prevention and removal. The Sinkelle DryFlow Splash Mat ($19.99) channels water directly back into the sink, reducing splashing and pooling, the root causes of stains. Drying surfaces immediately after use is the simplest, chemical-free prevention method.
What's the best way to organize a small sink area while keeping it dry and stain-free?
Use vertical storage and products designed to drain water away from countertops. The Sinkelle FlowRack Pro Caddy ($39.99) holds sponges and brushes while draining water back into the sink, no standing puddles. Pair it with a splash mat to protect the counter-to-sink boundary. Keep only daily-use items within arm's reach; store extras elsewhere to reduce clutter and water exposure.
Water stains around your kitchen sink don't have to be permanent. The right prevention habits, paired with smart tools like the Sinkelle splash mats and faucet guards, keep your sink area dry and stain-free. Start with daily drying and wiping, these habits cost nothing and deliver immediate results. Add a splash guard to catch water before it spreads. Shop the Sinkelle collection and transform your sink area into a clean, organized space that stays beautiful every single day.