


Table of Contents
- Assess Your Under-Sink Layout and Plumbing Configuration
- Minimalist Kitchen Sink Organization Ideas That Work Around Pipes
- Best Under Sink Organizers for Plumbing: Storage Solutions That Fit
- Under Sink Storage Ideas for Pipes: Maximizing Awkward Spaces
- Step-by-Step Installation Without Tools or Damage
- Establish Daily Maintenance Habits to Keep Your Sink Area Organized
- Common Mistakes to Avoid When Organizing Around Plumbing
- Conclusion
Last Updated: August 30, 2026
Assess Your Under-Sink Layout and Plumbing Configuration
Understanding your space before buying organizers prevents costly mistakes. Take ten minutes to map your under-sink area: locate your P-trap, supply lines, shutoff valves, and any garbage disposal. Measure the height from cabinet floor to sink basin, plus width and depth of usable space (the CDC). This information determines which storage solutions will actually work.
The plumbing configuration matters more than cabinet size. A seemingly spacious cabinet often has a drain assembly consuming the center, leaving only narrow strips on either side. Some setups have garbage disposals that generate heat and consume significant space. Understanding these constraints prevents wasted money on organizers that won't fit.
Document the layout with a quick sketch or phone photo, noting pipe diameters, valve locations, and sharp edges that might snag organizers. If you rent, check whether your landlord requires permission before installing anything.
Minimalist Kitchen Sink Organization Ideas That Work Around Pipes
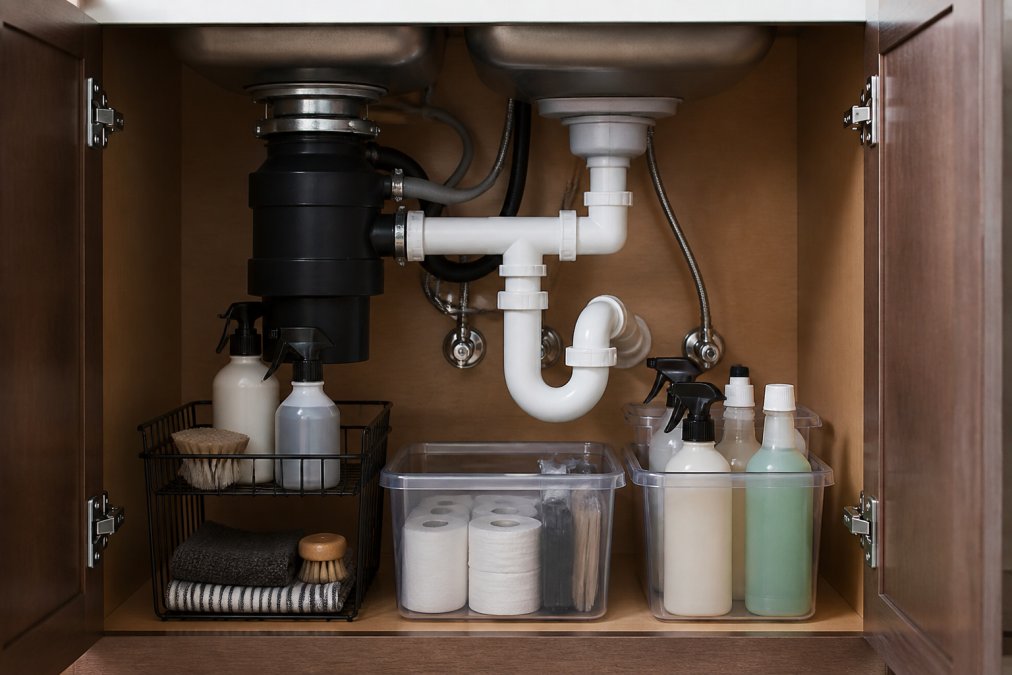
Minimalist organization succeeds because it works WITH your plumbing, not against it. Start with designated storage zones: cleaning supplies and dish soap under the sink, vertical storage on cabinet doors, and a clear countertop work zone.
Keep only essentials in your under-sink cabinet: dish soap, hand soap, sponge holder, and cleaning cloth. Everything else either goes elsewhere or gets decluttered. This prevents the space from becoming a catch-all for random supplies.
Vertical space is your ally. Command hooks on cabinet doors hold spray bottles and cloths without drilling. Small drying racks hang from cabinet doors, keeping wet items contained. Shelving units slide between pipes to maximize awkward gaps.
Water management prevents damage to organizers and stored items (the CDC). A splash mat under your faucet channels water back into the sink rather than pooling on your countertop. The Sinkelle DryFlow Splash Mat uses a sloped surface specifically designed for this purpose, protecting your storage investments while maintaining a clean aesthetic.
The goal is a system you'll actually maintain. Minimalist design works because it's easy to keep clean and simple to restore when things get messy.
Best Under Sink Organizers for Plumbing: Storage Solutions That Fit
When selecting organizers, prioritize adjustability and waterproof materials. Rigid plastic organizers that don't accommodate your specific pipe layout will either sit unused or require repeated removal.
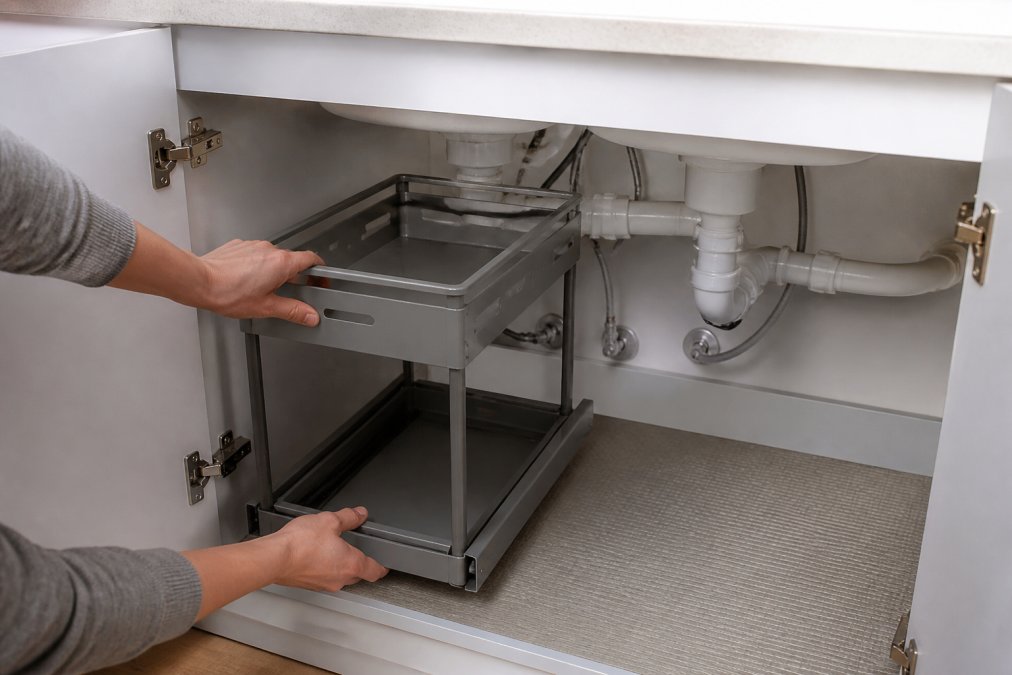
The Sinkelle 2 SlideNest Organizer addresses this directly. Its two-tier metal frame slides into available space without permanent installation. The tiers position at different heights to work around P-traps and supply lines. Metal construction resists moisture and won't warp if water accumulates. At $55.99, it handles the specific demands of plumbed cabinets.

Cabinet door organizers provide storage without touching your plumbing. The Sinkelle CabinetFlow Hanging Organizer mounts on cabinet doors, creating hanging storage for spray bottles, cloths, and tools. At $44.99, this keeps your under-sink area completely clear while providing accessible storage for daily-use items.
For multiple cleaning products, the Sinkelle Sink Organization Bundle ($43.99) combines three essentials into one coordinated system, ensuring organizers work together rather than assembled from mismatched pieces.
Material quality matters in moisture-rich environments (the EPA). Stainless steel and powder-coated metal resist rust and corrosion better than plastic. Waterproof construction prevents mold and mildew growth. Let your actual usage patterns determine placement: frequently-used items should be easily accessible without moving other items.
Under Sink Storage Ideas for Pipes: Maximizing Awkward Spaces
The space around your plumbing is usually wasted because it's awkward. Measure the specific dimensions of these gaps, that 8-inch space between your P-trap and cabinet wall might fit a slim vertical organizer perfectly.
Sliding organizers work better than fixed shelves in spaces with plumbing obstacles. They can be repositioned if you need to access valves or make repairs. Stackable containers maximize vertical space efficiently: use two or three smaller containers stacked vertically rather than one large container that's hard to access.
Test any organizer by simulating maintenance tasks you might need to perform. If a solution requires removing items every time you need to shut off water or access your P-trap, it's not functional.
Decluttering non-essentials makes every organizer work better. Remove expired supplies, backup bottles, and specialty products you haven't used in months. This ruthless approach means your organizers focus on items that actually matter.
Step-by-Step Installation Without Tools or Damage
Tool-free installation means you can organize your sink area in under an hour without landlord concerns.
Step 1: Clear Your Cabinet [Time: 5 minutes]
Remove everything from your under-sink cabinet. Wipe down the interior with a dry cloth to remove dust and debris.
Step 2: Position Your Splash Mat [Time: 2 minutes]
Place the Sinkelle DryFlow Splash Mat on your countertop directly under your faucet, with the sloped surface facing the sink. This prevents water from pooling on your countertop and dripping into organizers.
Step 3: Install Door-Mounted Organizers [Time: 8 minutes]
Position the Sinkelle CabinetFlow Hanging Organizer on your cabinet door. Command hooks or adhesive strips (included with quality organizers) attach without drilling. Press firmly for 30 seconds and let cure for 24 hours before loading.

Step 4: Position Your Tiered Organizer [Time: 5 minutes]
Slide your tiered organizer into available floor space, avoiding your P-trap, supply lines, and shutoff valves. Adjust tier heights to accommodate your most-used items at comfortable reach height.
Step 5: Arrange Your Supplies [Time: 10 minutes]
Place daily-use items in the most accessible locations. Dish soap and hand soap go in easy-reach spots. Backup supplies or less-frequently-used items go in less convenient locations.
Step 6: Test Access and Adjust [Time: 5 minutes]
Open and close cabinet doors. Simulate accessing your shutoff valve or P-trap. Make sure nothing blocks these critical maintenance points.
Establish Daily Maintenance Habits to Keep Your Sink Area Organized
Organization fails without maintenance. Start with a daily wipe-down habit: after washing dishes, wipe your countertop and splash mat dry. This takes 30 seconds and prevents water from accumulating on organizers.
Weekly cabinet checks take five minutes. Verify everything is in its designated zone and note supplies running low. Monthly deep maintenance involves removing organizers and wiping down your cabinet interior to prevent moisture buildup.
Match your maintenance habits to your actual lifestyle. If you're busy, keep your system simple with a single daily task. If you enjoy organizing, weekly deep maintenance is realistic. Choose habits you'll actually maintain rather than aspirational routines that fail after a month.
Common Mistakes to Avoid When Organizing Around Plumbing
Buying organizers before measuring your space leads to solutions that don't fit or block access to plumbing. Measure first, shop second.
Overcrowding your under-sink cabinet makes it difficult to maintain and locate items. Use the space you need, leave the rest empty.
Ignoring water management leads to damaged organizers. Water accumulates naturally in cabinets. Waterproof organizers and splash mat placement prevent this damage.
Using organizers requiring permanent installation when you rent creates conflicts with landlords. Tool-free solutions like command hooks and sliding organizers respect rental agreements.
Storing products you don't actually use wastes valuable space. Declutter ruthlessly before organizing.
Placing most-used items in hard-to-reach spots creates frustration. Let your workflow determine placement, not aesthetics.
Neglecting maintenance lets organization systems fail quickly. Commit to simple daily habits before investing in organizers.
Organizing your kitchen sink area around plumbing doesn't require complex systems or permanent modifications. It requires understanding your specific layout, choosing organizers designed for moisture-rich environments, and establishing maintenance habits that keep everything functional.
The Sinkelle product line addresses the specific challenges of organizing kitchen sink with plumbing. The 2 SlideNest Organizer accommodates irregular pipe placements with adjustable tiers. The CabinetFlow Hanging Organizer maximizes vertical space without touching your plumbing. The DryFlow Splash Mat prevents water damage to organizers and countertop. The Sink Organization Bundle combines these solutions into one coordinated system.

Start with your space assessment. Measure your cabinet, note your plumbing layout, and identify your actual daily needs. Choose organizers that respect these constraints. Install them without tools or permanent modifications. Establish simple daily habits that maintain your system. This approach transforms your sink area from cluttered and chaotic into organized and functional, without requiring renovation or professional installation.
Frequently Asked Questions
Q: How do you maximize space under the kitchen sink with pipes in the way?
A: Start by measuring the exact dimensions of your P-trap and supply lines, then choose organizers with open frames or tiered designs that allow pipes to run through them. Vertical organizers like the Sinkelle 2 SlideNest use the full height of your cabinet while leaving pipe clearance. Place wider items on the lowest tier and smaller bottles above, working around the plumbing angles.
Q: What are the best storage solutions for under-sink plumbing?
A: The best solutions combine durability with flexibility. Metal-frame organizers handle moisture better than plastic and won't warp around wet pipes. Tiered shelving systems like the Sinkelle 2 SlideNest ($55.99) work well because they create compartments without blocking plumbing access. Hanging organizers such as the Sinkelle CabinetFlow ($44.99) mount on cabinet doors, keeping cleaning supplies accessible while leaving under-sink space for pipes. Waterproof materials prevent mold and deterioration in high-moisture environments.
Q: Can I use tool-free organizers in a rental apartment without damaging the plumbing or walls?
A: Yes, tool-free organizers are designed specifically for renters and properties where you cannot drill or modify plumbing. Command hooks and adhesive-based systems mount directly to cabinet interiors without tools or permanent damage. Sliding organizers sit freely on cabinet floors and require no installation at all. The Sinkelle Sink Organization Bundle ($43.99) includes waterproof components that install instantly. Always verify that your landlord approves any adhesive products, and test adhesion on a small area first to ensure it releases cleanly when you move.
Q: How do I maintain an organized sink area so it doesn't become cluttered again?
A: Establish a daily habit of wiping down the sink area and returning items to their designated spaces immediately after use. Set a weekly decluttering time (15 minutes) to remove items that don't belong and check for spills or moisture. Label compartments clearly so everyone in your household knows where cleaning supplies, dish soap, and sponges belong. This habit formation prevents the creep of clutter and keeps your minimalist aesthetic functional.
This article was written using GrandRanker