


Table of Contents
- Why Wet Sponges and Brushes Become Bacteria Magnets
- What You'll Need Before You Start
- Step 1: Wring, Rinse, and Shake Off Excess Water
- Step 2: Choose a Drainage-Friendly Spot With Air Circulation
- Step 3: Set Up Vertical, Upright Storage With Drainage
- How to Sanitize Kitchen Sponges Without Ruining Them
- How Often to Replace Dish Brushes and Sponges
- Picking the Best Kitchen Sponge Holder for Your Sink
- Frequently Asked Questions
Last Updated: September 30, 2026
Why Wet Sponges and Brushes Become Bacteria Magnets
A wet sponge is one of the most bacteria-dense items in your kitchen. According to USDA Food Safety and Inspection Service guidance on kitchen sponge safety, the warm, damp conditions around a sink are ideal for microbial growth. This guide from SinkElle explains how to store wet sponges and brushes hygienically, so your cleaning tools stop spreading germs.
How Moisture and Warmth Feed Microbial Growth
Bacteria growth needs three things: water, warmth, and food. A damp sponge next to a sink has all three. Food bits trapped in the porous material become a food source. Room temperature keeps it warm. Trapped water keeps it wet.
The Cross-Contamination Risk in a Damp Sink Area
Cross-contamination happens when germs move from one surface to another. A wet sponge sitting on the counter picks up pathogens and spreads them to every plate, pan, and countertop it touches.
What You'll Need Before You Start
You don't need much to fix this. Gather these items first:
- A drying rack or sink caddy that drains
- A bristle brush for scrubbing
- Microfiber cloths for wiping
- White vinegar or a dish soap solution
- A timer for tracking replacement days
Step 1: Wring, Rinse, and Shake Off Excess Water
Start by squeezing every drop you can out of the sponge. Rinse it under warm water to push out food bits. Then shake it hard over the sink.

Step 2: Choose a Drainage-Friendly Spot With Air Circulation
Pick a spot where water can escape and air can move. Air circulation is the single biggest factor in drying your tools fast.
Why Under-Sink Cabinets and Closed Cabinets Trap Moisture
Closed cabinets are the worst place for wet tools. No airflow means humidity levels stay high. That trapped damp air feeds mildew and keeps bacteria growth going.
Material-Specific Storage: Cellulose, Synthetic Foam, and Bristle Brushes
Different tools need slightly different handling:
- Cellulose sponge: Squeeze hard, store upright so water drains out.
- Synthetic foam: Dries faster than cellulose but warps if left flat in water.
- Bristle brushes: Stand them bristles-down so water runs off the tips.
- Microfiber cloths: Hang them spread out, never bunched up.
Step 3: Set Up Vertical, Upright Storage With Drainage
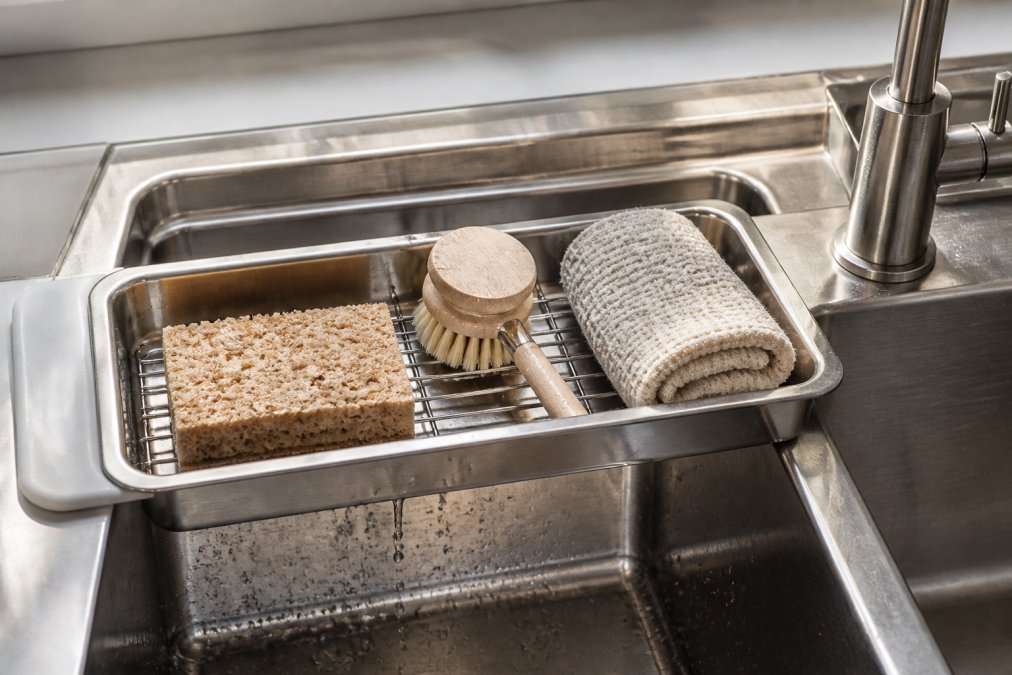
Upright storage lets gravity do the work. Water runs off the tool instead of soaking in. Pair that with a drying rack that drains back into the sink, and your tools dry in hours.
How to Sanitize Kitchen Sponges Without Ruining Them
Sanitizing reduces the microbial load on a sponge. It does not sterilize it, and it does not restore a worn-out sponge. The goal is to knock down bacteria between replacements so the sponge is not seeding germs onto every surface it touches.
Match the Method to the Material
- Cellulose sponges: Tolerate heat and moisture well. Microwave and dishwasher methods are both reasonable.
- Synthetic foam sponges: Heat can warp or melt the foam and break down the adhesive holding the scrubber layer. Dishwasher top rack is safer than the microwave.
- Silicone scrubbers: Heat-tolerant and non-porous. They can go through the dishwasher repeatedly without breaking down.
- Sponges with a scrubber pad glued on: The glue is usually the first thing to fail. Expect the pad to separate before the sponge itself wears out.
Microwave Method
- Soak the sponge in water until it is fully saturated. A splash of lemon juice is optional and mostly for odor.
- Microwave on high for one minute.
- Let it cool completely before squeezing or using it.
Never microwave a dry sponge. A dry sponge can scorch, smoke, or catch fire. Never microwave a sponge that contains metal mesh or a metallic scrubber layer.
Dishwasher Method
- Place the sponge on the top rack, not the bottom, so it is away from the heating element.
- Run a full cycle with a heated dry setting.
- Remove it once the cycle finishes so it does not sit in residual moisture.
Boiling and Vinegar Soaks
Boiling a sponge in water for about five minutes is another heat-based option, and it works on the same materials that tolerate the microwave. A white vinegar soak, roughly one part vinegar to three parts water, is gentler and mainly useful for odor and light mildew. Vinegar is not a disinfectant at kitchen-relevant concentrations, so treat it as a deodorizing step, not a germ-killing one.
Sinkelle FlowRack Pro — Keeps Sponges →
What Sanitizing Cannot Fix
A common pattern is treating sanitizing as a reset button. It is not. Heat and detergent kill a portion of the bacteria present, but the porous structure of a cellulose or foam sponge keeps trapping food particles and moisture, which is what feeds the next round of growth. Sanitizing buys you time between replacements. It does not extend the useful life of a sponge indefinitely, and it will not fix a sponge that already smells.
A few practical rules:
- Sanitize every one to two days if you cook daily.
- Sanitize after any raw meat, poultry, or egg contact, or replace the sponge outright.
- Never sanitize a sponge you used on raw meat and then use it on dishes.
- Skip sanitizing entirely once the sponge is discolored, falling apart, or persistently smelly.
How Often to Replace Dish Brushes and Sponges
Replace sponges every one to two weeks. Replace bristle brushes every one to three months, or sooner if bristles splay or smell. This answers the common question of how often to replace dish brushes and sponges: if it smells, it's overdue.
Picking the Best Kitchen Sponge Holder for Your Sink
The best kitchen sponge holder does three things: it drains water away from the tool, it lets air move around all sides of the tool, and it keeps the tool upright or angled so gravity pulls water off instead of into it. Everything else, material, finish, footprint, is secondary.
The Three Mechanics That Actually Matter
Drainage direction. A holder that collects water in a tray and holds it there is worse than no holder at all. Look for a design where water runs off the tool and either back into the sink or into a channel that empties. A flat tray with a lip is a puddle waiting to happen.
Holder Types and What Each One Is Actually Good For
| Holder Type | Drainage | Airflow | Best For |
|---|---|---|---|
| Over-sink rack | Strong, drains directly into sink | High, open frame | Most kitchens |
| Suction cup holder | Weak, depends on wall angle | Medium, open but small | Tight spaces, renters |
| Counter caddy with slotted base | Medium, drains to counter, not sink | Medium | Small counters with no sink lip |
| Adhesive wall hook | None, tool hangs, water drips down wall | High | Brushes only, not sponges |
| Closed tray or dish | None | None | Avoid |
Placement Beats Product
Where you put the holder matters as much as which one you buy. The best spot is over or beside the sink, where drips land in the basin and air moves freely. The worst spots are inside a closed cabinet, under the sink near the disposal or plumbing, or flat on the counter against a backsplash where air cannot circulate behind the tool.
What to Skip
- Enclosed caddies with a solid base and a lid
- Anything that holds the sponge flat against a non-porous surface
- Decorative trays that look tidy but trap water
- Holders mounted directly under a cabinet, where drips hit the cabinet bottom
Keeping the Holder Itself Clean
The holder becomes a hygiene problem if you ignore it. Wipe the tray or frame weekly with dish soap, and once a month run a plastic or stainless holder through the dishwasher if it fits. A holder with visible pink or black film is growing the same organisms you are trying to keep off your sponge.
Frequently Asked Questions
How long can bacteria live on a sponge?
Bacteria can survive on a damp sponge for days, and some pathogens persist for weeks in the moist, warm conditions found in kitchens. Because a sponge's porous material holds moisture long after you finish washing dishes, it gives bacteria a stable environment to multiply. The fix is airflow: wring the sponge out, stand it upright so water drains away, and let it dry fully between uses. A sponge that stays damp overnight is the one most likely to smell by morning.
What is the most hygienic way to dry a kitchen sponge?
The most hygienic method is to wring the sponge out thoroughly, then place it upright on an open rack that lets air reach every side while water drains into the sink. Avoid laying it flat on the counter or tossing it into a closed cabinet, both of which trap moisture. A rack with an angled drain tray, like the Sinkelle FlowRack Pro, sends water back into the sink instead of letting it pool underneath, so sponges dry in hours rather than days.
Can storing sponges in a holder prevent bacterial growth?
A holder helps only if it drains and ventilates. A closed or solid-bottom holder traps water against the sponge and can make bacteria growth worse. Choose an open design with drainage slots or an angled tray, keep it beside the sink rather than inside a cabinet, and clean the holder itself weekly. Combined with regular sanitizing, a draining holder is one of the simplest ways to cut microbial load on your scrubbing tools.
How often should you replace dish brushes and sponges?
Replace sponges every one to two weeks, and dish brushes every one to three months depending on use. Swap sooner if you notice a persistent odor, visible discoloration, or bristles that have splayed and no longer scrub effectively. Brushes dry faster than sponges because their bristles expose more surface area to air, so they last longer when stored upright. Mark replacement dates on your calendar to keep the schedule consistent.
Your cleaning tools can only stay hygienic if the spot you store them in lets them dry. SinkElle designs minimalist, waterproof sink organizers that drain water away and keep tools upright, so drying happens fast without any drilling or tools. The FlowRack Pro, FlexiDrain Caddy, and DryFlow Splash Mat each solve a different part of the wet-sink problem. Get started with SinkElle and turn your sink area into a cleaner, more organized space.