


Table of Contents
- Start With a Quick Declutter and Measure
- Build Kitchen Zones for Meal Prep and Daily Traffic Flow
- Pantry Organization for Busy Families: Dry Goods, Canned Goods, and First In, First Out
- Kitchen Cabinet Organization Ideas That Keep Everyday Items Easy to Reach
- Set Up a Meal-Prep and Lunch-Packing Station
- The Weekly Kitchen Reset: A 20-Minute Sunday Routine
- Shared-Kitchen Systems for Households and Renters
- Conclusion
- Frequently Asked Questions
Last Updated: October 6, 2026
Start With a Quick Declutter and Measure
Learning how to organize a kitchen for a busy work week starts with two steps: clear the counters, then measure before buying anything. Most people do it backwards, buying bins first and discovering nothing fits.
Clear Counters and Open Surfaces First
Empty every counter, wipe the surfaces, then put back only what you use daily.
- Coffee maker, kettle, cutting board: keep out
- Blender you use twice a year: store it
- Mail pile, random chargers, old receipts: recycle or file them
Clear counters change how the room feels. They also make cooking faster because you have room to work. The USDA Food Safety and Inspection Service kitchen guidance notes that clean, uncluttered food prep surfaces help reduce cross-contamination risks.
Measure Cabinets and Shelf Dimensions Before You Buy
Grab a tape measure and note the width, depth, and height of each shelf, plus the door swing and any fixed dividers. A shelf that is 28 centimeters deep will not hold a 30-centimeter bin.
Build Kitchen Zones for Meal Prep and Daily Traffic Flow
A kitchen zone is a defined area where one type of task happens, with everything that task needs stored inside it. Zones cut the steps you take while cooking, meaning faster meals on low-energy nights.
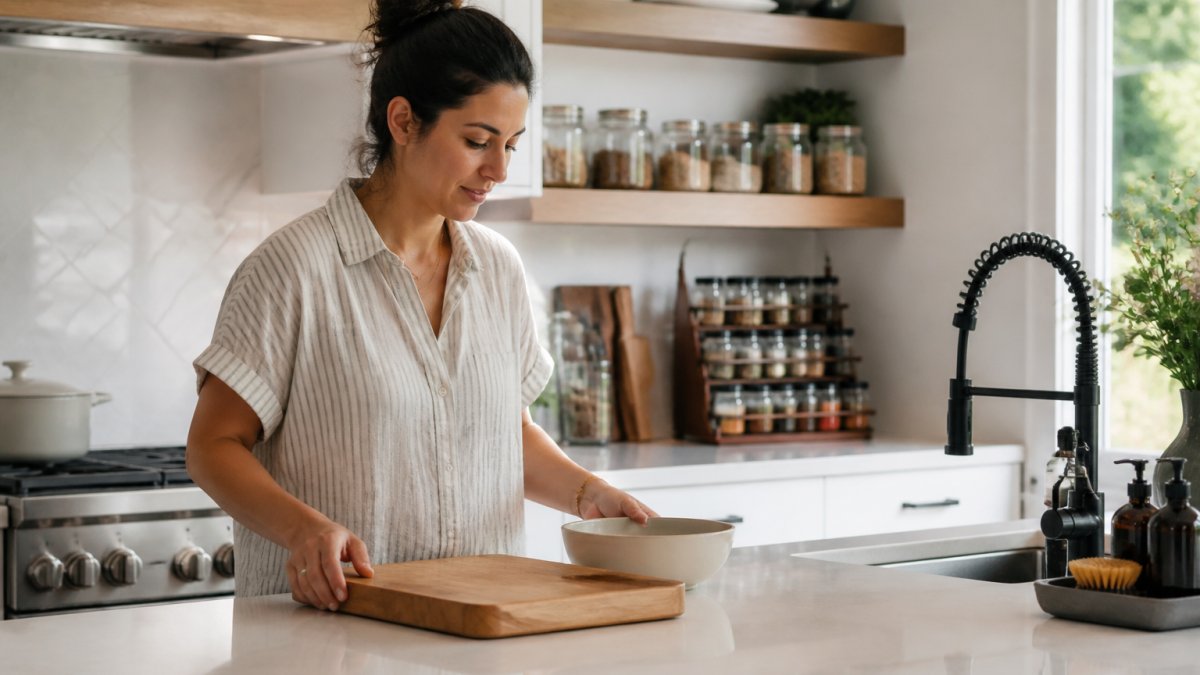
The Five Work-Week Zones That Matter Most
Most busy households only need five zones. Build these first:
- Prep zone - cutting boards, knives, bowls, near the main work surface
- Cooking zone - pots, pans, spatulas, oils, next to the stove
- Pantry zone - dry goods, canned goods, baking supplies, in one cabinet or closet
- Cleanup zone - sponges, dish soap, drying rack, at the sink
- Lunch-packing zone - containers, lids, bags, bottles, in one drawer or shelf
The cleanup zone is where SinkElle fits best. Our space-optimized systems turn the sink area into working storage instead of dead space.
Store Items Where You Use Them
Store items where you use them, not where they fit: coffee near the mugs, lunch containers near the fridge, the strainer near the sink. Move an item once and you save that walk hundreds of times a year.
Pantry Organization for Busy Families: Dry Goods, Canned Goods, and First In, First Out
Pantry organization for busy families comes down to three groups: dry goods, canned goods, and baking supplies.
Our Sinkelle FreshSeal Pantry Storage Canister is built for exactly this. The airtight silicone seal protects dry foods from moisture, and the stackable, crystal-clear design shows every grain of rice and scoop of flour.

How to Rotate Food Safely on a Deep Pantry Shelf
Use first in, first out. New groceries go behind or below the older ones, so you use the oldest item next.
On a deep pantry shelf, a pull-out organizer or shelf riser brings the back row forward; a lazy Susan does the same in a corner.
The FDA guidance on food storage and shelf life recommends checking dates and rotating stock regularly to keep food safe.
Kitchen Cabinet Organization Ideas That Keep Everyday Items Easy to Reach
Good kitchen cabinet organization ideas follow one principle: the items you touch most sit between hip and shoulder height.
Add a two-tier rack inside a cabinet and you double the usable surface. Our Sinkelle 2-Tier Pantry Storage Rack is made from natural bamboo, adjusts to different cabinet and countertop widths, and works for spices, jars, and snacks.

For seasonings, the Sinkelle SpiceRise 3-Tier Organizer keeps jars visible and within reach, with a built-in drawer for small items.

Pots, Pans, and the Cabinet Under the Sink
Stack pots and pans by size, or hang them, and add a pot lid organizer to stop the avalanche.
If your under-sink area is unusable, look up. Our Sinkelle Magnetic Refrigerator Storage Shelf attaches to compatible metal surfaces with a magnetic mount, no drilling required.
Set Up a Meal-Prep and Lunch-Packing Station
A meal-prep station is one counter area or drawer that holds everything you need to pack food, nothing else. It removes the daily hunt for lids and containers, but only pays off if built around the order you actually pack in.
Build the Station Around the Packing Sequence
Most people pack in the same order every time: container, main, side, snack, seal, label, refrigerate. Build the station left to right in that order so your hands move in one direction.
- Far left: containers and matching lids, nested by size
- Middle left: reusable snack bags, silicone pouches, and small lidded cups
- Middle right: cutting board, knife, and a small bowl for scraps
Group similar items so lids live with their bases, mismatched lids are the top reason people give up on packed lunches.
Keep the Station Near the Fridge, Not Near the Pantry
Placement matters more than container choice. The station should sit within one step of the refrigerator door, because cold items are the last thing you add and the first to spoil. If your fridge and pantry are far apart, put the station near the fridge and keep an overflow bin of shelf-stable snacks in the pantry.
A Realistic Weeknight Packing Rhythm
You do not need a full Sunday meal-prep marathon. A lighter pattern most busy households can sustain:
Sinkelle FreshSeal Pantry Storage Canister →
- Sunday, 15-20 minutes: wash and cut sturdy vegetables (carrots, cucumbers, peppers, celery), cook one pot of a grain, and portion two proteins.
- Weeknight, 5-8 minutes: assemble tomorrow's lunch from the prepped components while you clean up dinner.
- Friday, 5 minutes: empty the station, wipe it down, and note what you ran out of before the weekend shopping trip.
Packing tomorrow's lunch the night before is the highest-leverage habit here: it moves the decision out of the morning rush, when willpower and time are lowest.
Food Safety Basics That Belong in the Station
A packing station is also a food-safety checkpoint. A few rules keep packed food safe from morning to lunch:
- The USDA Food Safety and Inspection Service advises keeping perishable food out of the temperature danger zone between 40°F and 140°F, so cold items should go into an insulated bag with a freezer pack.
- Cooked leftovers should be refrigerated within two hours of cooking, and sooner in a warm kitchen.
- Label every container with the date it was packed, not the date it was cooked. That is the date you will actually use when deciding whether to eat it.
Snacks, Breakfasts, and the Grab-and-Go Shelf
The station should also cover the two meals people skip most when rushed: breakfast and snacks. One eye-level shelf or bin in the fridge, stocked with grab-and-go items, removes the morning decision entirely.
- Hard-boiled eggs, yogurt cups, and pre-portioned fruit
- Overnight oats or chia cups made two at a time
- Cheese sticks, nuts, and single-serve hummus
Restock this shelf during the weekly reset, not the morning rush, so on a bad morning the default choice is already made.
The Weekly Kitchen Reset: A 20-Minute Sunday Routine
A weekly kitchen reset is a short, repeatable routine that returns the kitchen to its baseline before the work week starts. But a Sunday-only reset is only half the system; the other half is a daily micro-reset that keeps the kitchen from drifting into chaos by Wednesday.
The Daily 10-Minute Reset
Run this every weeknight, right after dinner while the dishes are already out. Set a timer for 10 minutes.
- Load and start the dishwasher (2 minutes)
- Wipe counters and the stovetop (2 minutes)
- Clear the sink and run the disposal (2 minutes)
- Return stray items to their zones (2 minutes)
- Set out anything needed for tomorrow's breakfast or lunch (2 minutes)
Ten minutes a night is roughly 50 minutes a week, less than most people spend hunting for a missing lid on a rushed morning.
The Sunday 20-Minute Reset
Sunday is for tasks that do not need to happen daily. Run them in this order so wet tasks finish first and have time to dry.
- Clear and wipe counters (4 minutes)
- Check dates and rotate pantry stock (4 minutes)
- Wipe down the sink area and organizers (3 minutes)
- Restock the lunch-packing station (4 minutes)
- Return stray items to their zones (5 minutes)
Set a timer. When it rings, stop. The goal is a working kitchen, not a perfect one. If you finish early, use the leftover minutes on the messiest zone rather than starting a new project.
The Monthly 30-Minute Deep Reset
Once a month, add a longer pass. This is where food waste actually gets reduced, because you look at everything, not just the front row.
- Pull everything off one pantry shelf and check dates. Move anything expiring this month to a designated "use first" bin at eye level.
- Empty the fridge door shelves, which is where condiments go to expire unnoticed.
- Wipe the inside of the microwave and run a bowl of water with lemon for two minutes to loosen residue.
A common pattern is that households throw out the same three or four items every month. Once you notice which ones, stop buying them in bulk.
Why First-In, First-Out Belongs in the Reset
First-in, first-out is the most useful food-waste habit in a busy kitchen, and the weekly reset is when you enforce it: new groceries go behind or below the older ones, and during the reset you pull older items forward and move anything close to its date into the "use first" bin.
A Reset Schedule You Can Actually Keep
| Reset Task | Time | How Often |
|---|---|---|
| Load dishwasher and wipe counters | 10 min | Daily (weeknights) |
| Clear and wipe counters | 4 min | Weekly |
| Rotate pantry stock | 4 min | Weekly |
| Wipe sink area | 3 min | Weekly |
| Restock lunch station | 4 min | Weekly |
| Return stray items | 5 min | Weekly |
| Deep pantry and fridge check | 30 min | Monthly |
If you only have time for one thing, do the daily 10-minute reset. It is the habit that keeps the Sunday reset short.
Shared-Kitchen Systems for Households and Renters
Shared kitchens fail for one reason: no one knows where things belong. Fix that with simple systems, not rules.
- Label every shelf and bin by category, not by person
- Give each person one shelf or drawer for personal items
- Keep shared tools in one labeled spot everyone can find
Renters have an extra constraint: no permanent changes. Choose tool-free, non-damaging options.
The HUD guidance on renter rights and property modifications is a useful starting point if you want to confirm what your lease allows before installing anything.
| Reset Task | Time | How Often |
|---|---|---|
| Clear and wipe counters | 4 min | Weekly |
| Rotate pantry stock | 4 min | Weekly |
| Wipe sink area | 3 min | Weekly |
| Restock lunch station | 4 min | Weekly |
| Return stray items | 5 min | Weekly |
| Deep pantry check | 20 min | Monthly |
Conclusion
A busy work week punishes a disorganized kitchen. The fix is not more storage, but the right storage in the right place, built around how you actually cook and pack food.
At SinkElle, we design minimalist, Scandinavian-inspired organizers for exactly this problem. Start with the Sinkelle FreshSeal Pantry Storage Canister for dry goods, then add a rack or magnetic shelf where you need reach.
Get started with SinkElle and turn your kitchen into a space that works as hard as you do.
Frequently Asked Questions
What are some clever ways to organize my kitchen for faster weekday meals?
Group similar items into kitchen zones and store each group where you actually use it. Keep a meal-prep station with a cutting board, knives, and clear containers within arm's reach of the sink, and put everyday items like measuring spoons and cooking oils on an adjustable shelf riser or countertop organizer. The goal is fewer steps per meal, not a prettier shelf.
How should I organize a pantry for a busy work week?
Decant dry goods into airtight canisters so you can see what's left, then apply first in, first out: move older items to the front and new groceries behind them. Keep canned goods, baking supplies, and snacks on separate shelf levels, and use a 2-tier rack to lift small jars off a deep pantry shelf. This rotation prevents mid-week surprises when you reach for an ingredient that has gone stale.
What should I keep on the counter for everyday cooking?
Only what you touch daily: cooking oil, salt and pepper, a cutting board, and the utensils you use most. Everything else, including small appliances and specialty spices, should live in a cabinet or pantry so counters stay clear. If your sink area is tight, a magnetic refrigerator storage shelf can hold small containers and seasonings without adding another countertop unit.
How often should I reset or reorganize my kitchen?
A 15 to 20 minute reset once a week keeps the system working. Empty the sink, wipe counters, check pantry canisters for low stock, and return stray items to their zones. Do a deeper reorganization, including measuring cabinets and rethinking zones, only when your routine changes, such as a new work schedule or a new household member.