


Table of Contents
- Assess Your Current Kitchen Setup
- Sort and Decide What Stays: A Clear Keep-on-Counter Decision Rule
- Remove Clutter Using the Three-Box Method
- Small Kitchen Counter Organization Strategies
- Small Kitchen Storage Ideas for Renter-Friendly Organization
- Kitchen Organization With Limited Cabinet Space
- Maintain a Clutter-Free Kitchen: Daily Reset Routine
- Frequently Asked Questions
Last Updated: October 21, 2026
Assess Your Current Kitchen Setup
Before you start to declutter kitchen countertops, look at what you're working with.
Measure your counter space, note where the sink sits, check for room above the refrigerator, and see how far cabinet doors swing open.
Next, identify your high-traffic zones: the coffee maker near the counter, utensils near the stove, and the dish rack by the sink.
Take a photo of your kitchen now as a before picture and a reference for what stays on your countertops.
Sort and Decide What Stays: A Clear Keep-on-Counter Decision Rule
The biggest mistake is keeping too many things on your counters, which kills studio space fast. You need a simple rule.
Here's the rule we recommend: Keep only items you use at least three times per week.
Your coffee maker stays. The bread maker you used once goes to a cabinet. The spoons and spatulas you grab daily belong on the counter.
Apply this test to every item:
- Daily use items (coffee maker, cooking utensils, knife block) stay visible
- Weekly use items (blender, toaster) can stay if you have the space
- Monthly or less (specialty tools, decorative pieces) get stored away
Once you've decided what stays, group similar items together, cooking utensils in one spot, coffee essentials in another.
Remove Clutter Using the Three-Box Method
Now physically clear your countertops with the three-box method.
Get three labeled boxes or bags:
- Keep - Items that pass your three-times-per-week test
- Donate - Items in good condition you don't use
- Discard - Broken items, expired products, or things beyond repair
Go through every item and place it in a box.
For the "Keep" box, immediately decide where each item will live, a designated counter spot or a cabinet.
The "Donate" box should go to a local charity within a few days.
This method forces quick decisions, and the whole process usually takes one to two hours for a studio kitchen.
Small Kitchen Counter Organization Strategies
Once you declutter kitchen countertops, keep them that way without turning your studio into a wall of hardware. The best strategy is a countertop-specific plan that assigns every square foot a job and respects renter limits.
Map Your Countertop Zones Before You Buy Anything
A studio kitchen usually has three or four short counter runs, not one long stretch. Treat each run as a zone with a single purpose:
- Prep zone, the widest clear stretch, ideally next to the sink. This stays empty except for a cutting board you can move.
- Cooking zone, the counter beside the stove. This holds only the utensils and oils you grab while cooking.
- Coffee or landing zone, the spot nearest the door or bed. This is where keys, mail, and the coffee maker compete for space. Pick one.
Measure each run with a tape measure. A common studio pattern is a 24- to 36-inch run on either side of the sink; those numbers stop you from buying a shelf or appliance that won't fit.
Use Vertical Space Without Drilling
Vertical storage is the standard advice, but renters need versions that come down without a trace. Compare the main options:
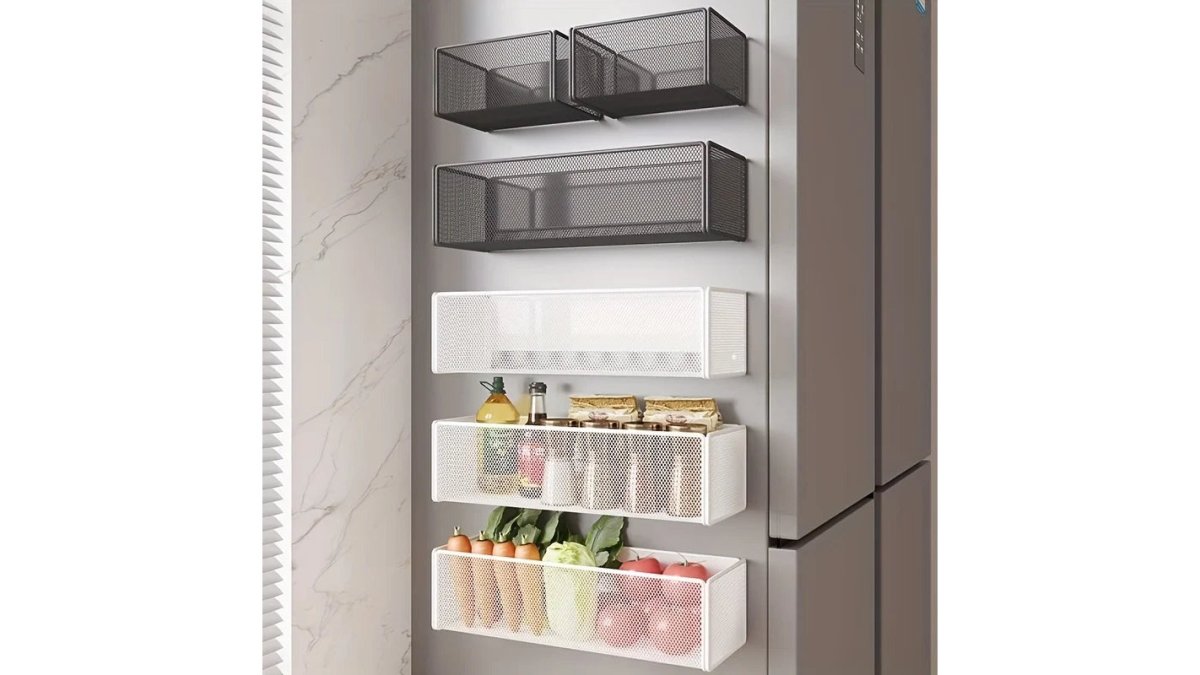
- Magnetic shelves attach to the refrigerator or a steel range hood. They hold spices, small containers, and foil or wrap. Check that your appliance door is magnetic, many stainless-steel fronts are not.
- Tension rods fit inside a cabinet or across a window frame and hold hanging tools or a small curtain. They work best for lightweight items.
- Adhesive hooks hold utensils, towels, and small pans. Follow the package weight limit and remove them slowly with a little warmth to protect paint.
A magnetic shelf on the side of the refrigerator is often the highest-value move in a studio: it uses a surface you already have.

Store Cooking Tools Where You Actually Reach
The hardest-working items in a studio kitchen are spoons, spatulas, tongs, and a knife. When drawer space is gone, three options work:
- A contained counter crock, one small crock holding only the tools you use daily. It costs about 6 inches of counter and keeps everything in reach. Cap it at five or six tools.
- A magnetic knife strip or magnetic tool bar mounted on the side of the refrigerator or a cabinet, no drilling if you use a magnetic version.
- A single drawer divider if you have one drawer to spare. Laying tools flat uses less vertical space than a crock and keeps the counter clear.
Pick one method per tool type, mixing a crock, wall rack, and drawer for the same utensils spreads clutter around.
Keep the Prep Zone Genuinely Empty
The prep zone is the one counter stretch that should stay clear between meals. A few rules make that realistic:
- The cutting board lives on its edge against the backsplash or hangs on a hook, not flat on the counter.
- Small appliances that only run occasionally, the blender, the food processor, move to a cabinet or a freestanding shelf.
- A single small tray can corral oil, salt, and pepper near the stove, but keep the tray narrow enough that you can still set down a pan.
A useful test: stand at the prep zone and try to set down a full sheet pan. If you can't, the zone has too much on it.
Make Under-Sink and Cabinet Space Work Harder
Under-sink storage is usually wasted because of the plumbing. Measure the clear height on each side of the drain pipe before buying anything; a two-tier riser that steps around the pipe often doubles usable space.
Sinkelle ExtendDry Retractable Sink Rack →
Inside cabinets, stack plates vertically in a dish rack and use risers to create a second level for mugs and bowls. Keep daily dishes at eye level and holiday or bulk items on the top shelf.
Small Kitchen Storage Ideas for Renter-Friendly Organization
Renters can't drill into walls or install permanent shelving, but you have options.
The FTC's guidance on renter rights reminds tenants that lease agreements vary. Some landlords allow minor modifications.
For no-drill solutions, magnetic systems work well. They attach to metal surfaces without damaging anything.
Adhesive hooks are another renter-friendly option.
The Sinkelle ExtendDry Retractable Sink Rack is perfect for renters. The retractable stainless steel design adjusts to fit different sink widths.

Freestanding shelving units don't attach to walls and move anytime.
Kitchen Organization With Limited Cabinet Space
Limited cabinet space is the studio reality, so prioritize ruthlessly.
Use every inch of cabinet height.
Group similar items together, mugs in one spot, pots in another, baking supplies in a third.
Small containers organize loose items.
Consider what actually needs to live in your kitchen.
The National Association of Professional Organizers research on small spaces suggests that limited storage forces intentional decisions.
The Sinkelle CounterRise 2-Tier Shelf maximizes vertical cabinet space without requiring installation.

Maintain a Clutter-Free Kitchen: Daily Reset Routine
Clearing the counters once is the easy part. In a studio, the kitchen is also your living room, so clutter returns fast. A realistic routine combines a short daily reset with a weekly check and a few safety habits.
The Five-Minute Evening Reset
Do this right after dinner, while you're already standing at the sink:
- Return every item to its zone. Utensils to the crock or drawer, coffee supplies to the coffee zone, mail to wherever mail actually lives, not the counter.
- Clear the sink. No dishes overnight. In a studio, a sink full of dishes is visible from the bed.
- Wipe the counters. A damp cloth and a quick pass takes about 30 seconds and stops sticky buildup around the stove.
- Sweep the landing zone. Anything that wandered onto the counter, keys, packages, a phone charger, goes back to its home.
Five minutes, every night. The point isn't perfection; it's preventing a small pile from becoming a weekend project.
The Weekly Ten-Minute Check
Once a week, add a slightly deeper pass:
- Move the small appliances and wipe underneath them. Crumbs collect under the toaster and coffee maker.
- Wipe the front of the refrigerator and the range hood, where grease films build up.
- Check the vertical storage, magnetic shelves, hooks, over-door racks, and tighten or re-seat anything that has slipped.
This weekly check is also the moment to notice whether a new item has crept onto the counter without earning a spot.
Safety and Hygiene Rules for a One-Room Kitchen
Because you cook, eat, and sleep in the same room, a few practical rules matter more than they would in a larger home:
- Keep clearance around heat. Leave open space on both sides of the stove and never store towels, paper, or plastic wrap directly beside or above a burner. Check the manufacturer's clearance instructions for your range.
- Respect the space above the stove. If you add a shelf or rack over the cooking area, keep it high enough that steam and grease don't reach what's stored there, and avoid hanging anything flammable.
- Protect the prep zone. Raw meat and produce need a clear stretch of counter to work on. If the prep zone is crowded, you're more likely to prep on a surface you haven't cleaned.
A Monthly Reset for When Life Gets Busy
Even with a daily routine, counters drift. Once a month, do a ten-minute version of the original sort: pick up each item on the counter and ask whether it has been used since the last reset. Anything that hasn't goes back into storage or into the donate bag. This keeps the "keep only what you use" rule from quietly eroding.
A studio kitchen works best when it's minimal and intentional. Every item on your countertops should earn its place, and every surface should stay clear enough to cook and clean safely. That combination, a short daily reset, a weekly check, and a few safety habits, is what keeps a small kitchen functional over the long run.
Frequently Asked Questions
What should you not keep on the kitchen counter?
Avoid storing small appliances you use less than once a week, expired condiments, dried-up pens, papers, or mail. Keep off counters: large gadgets (blenders, food processors), rarely-used specialty tools, decorative items that collect dust, and anything broken or waiting to be repaired. In a studio apartment, every inch counts, if an item doesn't serve daily cooking or eating, it belongs in a cabinet, drawer, or donated elsewhere. This keeps your counter clear and makes cleaning easier.
How can you declutter kitchen counters when you have limited cabinet space?
Use vertical storage by installing wall shelves above your sink or stove to hold frequently-used items like spices, oils, or mugs. Add shelf risers inside existing cabinets to double storage layers. Use the top of the refrigerator for seasonal items or infrequently-used appliances. Consider magnetic refrigerator organizers like the Sinkelle Magnetic Refrigerator Storage Shelf ($34.99) to store small containers and essentials without cabinet space. Group small items in baskets or trays to reduce visual clutter. A retractable sink rack such as the Sinkelle ExtendDry ($24.99) keeps dishes and produce organized directly over the sink, freeing up counter and cabinet real estate.
What should you keep on the counter in a small kitchen?
Keep only daily-use items on your studio kitchen counter: your coffee maker or kettle, cooking utensils in a container, salt and pepper, olive oil, and cutting board if space allows. Store everything else in cabinets, drawers, or on shelves. Use the counter primarily for food prep and eating. If you have a sink area against the wall, a retractable sink rack maximizes that space for draining dishes and produce without cluttering your limited counter. The rule: if you don't use it every day or every other day, it doesn't belong on the surface.
How do you maintain a clutter-free kitchen after decluttering?
Set a daily reset routine: spend 5 minutes each evening wiping down counters, putting away items that migrated during the day, and ensuring everything returns to its designated spot. After cooking, immediately wash and dry dishes or place them in a drying rack like the Sinkelle DryFlow ($61.99), then put them away. Before bed, clear the counter completely so you wake to a clean surface. Once a week, review what's accumulated and donate or relocate items that don't belong. This habit prevents clutter from rebuilding and keeps your studio kitchen functional and visually calm.