


Table of Contents
- Why Blind Corner Cabinets Waste So Much Space
- Blind Corner Cabinet Pull-Out Organizer Options That Work
- DIY Kitchen Corner Storage Ideas That Do Not Require a Remodel
- How to Organize Deep Kitchen Cabinets So Nothing Gets Lost
- Retrofitting Existing Cabinets: What You Can Add Without Rebuilding
- Weight Capacity, Durability, and Accessibility for Aging in Place
- Frequently Asked Questions
Last Updated: September 25, 2026
Why Blind Corner Cabinets Waste So Much Space
A blind corner cabinet is the L-shaped dead end where two runs of kitchen cabinets meet, and it swallows more storage than almost any other spot in the room. One cabinet box sits behind another, so its opening is hidden and its back half becomes unreachable.
That hidden zone is what designers call dead space. In a small apartment kitchen, that wasted volume is the difference between a workable pantry and a pile of forgotten appliances.
This guide from SinkElle covers creative ways to use blind corner cabinet space, from pull-out hardware to simple organizers you can add this weekend, focusing on what fits, what holds up, and what you can install without a contractor.
Corner cabinets promise extra capacity, then punish you for using it. Fix the access problem and the storage problem usually solves itself.
Blind Corner Cabinet Pull-Out Organizer Options That Work
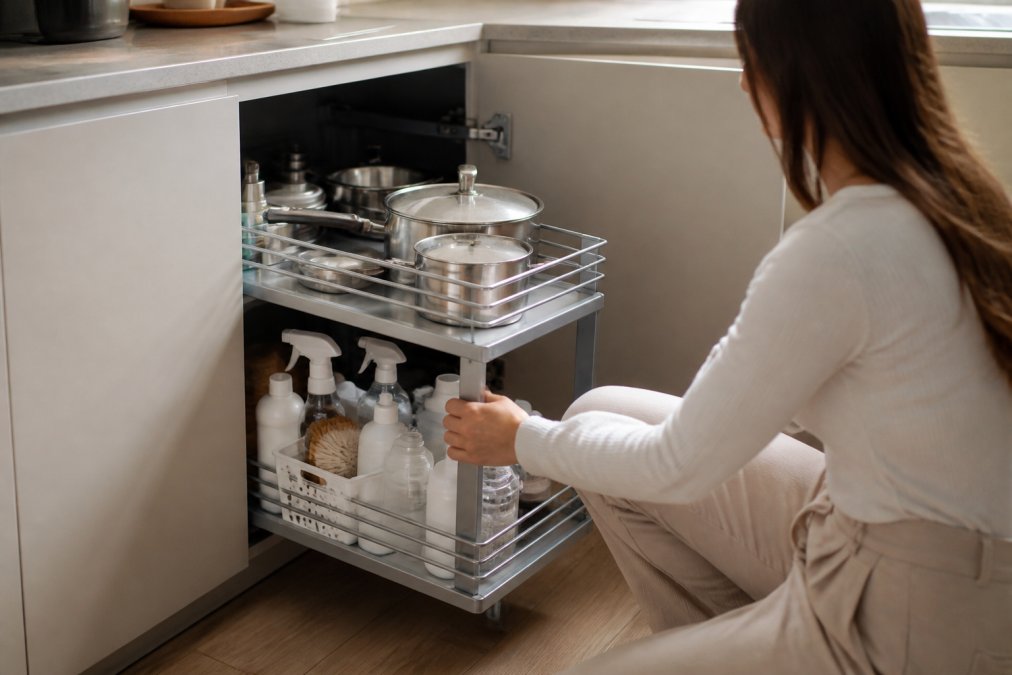
A blind corner cabinet pull-out organizer brings the back of the cabinet to you. Instead of crawling inside, you pull a tray, carousel, or basket forward and reach everything from the front.
| Option | How It Works | Best For | Main Trade-Off |
|---|---|---|---|
| Pull-out carousel | Rotating trays on a pivot mechanism | Deep corner bases | Needs full door swing |
| Lazy Susan | Single or dual rotating disc | Quick access to everyday items | Items slide off during spin |
| Pull-out trays | Drawers that slide forward on rails | Heavy pots and small appliances | Requires precise measuring |
| Diagonal corner unit | Angled front with a single door | New builds and full remodels | Not a retrofit option |
Pull-Out Carousels and Lazy Susans
A pull-out carousel slides out of the cabinet, then rotates on a pivot so you can reach every tray. The lazy Susan is the older, simpler cousin: a single rotating disc that spins in place.
Blind Corner Pull-Out Trays and Diagonal Units
Blind corner pull-out trays are the workhorse choice for heavy items. They slide straight out on rails, so a stand mixer or a stack of skillets moves with you instead of hiding in the dark.
DIY Kitchen Corner Storage Ideas That Do Not Require a Remodel
A few more renter-safe moves that hold up:
- Add a two-tier pull-out organizer to the reachable half of the corner
- Use stackable bins so you can lift a whole category out at once
- Keep the deepest, least-used items in labeled containers you can grab by the handle
- Move daily items to the front and reserve the back for seasonal or bulk goods
- Line the cabinet floor with a low-friction mat so heavy bins slide instead of scrape
One more rule that saves returns: measure the door opening, not just the cabinet interior. A tray that fits the box but not the frame is the most common DIY misfire in corner cabinets.
How to Organize Deep Kitchen Cabinets So Nothing Gets Lost
Knowing how to organize deep kitchen cabinets comes down to one rule: nothing goes in the back unless you can pull it out. Depth is not the enemy. Unreachable depth is.
A workable system looks like this:
Sinkelle 2 SlideNest Organizer →
- Empty the cabinet completely and sort contents into keep, relocate, and donate piles.
- Measure the interior width, height, and depth, including the door opening.
- Assign the front zone to daily items and the back zone to bulk or seasonal goods.
- Add pull-out trays so the back zone slides into view.
- Label containers by category, not by item, so anyone can put things back.
- Recheck the layout after two weeks and move whatever you keep reaching past.
Retrofitting Existing Cabinets: What You Can Add Without Rebuilding
Retrofitting is the angle most corner-cabinet guides skip, and it matters if you rent or are not ready to remodel. You can add a great deal without touching the cabinet box, and the install is usually a 30-to-60-minute job with a drill, a tape measure, and a pencil.
The retrofit decision tree
Before you buy anything, answer three questions in order:
- Does the door open past 90 degrees? If not, skip any slide-out that needs full swing and go with a turntable or a pull-string bin instead.
- Is there a solid mounting surface? Cabinet floors and fixed shelves are usually 1/2-inch or 3/4-inch plywood or particleboard and accept screws well. Thin back panels do not.
- How much weight will it hold? Match the hardware rating to the load, not to the price.
What you can add to an existing cabinet
- Slide-out trays that mount on the cabinet floor or an existing shelf with four to six screws. Look for units rated at 50 to 100 pounds per tray; most residential cabinet floors handle that load fine when the screws land in the panel, not the edge.
- Two-tier pull-out organizers that sit inside the footprint and need no center post. These are the best retrofit for a blind corner because they do not require access to the hidden half.
- Hanging racks that attach under the shelf above with short screws or adhesive strips rated for the load.
- Stackable bins and turntables that need no hardware at all.
What you cannot add without real work
- A diagonal corner unit, which requires a new cabinet front and a cabinet-maker's cut.
- A full carousel that needs a center post anchored into the cabinet floor and ceiling; the ceiling anchor is often blocked in a blind corner.
- Any system that depends on door swing your frame does not allow.
A concrete retrofit sequence
- Empty the cabinet and remove the shelf if it is adjustable.
- Measure the interior width, depth, and the door opening. Write the numbers on tape and stick them to the door so you do not lose them.
- Mark screw locations with a pencil. Pre-drill with a bit slightly narrower than your screw.
- Mount the rails or base plate first, then slide the tray in and check the motion before loading it.
- Load from the back forward so the heaviest items sit over the mounting screws.
The cost-benefit math
A new corner cabinet unit runs into the hundreds once you add labor and finish matching. A retrofit pull-out organizer costs a fraction of that and delivers most of the access benefit. Unless the cabinet box itself is failing, retrofit first.
Weight and durability, in plain terms
Steel-frame pull-outs outlast plastic units by a wide margin in a kitchen, because plastic sags under sustained load and warps near moisture. If you store cast iron, small appliances, or bulk dry goods, choose a metal frame and check the per-tray weight rating. For linens, paper goods, or seasonal items, a lighter-duty unit is fine and saves money.
Weight Capacity, Durability, and Accessibility for Aging in Place
Weight capacity and durability decide whether a corner solution lasts five years or five months.
Three practical checks before you buy:
- Weight rating: Match the hardware to what you store. Cast iron and small appliances need steel, not plastic.
- Material: Metal frames and carbon steel hold shape over time. Thin plastic sags under load and warps near moisture.
- Motion quality: Smooth sliding drawers stay smooth only if the rails are rated for the load you put on them.
Frequently Asked Questions
What can you do with a blind corner cabinet?
A blind corner cabinet can hold far more than people expect once you stop treating it as a junk drop zone. Add a pull-out carousel or a two-tier sliding organizer so items roll toward you instead of disappearing into the back. Use the deepest zone for rarely used appliances, the middle tier for cookware, and the front for everyday items. A hanging organizer mounted on the inside of the door adds usable vertical storage without blocking the hinge clearance.
What are the best pull-out solutions for a blind corner kitchen cabinet?
The three main options are a kidney-shaped lazy Susan, a two-tier slide-out tray, and a diagonal corner unit. Lazy Susans rotate items into reach and suit round containers. Slide-out trays pull the full shelf forward, which works better for rectangular cookware and small appliances. Diagonal units replace the blind corner entirely with angled door access. Choose based on what you store most: round items favor carousels, flat and heavy items favor pull-out trays.
How do I make a blind corner cabinet more accessible?
Accessibility comes down to three changes: pull-out hardware, tiered organization, and lighter loads. A pull-out sliding system brings the back of the cabinet to the front so you never have to reach past 18 inches of depth. Tiered organizers lift smaller items to eye level and keep heavier items on the bottom. If anyone in the home has trouble kneeling or reaching, keep daily items in the front tier and reserve the deep back for seasonal or backup supplies.
Are blind corner cabinets worth keeping or should you renovate?
Keep the cabinet in most cases. A blind corner holds 30 to 40 percent more volume than a standard base cabinet of the same width, and a full renovation costs thousands of dollars while a pull-out organizer runs $40 to $75. Renovation only makes sense if the corner blocks a walkway, interferes with appliance doors, or the cabinet box itself is damaged. For everything else, hardware upgrades recover the wasted space at a fraction of the cost.