


Table of Contents
- Why Under-Sink Protection Matters More Than You Think
- Silicone vs. PVC vs. Absorbent Fabric: Which Waterproof Mats Actually Work
- How to Measure Your Cabinet Space for a Custom Fit
- How to Install Cabinet Liners Without Tools or Damage
- Under Sink Leak Protection: Raised Edges, Absorbency, and Leak Detection
- Preventing Water Damage Under Kitchen Sink: Cleaning, Mold, and Long-Term Care
- What to Look For (and What to Ignore) When Buying Waterproof Mats
- Frequently Asked Questions
Last Updated: September 16, 2026
Why Under-Sink Protection Matters More Than You Think
Water damage under a kitchen sink rarely announces itself. It seeps, pools, and sits against cabinet flooring for weeks before you notice warped wood or a musty smell. This guide covers the best waterproof mats for kitchen cabinet protection, focusing on what actually holds up against drips, leaks, and the slow corrosion of particle board. The under-sink cabinet is the most moisture-exposed storage space in most homes, yet it's often the last place people think to protect.
EPA guide to indoor air quality and moisture control
Silicone vs. PVC vs. Absorbent Fabric: Which Waterproof Mats Actually Work
Silicone wins for most under-sink applications because it stays flexible, resists mold, and handles temperature swings without cracking. PVC mats cost less but can stiffen over time and may contain plasticizers that off-gas in enclosed spaces. Absorbent fabric liners handle small drips well but fail completely once saturated, and they need frequent washing to avoid mildew.
| Material | Waterproof | Mold Resistance | Flexibility | Best For |
|---|---|---|---|---|
| Silicone | Yes | High | Excellent | Long-term leak containment |
| PVC | Yes | Moderate | Fair | Budget setups |
| Absorbent fabric | No (water-resistant) | Low | Good | Light spill prevention |
Chemical Safety and VOC Off-Gassing: What Most Guides Skip
Most buying guides ignore what these mats are made of. Volatile organic compounds can off-gas from low-grade PVC and some adhesives, and under-sink cabinets have poor airflow. Look for mats labeled food-safe or phthalate-free, and let any new liner air out for a day or two before installing it near stored food or cleaning supplies.
How to Measure Your Cabinet Space for a Custom Fit
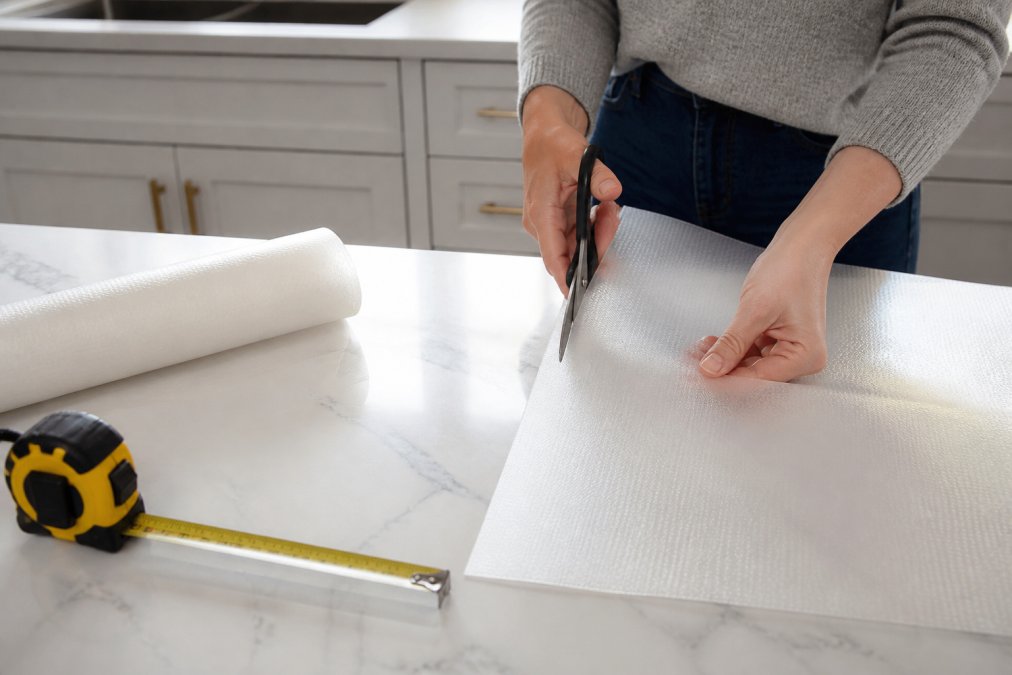
Measure the cabinet floor at its widest and deepest points, then measure around the plumbing stub-out and any disposal unit. Most cabinets aren't square, so take measurements at the front, middle, and back of the opening. Write down the distance from the cabinet wall to the nearest pipe, and note the diameter of any pipe passing through the floor. A trim-to-fit mat only works if you know exactly where to cut.
- Width at front, middle, and back
- Depth at left, center, and right
- Pipe locations and diameters
- Height clearance under the disposal
How to Install Cabinet Liners Without Tools or Damage
Installation is a 15-to-30-minute job with no drilling, no adhesive, and no cabinet modification. The hard part isn't laying the mat flat; it's cutting clean openings around the plumbing without turning a trim-to-fit mat into a torn, leaky mess.
The two-piece method for disposals and offset drains
A single-piece mat with a hole cut in the middle will almost always buckle, because the disposal body and the P-trap sit at different heights and angles. Instead, cut the mat into two overlapping panels:
- Lay the mat in the cabinet and press it against the back wall.
- Mark where the disposal body, the P-trap, and the supply stub-outs meet the mat with a pencil or a piece of chalk.
- Cut the mat along a line that runs from the back edge to the front edge, passing through the pipe marks, not a closed hole.
- Slide each half around the plumbing from the front, then overlap the seam by 1 to 2 inches.
- Run a bead of 100% silicone caulk along the seam if you want a continuous surface, or leave it dry if you plan to lift the mat for cleaning.
Cutting around a P-trap and supply lines
For a standard P-trap with two supply lines, a single-piece mat works if you cut a keyhole shape rather than a circle:
- Measure the outside diameter of each pipe with a tape measure or wrap a piece of string around it and measure the string.
- Add 1/8 inch to each measurement so the mat slides over the pipe without tearing.
- Cut from the nearest edge of the mat to the marked circle, then remove the circle. The slit lets you flex the mat around the pipe.
- Press the mat flat and check that the slit closes. If it gaps, overlap the two edges by 1/4 inch and press down.
What not to do
- Don't cut a hole smaller than the pipe and force the mat over it. Silicone stretches, but PVC and fabric liners tear at the cut line, and a torn liner lets water run straight through to the cabinet floor.
- Don't caulk the mat to the cabinet floor unless you're prepared to replace the caulk every time you clean. A dry-fit mat lifts out in seconds; a caulked mat does not.
- Don't stack two liners to fix a bad cut. Water wicks between layers and sits against the wood.
Under Sink Leak Protection: Raised Edges, Absorbency, and Leak Detection
Raised edges contain spills up to their lip height, which is the difference between a puddle on the mat and a puddle in your cabinet. Pair a raised-edge mat with a small water alarm for early leak detection. Absorbency helps with slow drips, but containment matters more for sudden failures like a burst supply line.
Preventing Water Damage Under Kitchen Sink: Cleaning, Mold, and Long-Term Care
A waterproof mat does two things at once: it keeps water off the cabinet floor, and it traps whatever moisture gets underneath it. The second part is where most cabinets fail. A mat that sits flat on a plywood or particleboard floor with no airflow will hold a thin film of condensation against the wood for months. Particleboard swells and crumbles once it absorbs water; plywood delaminates.
The breathability trade-off
Silicone and PVC mats are non-porous, which is what makes them waterproof, and what makes them trap moisture. Absorbent fabric liners breathe, but they hold water themselves and need washing after every spill. There is no mat that is both fully waterproof and fully breathable. The practical fix is to manage the moisture you can't prevent:
- Lift the mat and dry the cabinet floor once a month, even if the mat looks dry on top.
- Check the underside of the mat for condensation after running the dishwasher or a long hot-water session at the sink.
- Leave a 1/4-inch gap between the mat edge and the cabinet wall so air can move.
- If the cabinet has no ventilation, drill a 1-inch hole in the toe kick or cabinet side and cover it with a vent cover. This is a common retrofit in older cabinets and costs a few dollars in parts.
Cleaning schedule that actually prevents mold
Mold needs moisture, organic dust, and darkness, all three are present under a sink. A realistic schedule:
- Weekly: wipe the mat with a damp cloth and mild dish soap. Dry it completely before putting it back.
- Monthly: remove the mat, vacuum the cabinet floor, and inspect for discoloration, soft spots, or a musty smell.
- Quarterly: check the cabinet floor near the back wall and around the plumbing penetrations, where slow leaks pool first.
- After any leak: pull the mat, dry the floor with a fan or towel, and let the cabinet air out for 24 hours before reinstalling.
Signs the cabinet floor is already damaged
- Soft or spongy spots when you press down
- Dark staining that doesn't wipe off
- A musty smell that returns within days of cleaning
- Swelling at the seams where the cabinet floor meets the sides
- Peeling or bubbling laminate or melamine
If you see these, the mat is no longer the problem, the floor is. A cabinet floor replacement is a bigger job than a mat.
What to Look For (and What to Ignore) When Buying Waterproof Mats
Prioritize material, thickness, and edge height over color or pattern. Ignore "universal fit" claims; almost every cabinet needs trimming. Check for slip-resistant backing, washability, and stain resistance. Sustainability matters too.
Frequently Asked Questions
What is the best waterproof material for kitchen cabinets?
Silicone and food-grade PVC are effective waterproof mats for kitchen cabinet protection. Silicone resists heat and contains no plasticizers that can off-gas. PVC is durable but may release VOCs over time. Absorbent fabric mats handle small drips but are not truly waterproof, so they work best as a secondary layer under silicone. For under-sink areas with plumbing, choose a flexible silicone mat with raised edges.
How do I protect the bottom of my kitchen cabinet from water leaks?
Start with a waterproof mat that has raised edges to contain spills. Measure your cabinet floor and trim the mat to fit around pipes using scissors. Check the mat monthly for standing water, and dry it immediately.
Are silicone mats better than plastic liners for under-sink protection?
Silicone mats offer benefits for under-sink setups. Silicone stays flexible across temperature changes. Plastic liners are thinner but may tend to curl at the edges. Silicone also has a non-slip backing. Pricing depends on quantity, dates, and delivery; please visit our website for current prices.
Can waterproof mats prevent mold growth under the sink?
Waterproof mats help prevent mold by keeping moisture off the cabinet floor, but they only work if you dry them. Mold needs sustained dampness. If water sits under the mat for weeks, mold can still grow on the cabinet surface. Clean your mat monthly with warm soapy water and let it air dry completely before placing it back.
Protecting an under-sink cabinet shouldn't require tools, drilling, or a weekend of work. SinkElle designs minimalist, Scandinavian-inspired waterproof systems with tool-free installation, space-optimized layouts for sink areas, and durable materials built to handle real kitchen moisture. If your current setup warps, smells, or slides around, it's time to upgrade. Get started with SinkElle and turn that wasted cabinet into a clean, protected space that lasts.