


Table of Contents
- 5 Kitchen Organization Tips for Beginners
- How to Maximize Kitchen Counter Space Right Now
- Small Kitchen Storage Hacks That Cost Almost Nothing
- The Decluttering a Small Kitchen Checklist
- What to Ignore: Common Beginner Mistakes
- Frequently Asked Questions
Last Updated: September 4, 2026
5 Kitchen Organization Tips for Beginners
A cluttered kitchen creates friction in your daily routine, making cooking feel like a chore rather than a pleasure. Kitchen organization tips for beginners go beyond simply buying storage bins; they are about creating a system that respects how you actually cook and move through the space. This guide from SinkElle breaks down the five foundational strategies that transform a chaotic countertop into a calm, efficient workspace, starting with the most impactful change you can make today.
The biggest mistake new organizers make is purchasing containers before they have a plan. This leads to mismatched bins and wasted money. Instead, focus on establishing smart habits that work with your kitchen's layout. Below, we'll show you exactly how to implement these five strategies.
Tip 1: Maximize Your Vertical Storage Space
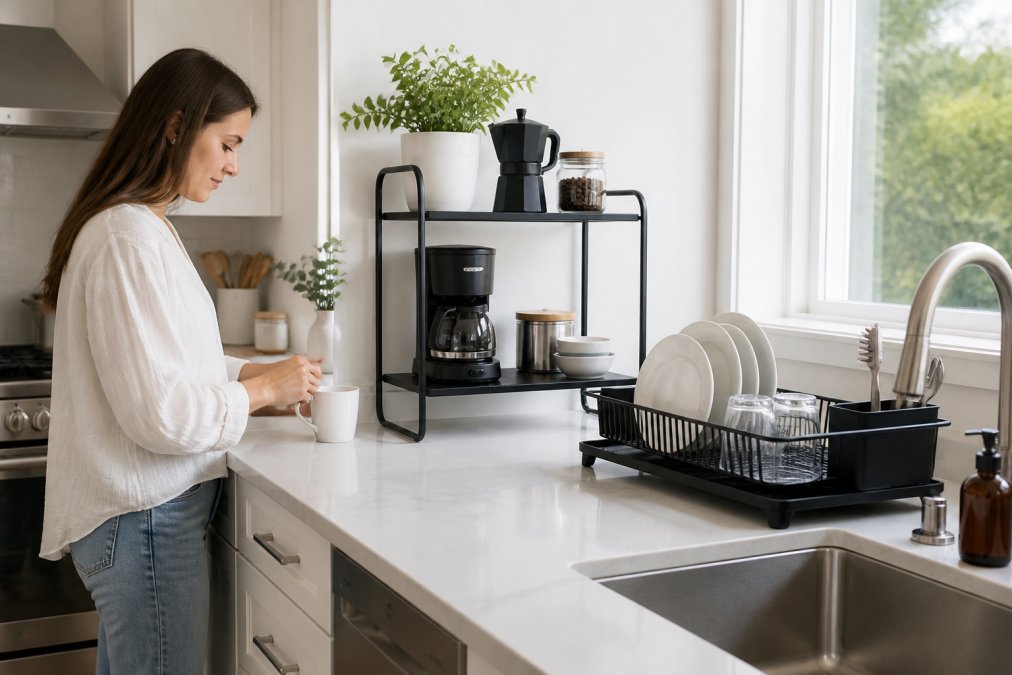
When horizontal space is limited, the only way to expand is upward. Vertical storage is the single most effective method for increasing cabinet capacity without a renovation (extension.umn.edu). For example, the SinkElle SpiceRise 3-Tier Organizer uses your countertop's height to keep spices visible and accessible, eliminating the need to dig through deep cabinets. By stacking items, you turn wasted airspace into prime real estate for pantry staples and cooking essentials.

Tip 2: Group Similar Items Together
Your kitchen workflow should dictate how you arrange your items. Grouping similar items creates logical "zones" that speed up meal prep and cleanup. This means keeping all baking sheets, cutting boards, and pot lids in one designated area. The SinkElle PanNest Adjustable Pot Organizer excels here, as its adjustable design corrals pots, pans, and lids into a single, stable unit, preventing the frustrating stack-tumble-search cycle that plagues many cabinets.

Tip 3: Corral the Chaos with Drawer Dividers
Drawers become black holes without internal structure. Drawer dividers and cutlery trays are essential tools for keeping utensils, gadgets, and food storage containers in their designated spots. They prevent items from sliding into disarray every time you open and close the drawer. This simple addition ensures that your prep area remains functional and that you aren't wasting time hunting for a measuring spoon mid-recipe.
Tip 4: Declutter Your Countertops
A clear countertop is the hallmark of an organized kitchen. Begin by identifying which appliances you use weekly and which are simply taking up space. Relocate rarely used items to cabinets or pantry shelves. For the items that must stay out, such as dish soap and sponges, invest in a dedicated system that looks intentional. The SinkElle FlowRack Pro is designed for this exact purpose, lifting sponges and brushes off the surface to dry quickly while keeping the sink area visually clean.
Tip 5: Use Shelf Risers to Double Your Space
Inside your cabinets, you are likely only using half of the available height. Shelf risers and inserts allow you to create a second level for plates, bowls, or mugs, effectively doubling your storage capacity. This is a low-cost, high-impact solution that works wonders for dishware and small appliances. By stacking items vertically, you can access what you need without unstacking a precarious pile.
How to Maximize Kitchen Counter Space Right Now
The fastest way to maximize kitchen counter space is to remove everything that doesn't have a daily job and assign a permanent "home" for the rest. Start by evaluating your current setup: if you have a dish rack, consider whether it is the most space-efficient option available. A simplified model like the SinkElle DryFlow Dish Rack can minimize its footprint while performing the same job, freeing up valuable inches around your sink.
Next, look at your "dead zones," such as the wall space under your upper cabinets. The SinkElle CabinetFlow Hanging Organizer capitalizes on this unused area, providing a spot for paper towels or cutting boards that would otherwise crowd your prep area. By thinking vertically and using under-cabinet space, you can reclaim a surprising amount of countertop real estate in under an hour.

Small Kitchen Storage Hacks That Cost Almost Nothing
Most organization guides assume you need to buy a trunk full of new containers. But the most effective first step for a beginner is to look at what you already own. Before you spend a dollar, you can reclaim significant space with these zero-cost hacks that target the most common clutter zones.
The Tension Rod Trick for Under-Sink Storage
The space under your sink is usually a black hole of bottles and sponges. A standard tension rod (the kind used for shower curtains, often found in a closet or bathroom) can be wedged horizontally between the cabinet walls. Use it to hang spray bottles by their necks, instantly freeing up the floor space below. This hack works because it uses the vertical airspace that is otherwise wasted, and it costs nothing if you already have a rod.
Repurpose a Magazine Holder for Cutting Boards and Sheet Pans
If you have a stack of cutting boards or baking sheets sliding around in a lower cabinet, find a sturdy magazine holder or file organizer. Place it vertically inside the cabinet and slide your boards and pans into the slots. This turns a horizontal pile into a vertical filing system, making it easy to grab the one you need without unstacking a precarious tower. It is a perfect example of using an item's existing structure to solve a storage problem.
The 'One-Touch' Rule for Countertop Clutter
Before you buy a new organizer, audit your countertop with the 'One-Touch' rule. If an item is not used at least once a week, it should not live on the counter. For the items that remain, ask yourself if they have a designated 'parking spot.' If you find yourself moving the same toaster or knife block out of the way every time you prep, it is a sign that the layout is wrong, not that you need a new gadget. A common pattern in organized kitchens is that every surface item has a permanent home that does not interfere with the primary work triangle (sink, stove, fridge) (extension.psu.edu).
DIY Drawer Dividers from Cardboard or Shoe Boxes
Drawer dividers are a top recommendation, but you can create the same effect for free. Cut sturdy cardboard from a shipping box into strips and fold them into a grid that fits your drawer. Or, use clean, empty shoe boxes to corral smaller items like takeout menus, plastic bags, or measuring spoons. This provides the same 'home' for each item as a store-bought divider, allowing you to test a layout before investing in a permanent solution. The key is to ensure the dividers are snug so they do not shift when the drawer opens and closes.
The 'Wait a Week' Rule for Purchases
This is the most important budget hack of all. When you feel the urge to buy a specific organizer, take a photo of the problem area and wait one week. Most of the time, you will find a DIY solution or realize the item was not necessary. This prevents the common beginner mistake of buying mismatched bins that do not fit your cabinet dimensions. If you still need the product after a week, you will have a clear plan for what you need, ensuring your money is spent effectively.
The Decluttering a Small Kitchen Checklist
Decluttering is not a one-time event; it is the first step in a continuous cycle. A common pattern in kitchens that stay organized is not that they are perfect, but that they have a simple, repeatable maintenance routine. This checklist is designed to be completed in one focused session, followed by a 'Weekly Reset' to ensure the clutter does not return.
The Initial Declutter Session
Work through this list zone by zone. Do not move to the next zone until the current one is complete. Set a timer for 45 minutes to avoid burnout (the CDC).
- The Countertop Zone: Remove all small appliances. Keep only the coffee maker or kettle if used daily. Clear all mail and keys. Wipe down the surface.
- The Sink Zone: Remove all sponges, brushes, and soap from the counter edge. Clean the area thoroughly before replacing them in a draining organizer.
- The Cooking Zone: Pull out all pots, pans, and lids. Discard any with broken handles or warped bases. Group the rest by size and store them with the PanNest organizer.
- The Pantry/Cabinet Zone: Check expiration dates on all food items. Consolidate partial bags of rice, pasta, and flour into clear, airtight canisters.
- The Prep Zone: Empty drawers and remove items you haven't used in six months. Use dividers to create designated spots for utensils and tools.
The 10-Minute Weekly Reset
This is the habit that separates a tidy kitchen from one that reverts to chaos. Schedule a 10-minute reset every Sunday evening. The goal is not a deep clean; it is to maintain the systems you built. A practical reset routine looks like this:
- The 5-Minute Surface Sweep (Minutes 0-5): Walk the perimeter of your kitchen and return any item that is out of place to its designated 'home.' This includes moving the salt shaker back to the stove, putting the fruit bowl back on the counter, and returning the junk mail to the recycling bin.
- The 2-Minute Sink Check (Minutes 5-7): Ensure no dishes are left in the sink. Put away any clean dishes from the drying rack. Give the sink a quick wipe down to prevent buildup.
- The 3-Minute Zone Audit (Minutes 7-10): Look at your three main zones: the coffee station, the prep area, and the cooking zone. Is anything accumulating? If you notice a pile of bills near the coffee maker, it is a sign that the system is not working. Adjust the 'home' for that item, don't just put it away.
The 'One In, One Out' Rule for Long-Term Success
To prevent future clutter, adopt the 'One In, One Out' rule. For every new kitchen gadget, pan, or set of containers you bring into the house, one similar item must leave. This forces you to be intentional about purchases and prevents the slow creep of unused items back onto your counters and into your cabinets. This simple rule is the most effective way to ensure your decluttering efforts are not wasted.
What to Ignore: Common Beginner Mistakes
Many beginners fail because they focus on buying products instead of changing habits. One common mistake is purchasing a collection of mismatched containers before measuring cabinet depth and height. This leads to wasted space and frustration. Another frequent error is over-organizing: creating categories so specific that the system becomes too rigid to maintain. If you have to think hard about where a spatula goes, the system is too complex.
Accessibility is also a key factor. If you are storing heavy stand mixers on high shelves or daily-use pans on low, hard-to-reach racks, you are creating an ergonomic barrier for yourself. The best systems are those that are easy to maintain. If you rent and cannot install permanent fixtures, look for tool-free solutions. Many of SinkElle's organizers, including the FlowRack Pro, require no drilling and are designed to be temporary and damage-free, making them perfect for strict landlords.
| Beginner Mistake | Why It Fails | Better Approach |
|---|---|---|
| Buying bins before planning | Creates mismatched, wasted space | Measure and group items first |
| Ignoring vertical space | Wastes half of cabinet volume | Use shelf risers and tiered racks |
| Storing daily items out of reach | Disrupts kitchen workflow | Keep heavy/daily items at waist height |
| Over-categorizing items | System becomes too rigid to maintain | Group by broad cooking zones |
| Forgetting maintenance | Clutter returns within weeks | Schedule a 10-minute daily reset |
Organizing your kitchen is not about achieving a perfect, magazine-ready aesthetic; it is about creating a functional space that supports your daily routine. The challenge is maintaining the system you build, which requires consistent habits rather than a one-time purge. SinkElle offers a range of minimalist, durable organizers, from the PanNest pot rack to the SpiceRise tiered shelf, designed to make this process intuitive and elegant. Get started with SinkElle and turn your kitchen into a space that works for you, not against you.
Frequently Asked Questions
What are common mistakes to avoid in a small kitchen?
The most common mistake is buying storage containers before decluttering. You end up organizing clutter into new bins. Start by removing items you don't use. Another frequent error is ignoring vertical space. Stackable bins, shelf risers, and under-cabinet organizers double your storage without taking counter space. Finally, avoid mixing zones. Keep coffee items together, cooking tools near the stove, and cleaning supplies under the sink. Grouping by task cuts time spent searching.
How do I organize a kitchen with no counter space?
Focus on vertical storage and hidden areas. Install a hanging organizer under a cabinet for paper towels or cutting boards. Use a 2-tier shelf to double the usable area for small appliances like a coffee maker. Inside cabinets, add shelf risers to stack plates and mugs. A pot organizer inside a cabinet door or a pull-out rack can hold cookware. This clears counter space for the few items you use daily.
What is the first step to organizing a kitchen?
The first step is to empty one zone completely, like a single cabinet or the counter beside the sink. Wipe it down, then sort everything into three groups: keep, relocate, and remove. Only return items you use weekly. This prevents overwhelm and gives you a clear view of what you own. Repeat this process zone by zone. Starting small builds momentum and makes the task feel manageable.
What are some small kitchen storage hacks for renters?
Renters need non-permanent solutions. Use adhesive hooks on cabinet doors for measuring cups or pot lids. Tension rods inside cabinets create dividers for cutting boards and baking sheets. Over-the-sink dish racks use space that is otherwise empty. A rolling cart adds a portable prep area. These options require no drilling and leave no marks, so you can take them to your next place.
This article was written using GrandRanker