


Table of Contents
- Why Vertical Storage Transforms Cramped Cabinets
- Pot and Pan Cabinet Organization With Adjustable Racks
- Baking Sheet and Cutting Board Storage Solutions
- Narrow Cabinet Storage Ideas Using Shelf Risers
- Under-Sink Storage Ideas and Pull-Out Systems
- Over-the-Door and Wall-Mounted Vertical Storage
- Stacking Bins and Rotating Organizers for High Shelves
- Measurements, Weight Limits, and Safety Considerations
- Frequently Asked Questions
Last Updated: October 21, 2026
Why Vertical Storage Transforms Cramped Cabinets
Vertical storage ideas for cramped cabinets solve a common kitchen problem: wasted space and items buried in the back.
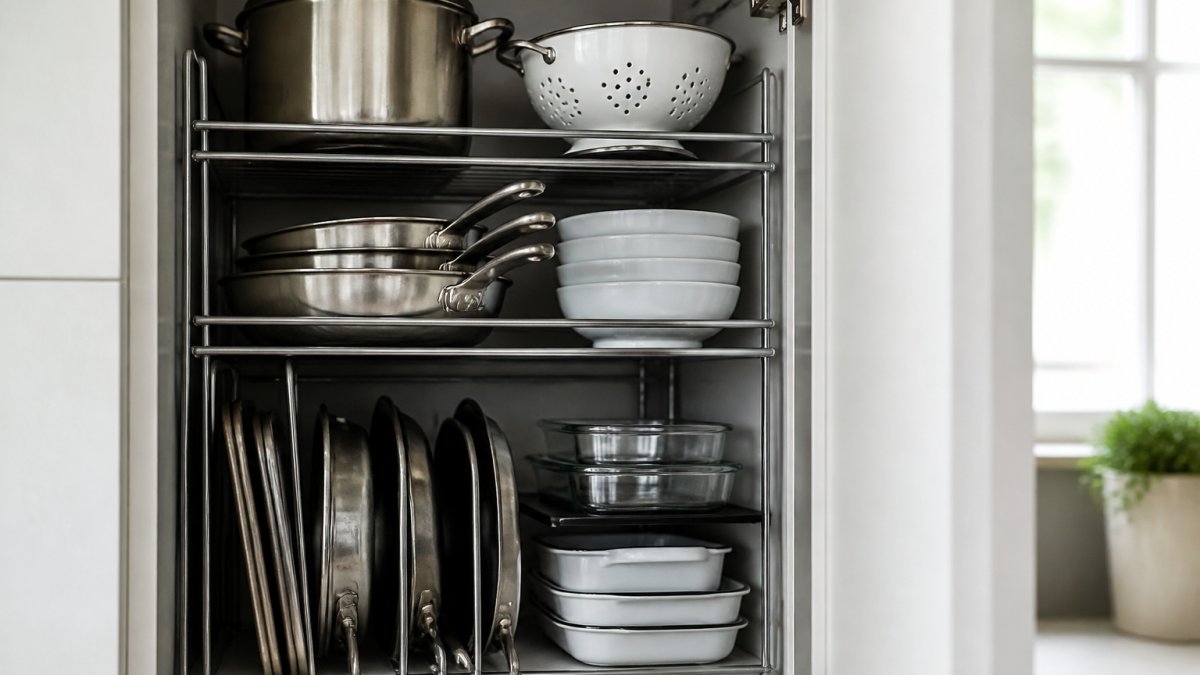
At SinkElle, we help homeowners reclaim kitchen space by rethinking cabinet organization.
Vertical storage works because it uses space you've already paid for: the height of your cabinet.
The challenge is finding solutions that fit your cabinet dimensions and the items you store: what works for baking sheets may not work for pots.
Pot and Pan Cabinet Organization With Adjustable Racks
The most effective pot and pan cabinet organization uses adjustable racks that customize spacing for different cookware sizes. A Dutch oven might be 4 inches tall while a sauté pan is 2 inches, so fixed shelves waste space while adjustable ones adapt.
The Sinkelle PanNest Adjustable Pot Organizer ($38.99) is purpose-built for this problem. Durable carbon steel and stainless steel support heavy cookware without sagging, and adjustable dividers fit your specific pots, pans, lids, and baking trays.

Here's how to set it up effectively:
-
Measure your cabinet depth and height. Standard base cabinets are 24 inches deep; leave at least 1 inch clearance on all sides for easy sliding.
-
Group cookware by type. Keep pots together, pans together, and lids in their own section. This prevents searching and makes returning items intuitive.
-
Arrange by frequency of use. Keep most-used pans at eye level (roughly 36-48 inches from the floor) and less-used pieces higher or lower.
-
Load vertically, not horizontally. Stand pans on their edges rather than stacking them flat. This uses 60% less space and prevents scratches.
-
Secure the organizer to prevent tipping. If the rack is tall or heavily loaded, use non-damaging adhesive strips or small brackets to anchor it to the cabinet.
Distribute weight evenly to avoid stress on dividers.
Baking Sheet and Cutting Board Storage Solutions
Baking sheets and cutting boards are hard to store because they're flat, take up horizontal space, and lean awkwardly.
A single baking sheet is only 1/4 inch thick, but a stack of five becomes 1.25 inches, and cutting boards run 1/2 inch to 1.5 inches thick.
Vertical storage solves this by storing sheets and boards upright like files, fitting 8-12 in 12 inches of vertical space.
Implementation steps:
-
Choose a cabinet location. A base cabinet next to the stove or oven is ideal. Ensure the opening is at least 12 inches wide and 18 inches tall.
-
Install a divider system. Use adjustable shelf dividers (3-4 inch spacing) or a pull-out tray with built-in slots. Dividers prevent sheets from leaning and damaging each other.
-
Organize by size. Group standard 13x18 inch sheet pans together, quarter-sheet pans together, and cutting boards separately. Label dividers if you have multiple people in your household.
-
Account for weight. A full set of 4-6 sheets weighs 8-12 pounds, so ensure the shelf or pull-out system supports at least 15 pounds.
-
Leave clearance. Add 1/2 inch of space above the tallest item so you can slide things in and out without friction.
A pull-out tray system gives you the best access and prevents reaching into the back of deep cabinets.
Narrow Cabinet Storage Ideas Using Shelf Risers
Narrow cabinets, those 9-12 inches wide, are common in urban apartments and older homes. Too small for standard organizers, they become functional vertical storage with a shelf riser, a simple metal or plastic platform that elevates one shelf to create a second tier underneath.
Shelf risers need no installation: place one on an existing shelf and stack items on top.
How to maximize narrow cabinet space with risers:
-
Measure your cabinet interior width and depth. Risers come in standard sizes (12x12, 12x18, 18x24 inches); choose one leaving 1 inch of clearance on all sides.
-
Stack strategically. Place heavier items (plates, bowls) on the lower shelf and lighter items (mugs, glasses) on the riser above. This prevents tipping and makes access safer.
-
Use multiple risers. In a 24-inch-wide cabinet, you can fit two 12-inch risers side by side, creating two separate storage zones. This lets you organize by category without items shifting.
-
Combine with bins. Place shallow bins or containers under the riser to corral small items like tea, spices, or kitchen gadgets. This prevents clutter and makes retrieval faster.
-
Test stability. Load the riser gradually and check for wobbling. If it shifts, place non-slip shelf liners underneath to anchor it.
For renters, shelf risers are ideal: they leave no marks and come out in seconds, letting anyone hesitant about permanent solutions test the concept without commitment.
Under-Sink Storage Ideas and Pull-Out Systems
Under-sink cabinets are notorious dead zones, with pipes, garbage disposals, and irregular plumbing making them seem unusable. With the right approach, the space above and around pipes holds cleaning supplies, dish soap, sponges, and other essentials.
Work around obstacles rather than fighting them: pull-out trays and tiered organizers let you access items without reaching into the back and accommodate plumbing without damage.
Practical under-sink storage setup:
-
Map your plumbing. Most sink cabinets have a U-shaped trap in the center and shutoff valves on the sides. Measure clearance on both sides and above the trap, that's your usable space.
-
Install a pull-out tray. The Sinkelle 2 SlideNest Organizer ($55.99) is a 2-tier pull-out system with smooth sliding drawers that fits under most sinks, so you can reach items without crawling into the back. Its durable, waterproof metal frame handles spills without warping.
-
Use shallow bins for small items. Place containers for sponges, brushes, and cleaning cloths on the upper tier. Reserve the lower tier for larger bottles (dish soap, hand soap) or backup supplies.
-
Leave the center clear. Don't store anything directly under the trap. This prevents damage to pipes if there's a slow leak and makes repairs easier for plumbers.
-
Add a mat or shelf liner. Water splashes and leaks happen. A waterproof mat under the organizer catches drips and protects the cabinet floor from stains.
-
Install a door-mounted rack. The inside of the cabinet door is often wasted space. A hanging organizer holds spray bottles, towels, and small tools without taking up shelf space.

Sinkelle CabinetFlow Hanging Organizer
Distribute weight evenly and avoid overloading one side.
Over-the-Door and Wall-Mounted Vertical Storage
Over-the-door racks and wall shelves add storage without taking up cabinet or countertop space, especially valuable in small kitchens where every inch counts.
Over-the-door racks hang on the inside of cabinet doors or the kitchen door itself, holding pot lids, cutting boards, kitchen towels, and wraps.
The Sinkelle CabinetFlow Hanging Organizer ($44.99) is designed specifically for under-cabinet mounting.
Installation and placement:
-
Choose your mounting location. Under cabinets is ideal because it's out of the way and uses wasted vertical space. If you rent, look for adhesive-mounting options that don't require drilling.
-
Check weight capacity. Distribute weight evenly.
-
Ensure clearance. If mounting under a cabinet, measure the distance to the counter below. You need at least 6-8 inches of clearance so items don't hit the counter when you open the door or remove things.
-
Secure adhesive strips properly. Clean the mounting surface with rubbing alcohol and let it dry completely. Press the adhesive strip firmly for 30 seconds to ensure a strong bond. Wait 24 hours before loading.
-
Load strategically. Place heavier items (cutting boards, cast iron lids) on lower hooks and lighter items (towels, wraps) above them.
Wall shelves offer a more permanent aesthetic solution.
Stacking Bins and Rotating Organizers for High Shelves
High shelves, above eye level or in upper cabinets, often hold items you rarely use. Stacking bins and rotating organizers make these spaces functional while keeping things organized and accessible.
Stacking bins are shallow containers that sit on top of each other, creating multiple storage layers without adding cabinet depth. Rotating organizers (like the Sinkelle SpinSpice Bamboo Rack at $29.99) let you turn the unit to access items on the back without reaching or moving things.
How to organize high shelves:
-
Use shallow, stackable bins. Standard bins are 4-6 inches tall and 12-18 inches wide. Stack two or three on a single shelf to maximize vertical space. Label each bin so you know what's inside without pulling them down.
-
Group by category. One bin for baking supplies, one for specialty spices, one for backup pantry items. This prevents mixing items and makes restocking intuitive.
-
Install a rotating organizer for spices. The SpinSpice Bamboo Rack uses vertical space efficiently and lets you rotate the unit to access spices on the back. Its multi-layer design holds 12-15 bottles in a footprint of just 8 inches.
-
Consider weight distribution. High shelves support weight, but uneven loading can cause the shelf to sag. Distribute bins evenly across the shelf's width and avoid loading all weight to one side.
-
Add a non-slip mat. Bins can slide if the shelf is smooth or if you remove items quickly. A rubber shelf liner prevents shifting and protects the shelf from scratches.
Rotating organizers are particularly useful for spices and seasonings because they maximize vertical space while keeping everything visible. A single rotating rack replaces a large drawer or shelf, freeing space for other items.
Measurements, Weight Limits, and Safety Considerations
Vertical storage ideas only work if they fit your specific cabinet and don't create safety hazards. Before buying any organizer, measure your space and understand weight limits.
Essential measurements:
- Cabinet interior width: Measure side to side at the widest point. Most organizers need 1 inch clearance on each side.
- Cabinet interior depth: Measure front to back. Standard base cabinets are 24 inches deep. Measure your actual cabinet to account for variations.
- Cabinet interior height: Measure from the shelf or floor to the bottom of the shelf above. This determines how tall your organizer can be.
Weight limits:
- Distribute weight evenly. A shelf rated for 50 pounds can handle 50 pounds spread across its length, but 50 pounds concentrated on one side can cause sagging or tipping.
Safety considerations:
-
Secure tall organizers. If an organizer is taller than 18 inches or heavily loaded, use adhesive strips or small brackets to anchor it to the cabinet back or side. This prevents tipping if someone pulls on an item or bumps the cabinet.
-
Keep heavy items at waist height or below. Lifting items from above shoulder height increases injury risk and makes retrieval awkward. Reserve high shelves for lightweight, rarely-used items.
-
Avoid blocking plumbing access. Never store items directly under sink pipes or against shutoff valves. If a leak occurs, you need immediate access to stop the water.
-
Use waterproof organizers under sinks. Metal or plastic systems with waterproof coatings resist moisture and prevent rust or mold. Fabric organizers absorb water and can harbor mold.
-
Test stability before loading fully. Place an organizer in position and load it gradually. Check for wobbling or shifting before trusting it with your full storage load.
-
Follow manufacturer weight ratings. These are tested limits. Exceeding them voids warranties and risks failure.
| Organizer Type | Typical Weight Limit | Best Location | Safety Notes |
|---|---|---|---|
| Adjustable pot rack | 30-50 lbs per shelf | Base cabinets | Secure if over 18 inches tall |
| Pull-out tray | 20-40 lbs | Under sink | Must fit around plumbing |
| Shelf riser | 25-40 lbs | Any shelf | Test stability before loading |
| Hanging organizer | 10-20 lbs | Under cabinet | Check adhesive strength after 24 hours |
| Rotating organizer | 15-30 lbs | Countertop or shelf | Ensure base doesn't wobble |
Vertical storage ideas for cramped cabinets work because they use the full height of your space instead of wasting it.
SinkElle's organizers are designed with this philosophy in mind. The PanNest Adjustable Pot Organizer, CabinetFlow Hanging Organizer, SpiceRise 3-Tier Organizer, and 2 SlideNest Organizer all solve specific cramped-cabinet problems without requiring tools or permanent installation.

Start with one organizer in your most-used cabinet. Measure carefully, check weight limits, and test stability.
Frequently Asked Questions
How do you organize pots and pans in a small cabinet?
Use an adjustable pot rack like the Sinkelle PanNest ($38.99) to store cookware vertically instead of stacking. Position pans upright in divided slots, and arrange lids separately on the upper tier. This prevents damage, saves space, and makes items easier to access. For very tight cabinets, measure the interior width and depth before purchasing to ensure the organizer fits without blocking cabinet doors.
What can you store vertically in kitchen cabinets?
Store pots, pans, baking sheets, cutting boards, plates, and food containers vertically using shelf risers and tiered organizers. Vertical storage works for items you use regularly and can safely stand upright. Avoid storing heavy glassware or fragile items too high, where they risk falling. Lighter items like wraps, kitchen cloths, and paper towels work well on hanging organizers beneath cabinets.
Are vertical cabinet organizers worth it for narrow spaces?
Yes, vertical organizers use height instead of depth. Products like the Sinkelle CabinetFlow Hanging Organizer ($44.99) and SpiceRise 3-Tier Organizer ($58.99) eliminate stacking, reduce clutter, and improve access to frequently used items.
How do you organize the cabinet under a kitchen sink?
Use a pull-out sliding organizer like the Sinkelle 2 SlideNest ($55.99) to maximize under-sink space while working around plumbing. Place it on the cabinet floor, then arrange cleaning supplies, dish soap, and sponges on the tiers. Keep heavier items on the lower shelf and lighter supplies above. Measure your cabinet interior to confirm the organizer fits, and leave space around pipes for water access.
What is the best way to store baking sheets and cutting boards?
Store baking sheets and cutting boards vertically in a dedicated slot or divider within a cabinet, or use a hanging organizer on the inside of a cabinet door. Vertical storage prevents warping, saves shelf space, and makes items quicker to grab. The Sinkelle CabinetFlow Hanging Organizer ($44.99) holds cutting boards and baking sheets securely while keeping them visible and accessible.
Shop Now at SinkElle and reclaim your cabinet space with sophisticated, minimalist organization solutions designed to maximize every inch of your kitchen.