


Table of Contents
- How to Set Up a Simple Meal Prep Station in a Small Kitchen
- Kitchen Work Zones for Small Kitchens: The Three-Zone Framework
- Meal Prep Station Essentials: A Budget-Tiered Equipment Checklist
- How to Maximize Kitchen Counter Space During Prep
- Small Kitchen Storage Without a Pantry: Where Ingredients Live
- Food Safety and Storage Workflow During Batch Prep
- Renter-Friendly Setup Variations for Different Kitchen Layouts
- Conclusion: Start With One Zone, Not the Whole Kitchen
- Frequently Asked Questions
Last Updated: October 9, 2026
How to Set Up a Simple Meal Prep Station in a Small Kitchen
A simple meal prep station setup for small kitchens starts with one clear work zone, not a full remodel.
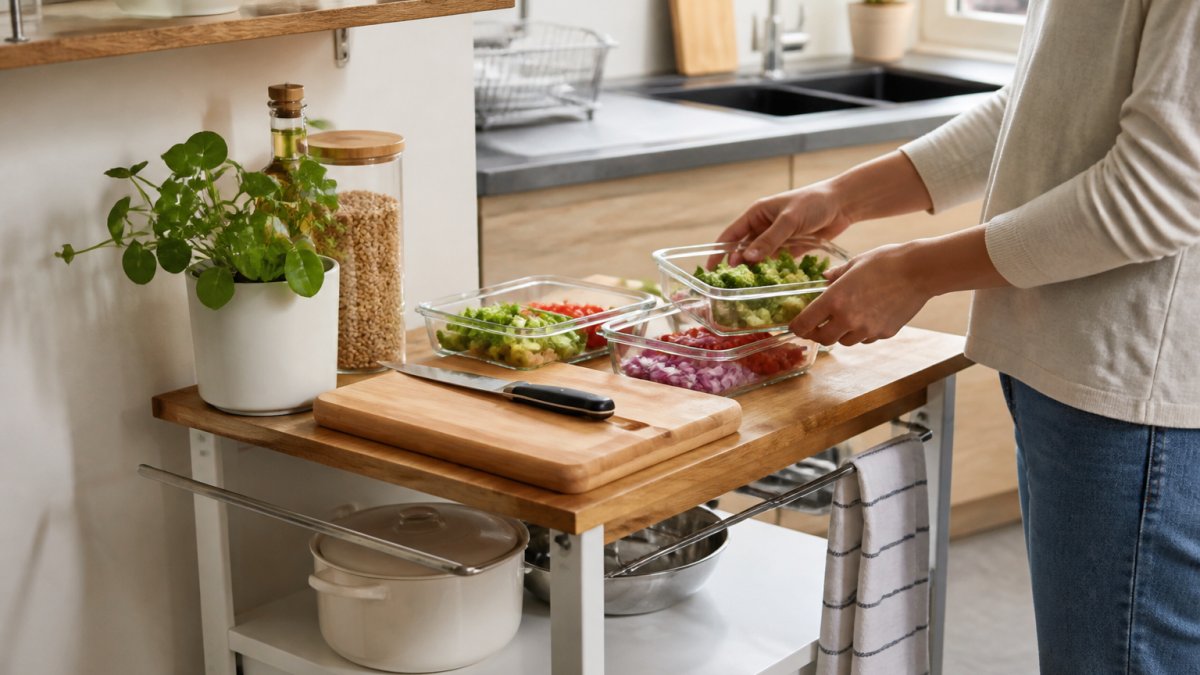
You don't need a chef's kitchen to cook for the week, just one spot where chopping, mixing, and packing happen without moving your feet: a meal prep station.
Most guides say to reorganize the whole kitchen first. That's backwards: one well-set station beats a perfectly organized kitchen with no clear work surface.
Measure Before You Buy: Clearance and Dimensions That Matter
Measure your walking path before you measure anything else. You need at least 36 inches of clear floor between counters, appliances, and any cart you add, which is the minimum passage width recommended in ADA accessibility guidelines for kitchen clear floor space.
Then check work surface height. Standard counters sit at 36 inches; a cart or table between 34 and 36 inches keeps your wrists neutral while chopping.
Key numbers to write down:
- Walkway width: 36 inches minimum
- Cart depth: 18 to 24 inches, so it tucks against a wall
- Prep surface width: 22 to 24 inches is enough for a cutting board plus a bowl
A common mistake is buying a cart that fits the wall but blocks the fridge door. Open every appliance fully before you commit.
Pick Your Spot: Counter, Island, or Rolling Cart
Choose a rolling cart if your counter is short and floor space tight, it gives you a full prep surface that disappears when you're done. The Sinkelle RollCrest Kitchen Island Cart folds its drop-leaf top out to 22.8 inches for prep, then flat to reclaim the floor.

The three main options:
- Existing counter: free, but often only 12 to 18 inches wide in small kitchens
- Rolling cart: movable, storable, and the best fit for renters
- Breakfast nook or table: works if it sits within two steps of the fridge and sink
For most small kitchens, a cart wins. It doubles as a coffee bar, baking station, or microwave stand on non-prep days.
Kitchen Work Zones for Small Kitchens: The Three-Zone Framework
A small kitchen works best with three zones: storage, prep, and cook. Keep them in that order from fridge to stove, and your kitchen work zones for small kitchens stop fighting each other.
The classic work triangle connects fridge, sink, and stove. In a galley it shrinks to a straight line, so the goal becomes a short, unobstructed path between the three points, each with a defined footprint.
Here's how to place each zone, with the footprint it needs:
- Storage zone: fridge and pantry items, closest to where you unpack groceries. Reserve 18 to 24 inches of clear floor in front of the fridge door so it swings fully open.
- Prep zone: your station, with the sink within one step. Aim for a 22 to 24 inch wide surface and 18 to 24 inches of depth so a board plus a bowl fit side by side.
- Cook zone: stove and oven, with nothing stored on top. Keep 15 inches of clear counter on at least one side of the range for landing hot pans.
A Step-by-Step Setup Sequence
Here's the order that works when you set the station up in one afternoon:
- Clear the landing zone first. Empty the counter beside the stove, where hot pans go, and the first thing to disappear when clutter creeps back.
- Mark the prep footprint. Outline the cart or table spot with painter's tape and live with it for a day before buying anything.
- Place the prep surface. Put the cart or table so the sink is one step away and the fridge door still opens fully.
- Stage tools on the surface. Board, knife, bowl, containers. Nothing else lives here.
- Add vertical storage last. A tiered shelf or wall rack goes up only after the prep surface works, so you don't build storage around an untested layout.
Zone Dimensions by Layout
| Layout | Prep Zone Placement | Watch For |
|---|---|---|
| Galley | Across from the sink, at the end of the run | Cart blocking the walkway between counters |
| L-shaped | In the open corner, sink one step away | Corner depth eating into the 22-24 inch surface |
| U-shaped | On the leg opposite the range | Two cooks colliding in the same aisle |
| Studio / open plan | Against a wall, folded away between sessions | Cart drifting into the living area |
The One-Step Rule
If you can't reach the sink from your prep surface without moving your feet, the zone is misplaced. Move the cart six inches closer before adding storage, cheaper than reorganizing the whole kitchen later.
What to Do When You Have No Spare Floor
If tape on the floor shows there's no room for a cart, don't force one. Shift the prep zone onto the counter nearest the sink and move storage up: a tiered shelf plus a board that fits over the sink gives the same three-zone flow without new floor space.
Meal Prep Station Essentials: A Budget-Tiered Equipment Checklist
Start with the basics and add gear only when a task slows you down. A working meal prep station needs four things: a surface, a board, a knife, and containers.
Starter Setup (Under $75)
- Large cutting board, at least 15 by 20 inches
- One chef's knife, 8 inches
- Three to five clear food containers with lids
Mid-Tier and Full Setup
Add these once the basics feel automatic:
- Stackable airtight canisters for dry goods, like the Sinkelle FreshSeal Pantry Storage Canister, which seals with a silicone ring and stacks to save shelf space
- A two-tier countertop shelf, such as the Sinkelle CounterRise 2-Tier Shelf, to lift mugs and jars off the work surface
- A slim rolling rack for narrow gaps, like the Sinkelle FlowCart Storage Rack
| Setup Level | What You Add | Best For |
|---|---|---|
| Starter | Board, knife, containers, bowl | First-time preppers |
| Mid-tier | Airtight canisters, tiered shelf | Weekly batch cooks |
| Full | Slim rolling rack, scraps bin | Cooks prepping 3+ meals |
How to Maximize Kitchen Counter Space During Prep
Clear the counter before you cook, not after. How to maximize kitchen counter space comes down to one rule: nothing lives on the prep surface except what you're using right now.
Sinkelle RollCrest Kitchen Island Cart →

Move these items off the counter permanently:
- Small appliances you use less than twice a week
- Utensil crocks and knife blocks
- Paper towel holders and drying racks
Then stage your ingredients, mise en place: everything chopped, measured, and lined up before heat goes on. In a small kitchen, it's the difference between cooking and chaos.
Small Kitchen Storage Without a Pantry: Where Ingredients Live
Small kitchen storage without a pantry works by going vertical and using gaps. Treat the wall, cabinet doors, and space beside the fridge as storage, but measure each spot before buying a rack.
Measure the Gap Before You Buy the Rack
Narrow-gap racks come in standard widths, and your gap rarely matches. Write these numbers down first:
- Gap width: slim rolling racks typically run 4.5 to 7 inches wide. Measure at the narrowest point, not the widest.
- Gap depth: most slim racks are 18 to 24 inches deep. If your gap is shallower, the rack will stick out past the cabinet face.
- Height clearance: leave 2 inches above the tallest item so you can lift it out without scraping.
Where Each Category Goes
- Dry goods: stackable airtight canisters on an upper shelf or open rack. Square or rectangular canisters waste less shelf space than round ones.
- Narrow gaps: a slim rolling rack beside the fridge or between cabinets, sized to the measurements above.
- Cabinet doors: an over-door rack for lids, foil, and wrap. Keep the weight light, over-door racks stress hinges over time.
Renter Trade-Offs
Every storage option above has a renter cost, usually damage risk and portability, not money:
- Tension rods and over-door racks: no holes, but they can mar paint or bow lightweight cabinet doors.
- Adhesive hooks and strips: removable, but they fail under heat and humidity near the stove.
- Freestanding slim racks: the safest renter choice. No wall contact, no adhesive, and they move with you.
Tie Storage Back to the Prep Workflow
The goal is accessibility, not maximum capacity. If you must move two things to reach the rice, you'll stop using the system within a month. Stand at your prep surface and reach for your three most-used ingredients, if any require a step or shuffle, move it closer.
Food Safety and Storage Workflow During Batch Prep
Batch prep has one hard rule: keep cold food cold and hot food hot. The USDA Food Safety and Inspection Service recommends keeping perishable food out of the temperature danger zone, which is between 40°F and 140°F, and refrigerating cooked food within two hours (USDA food safety guidance on the danger zone).
Build that into your workflow:
- Prep raw vegetables first, then raw meat last
- Use a separate board and knife for raw meat
- Cook, then cool food in shallow containers so it chills faster
- Label each container with the date
- Move finished meals to the fridge within two hours
Cooling is where most home cooks slip. A deep container of hot stew can sit warm in the middle for hours. Spread it into shallow trays instead.
Renter-Friendly Setup Variations for Different Kitchen Layouts
Renters should avoid anything that drills, screws, or touches plumbing. Every setup below uses freestanding or tension-based pieces, so nothing marks the walls.
Match the setup to your layout:
- Galley kitchen: one rolling cart at the end of the run, used as the prep zone
- L-shaped kitchen: a cart in the open corner, with the sink one step away
- Studio or open plan: a folding cart that stores against the wall between uses
For under-sink areas with a garbage disposal or angled pipes, skip cabinet storage entirely. Use a slim rolling rack beside the cabinet instead, where the plumbing can't block it.
Conclusion: Start With One Zone, Not the Whole Kitchen
The hardest part of meal prep in a small kitchen isn't cooking. It's keeping one clear surface free long enough to actually use it.
Pick one zone this week. Measure your walkway, choose a cart or table that fits, and stage only what you need for one batch of meals.
That's where SinkElle comes in.
Get started with SinkElle and turn one cramped corner into a station you'll actually use.
Frequently Asked Questions
What should I keep in a meal prep station?
Keep only what you use every prep session: a cutting board, one chef's knife, a small bowl for scraps, containers for finished portions, and a towel. Everything else, like specialty gadgets or extra knives, belongs in a drawer. A two-tier shelf or a rolling cart with a drawer keeps these items within arm's reach without covering your work surface. If an item hasn't been used in three prep sessions, it's clutter, not equipment.
How do I set up a meal prep station in a small kitchen without a pantry?
Use vertical and gap space instead of floor space. Stack airtight canisters on open shelves or inside cabinets, and slide a slim multi-tier rack into the narrow gap beside the refrigerator. Clear, stackable containers let you see what you have without pulling everything out. Keep only the current week's ingredients in the prep zone and store backup staples higher up or in another room.
What is the 3x4 kitchen rule?
In a small kitchen, you can approximate a workable layout by keeping one continuous 36-inch stretch of counter clear and making sure your rolling cart or prep table can be pushed aside when you need to move through the room.
How can I keep my small kitchen counter clear while cooking?
Work in stages instead of pulling everything out at once. Chop one ingredient, move it to a container, wipe the board, then start the next. Put finished components on a tiered shelf or the cart's lower shelf rather than the counter. A scrap bowl catches peels so they don't spread across your work surface. When you finish a task, put the tool away before starting the next one, and the counter stays usable through the whole session.