


Table of Contents
- Start With a Declutter and Measure Process
- Small Kitchen Storage Ideas That Use Vertical Space
- Kitchen Organization for Renters: No Drilling Required
- How to Organize a Kitchen Without Cabinets
- Under-Sink Kitchen Organization Around Plumbing
- Organize a Tiny Apartment Kitchen by Layout
- Budget Tiers and Maintenance Routines
- Conclusion
- Frequently Asked Questions
Last Updated: October 12, 2026
Start With a Declutter and Measure Process
Learning how to organize a tiny apartment kitchen starts with two steps most people skip: clearing out what you don't use, then measuring what you have. At SinkElle, we've watched countless small kitchens get "organized" into a bigger mess because someone bought bins before they knew their dimensions. The fix takes one afternoon.
The 3-Box Declutter Method
Grab three boxes and label them Keep, Donate, and Trash. Empty one cabinet at a time and sort every item fast. If you haven't used it in a year, it goes. This one pass usually frees up more space than any product you can buy.
Measure Before You Buy Anything
Write down four numbers for every zone you want to fix:
- Cabinet width, height, and depth
- Counter depth from wall to edge
- Distance between counter and upper cabinets
- Sink width at its narrowest point
Keep that list on your phone. It stops you from buying organizers that don't fit.
Small Kitchen Storage Ideas That Use Vertical Space
Small kitchen storage ideas work best when they go up, not out. Walls, cabinet sides, and the space above your fridge are free real estate in most apartments, but not all vertical space is equal. Heat, moisture, and light decide what each zone can safely hold.
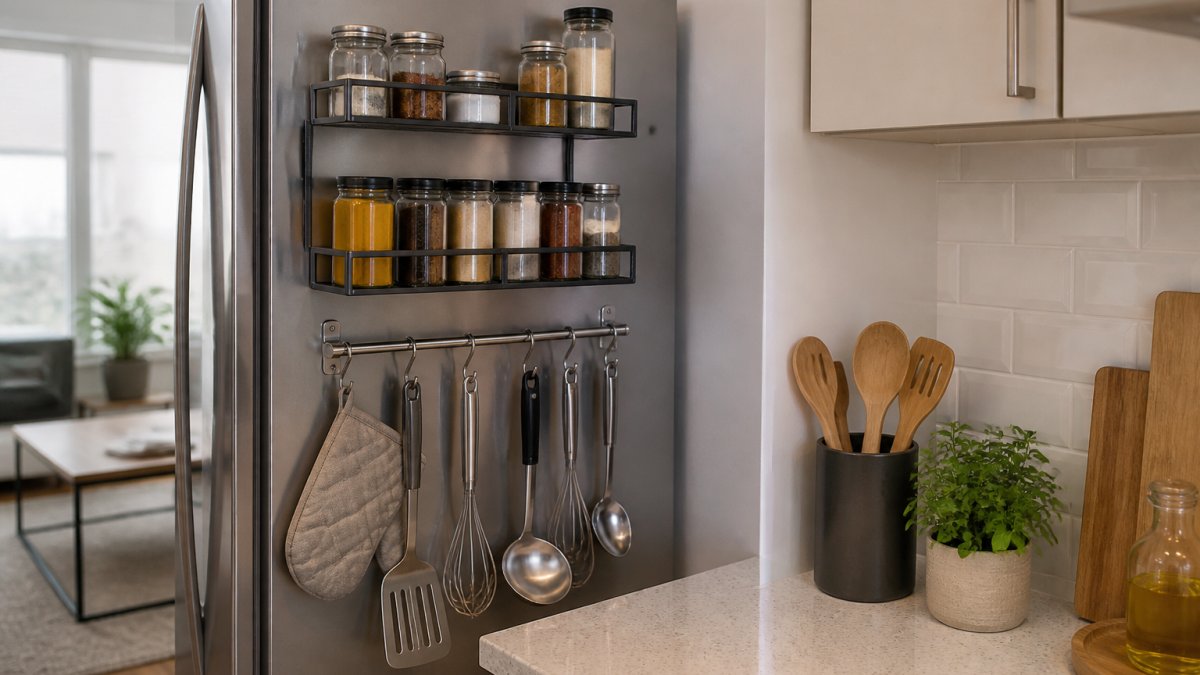
Walls, Rails, and Magnetic Surfaces
A wall-mounted shelf or hanging rail turns blank wall space into storage. Magnetic storage is the renter's secret weapon because it needs no hardware at all. Our Sinkelle Magnetic Refrigerator Storage Shelf ($34.99) attaches straight to a compatible fridge side and holds seasonings, small containers, and cleaning supplies off your counter.

A few rules keep wall storage working:
- Mount rails at least 18 inches above the counter so tall bottles still clear them.
- Keep the rail's bottom edge above the tallest item you plan to hang, not at its midpoint.
- Leave 12 to 15 inches of clear wall beside the stove; grease splatter ruins adhesive and finishes alike.
Above-Cabinet and Above-Appliance Space: What's Safe to Store There
This is the zone most guides gloss over.
What belongs up there:
- Holiday dishes, serving platters, and seasonal bakeware
- Backup pantry stock in sealed, opaque containers (rice, dried beans, pasta)
- Paper goods, foil, and plastic wrap still in their original packaging
- Rarely used small appliances with cords wrapped and secured
What does not belong up there:
- Cooking oils, which oxidize faster with heat and light exposure
- Spices, which lose potency in the same conditions
- Anything in clear glass that you want to keep out of light
- Open bags of flour, sugar, or grains, which invite pests
The heat rule. The space directly above a running refrigerator or a wall oven runs warmer than the rest of the kitchen. The U.S.
The grease rule. Above-cabinet space near a cooktop collects airborne grease. Line the shelf with removable, washable shelf liner and wipe it down monthly. Skip fabric liners, which trap grease and odor.
The reach rule. Anything above 72 inches from the floor is a ladder zone.
The Vertical Zone Map
Think of your kitchen as four stacked zones and assign items by how often you use them:
| Zone | Height from floor | Best for |
|---|---|---|
| Prime reach | 30-60 in | Daily dishes, glasses, cooking tools |
| Easy reach | 60-72 in | Weekly items, backup staples |
| Ladder zone | 72-84 in | Seasonal, holiday, rarely used |
| Top-out | 84 in and up | Non-food, decorative, long-term storage |
Once items are sorted by zone, the wall, rail, and magnetic surfaces fill in the gaps, and nothing ends up stored somewhere it will spoil or fall.
Kitchen Organization for Renters: No Drilling Required
Kitchen organization for renters comes down to one rule: leave no trace. Tension rods, adhesive strips, over-the-door hooks, and magnetic mounts all work without touching your security deposit, but only if you match the mount to the surface, the weight, and the removal plan. Most rental damage charges come from skipping one of those three.
Sinkelle Magnetic Refrigerator Storage Shelf →
Damage-Free Mounting Options and What They Actually Hold
- Tension rods: Best inside cabinets for stacked lids, cutting boards, and baking sheets. They rely on outward pressure, so they only work between two parallel, solid surfaces. Skip them in cabinets with a single thin side panel.
- Adhesive hooks and strips: Good for light tools and towels. Follow the manufacturer's stated weight limit and stay well under it, a hook rated for 5 lb holds far less on a textured or painted surface. Command strips are the most widely available example; their packaging lists surface-by-surface limits.
- Over-cabinet hooks: Hang mugs, towels, or a small cutting board on the door itself. They add no wall contact, which makes them the safest option for painted or wallpapered surfaces.
- Magnetic mounts: Stick to fridge sides and other ferrous metal with zero hardware. They fail on stainless steel that is not magnetic and on any non-metal surface.
- Suction mounts: Work on smooth tile and glass but release with temperature swings. Not reliable in a kitchen that gets steamy.
Surface Compatibility: Test Before You Stick
Adhesive performance depends on the surface, not the hook. A quick compatibility check saves a repair charge:
| Surface | Adhesive holds? | Notes |
|---|---|---|
| Painted drywall | Yes, light loads | Paint may lift on removal if it was applied poorly |
| Glossy tile | Yes | Clean and dry first; best surface for strips |
| Matte or textured tile | Weak | More surface area, less contact |
| Wallpaper | No | Adhesive tears the paper |
| Stainless steel (non-magnetic) | No | Use suction or over-door instead |
| Laminate cabinet doors | Yes, light loads | Test on the inside face first |
The Install Sequence That Prevents Falls
- Clean the surface with rubbing alcohol and let it dry completely.
- Press the strip or mount firmly for the full time the packaging specifies, usually 30 seconds.
- Wait the full cure time before hanging anything. This is typically 1 hour for light loads and up to 24 hours for heavier ones, and it is the single most skipped step.
- Hang the lightest item first and check it after an hour.
- Add weight gradually over the first day.
Removal and Move-Out Restoration
Removing mounts correctly matters as much as installing them:
- Stretch, don't pry. Adhesive strip tabs are designed to stretch straight down and release. Pulling outward can take paint with them.
- Warm stubborn adhesive. A hair dryer on low softens the bond without damaging most finishes.
- Clean residue with rubbing alcohol or a citrus-based adhesive remover, not a scraper.
- Patch and touch up. Keep a small container of spackle and a matching paint sample from your move-in walkthrough. Small nail and adhesive marks are the most common deduction.
- Photograph everything before and after, and compare against your move-in inspection sheet.
How to Organize a Kitchen Without Cabinets
A kitchen without cabinets is not a lost cause. Open shelving, a slim rolling cart, and hanging organizers can replace almost everything a cabinet does. A narrow rolling cart fits the gap beside the fridge and holds pantry items on multiple tiers. Our Sinkelle FlowCart Storage Rack ($30.99) is built for exactly that kind of narrow space.
Hang a multi-purpose rack under a shelf to hold paper towels, cutting boards, and pot lids. The Sinkelle CabinetFlow Hanging Organizer ($44.99) turns dead space under any shelf into real storage without using an inch of counter.

Under-Sink Kitchen Organization Around Plumbing
Under-sink kitchen organization fails when people ignore the pipes. A garbage disposal and angled drain lines eat up the center, so work around them instead of fighting them.
- Use a low, narrow bin on one side of the disposal
- Add a small caddy on the cabinet door for sponges and brushes
- Keep a shallow tray in front for dish soap
- Store cleaning supplies in a caddy you can lift out
Check for leaks before you load anything. One slow drip can warp a cardboard box in a week.
Organize a Tiny Apartment Kitchen by Layout
The right setup depends on your layout. Here is how to approach each common shape.
| Layout | Best Move | Watch Out For |
|---|---|---|
| Galley | Vertical rails on both walls | Blocking the walkway |
| L-shape | Corner carousel or lazy Susan | Dead corner space |
| One-wall | Over-sink rack plus cart | Zero counter room |
| U-shape | Under-cabinet hooks | Crowded corners |
Galley, L-Shape, and One-Wall Kitchens
In a galley kitchen, keep both counters clear and push storage upward. L-shape kitchens live or die by the corner, so a rotating tray earns its spot. In a one-wall kitchen, every inch of counter matters, which is where an over-sink rack helps. Our Sinkelle ExtendDry Retractable Sink Rack ($24.99) adjusts across different sink sizes so dishes and produce drain right over the sink instead of piling up on the counter.

Budget Tiers and Maintenance Routines
You can organize a tiny apartment kitchen at almost any budget. The trick is spending where it saves you the most daily friction.
- Under $30: Tension rods, adhesive hooks, a sink rack
- $30 to $50: A magnetic shelf, a slim rolling cart, a hanging organizer
- $50 and up: Combine two or three pieces for a full system
Cost per use matters more than sticker price. A $25 rack you touch every day beats a $10 bin you forget about. Once your system is in place, spend five minutes each evening putting things back. A quick weekly wipe-down keeps waterproof surfaces looking new, and a monthly check catches clutter before it builds.
Conclusion
A small kitchen stays organized only if the system fits your space and your habits. SinkElle builds minimalist Scandinavian-inspired pieces that make that easy: waterproof materials, tool-free installation, and designs made for tight sink areas. Start with a declutter and a tape measure, then add storage that works around your layout. Shop Now at SinkElle and turn your counter into a space you actually enjoy using.
Frequently Asked Questions
How do I organize a tiny apartment kitchen when I have almost no counter space?
Move storage off the counter and onto vertical surfaces. A magnetic shelf on the side of your refrigerator holds spices and small containers without using counter space, and a retractable rack over the sink gives you a draining surface that disappears when you are done. Free up one counter zone for food prep only, and keep everything else on walls, cabinet doors, or inside cabinets.
What are the best small kitchen storage ideas for renters who cannot drill into walls?
Rely on magnetic mounting, tension rods, over-the-door hooks, and freestanding carts. A magnetic refrigerator shelf attaches to compatible metal surfaces with no drilling, and a slim rolling cart slides into the gap between your fridge and counter. These options remove cleanly at move-out and leave no holes, so you keep your deposit and your storage.
How do you organize a kitchen without cabinets?
Without cabinets, you build storage from open shelving, hanging rails, stackable bins, and carts. Use a wall-mounted shelf or magnetic surface for everyday items, a hanging organizer under an existing shelf for paper towels and cutting boards, and a multi-tier rolling cart for pantry goods. Group items by how often you use them, keeping daily items at eye level and occasional items higher or lower.
What should I do with the space under my sink if the plumbing gets in the way?
Work around the pipes instead of fighting them. Measure the clear width on each side of the disposal and drain line, then use narrow bins or a slim organizer that fits those gaps. Keep cleaning supplies and dish items in the usable zones, and avoid storing food near plumbing where leaks or moisture could cause problems.