


Table of Contents
- Why Kitchen Sponges Develop Odor
- The Best Way to Sanitize Kitchen Sponges
- How to Dry Kitchen Sponges Properly
- Storage Solutions to Prevent Musty Odor
- How Often to Replace Kitchen Sponges
- Material-Specific Care for Different Sponge Types
- Frequently Asked Questions
Last Updated: October 2, 2026
Why Kitchen Sponges Develop Odor
A sponge's cellulose structure traps water, which doesn't dry quickly on its own.
Food residue feeds bacteria, and the combination of moisture, food, and warmth creates conditions where bacterial colonies produce the musty odor.
The sink environment amplifies bacterial growth: sponges sit near standing water and are exposed to splashing and contamination from dirty dishes.
The Best Way to Sanitize Kitchen Sponges
Sanitizing removes bacteria and mildew by using heat, chemicals, or natural antimicrobial agents, regular rinsing alone won't eliminate pathogens.
The most effective methods use high heat or proven disinfectants: microwave sanitizing kills microorganisms with heat, bleach destroys bacterial cell walls, and natural alternatives like vinegar and baking soda are less powerful but gentler.
Choose a method based on your sponge material and preference. Cellulose sponges handle most methods well. Microfiber sponges need gentler treatment. Natural sea sponges require careful handling to avoid damage.
Microwave Sanitizing Method
Microwave sanitizing is the fastest way to disinfect a sponge, killing most bacteria and mildew in two minutes by reaching temperatures that denature bacterial proteins.
Here's how to do it:
- Rinse the sponge thoroughly with hot water to remove visible debris
- Squeeze out excess water (the sponge should be damp, not soaking)
- Place the sponge on a microwave-safe plate
- Microwave on high for 2 minutes
- Let it cool for 30 seconds before handling
- Check that the sponge is hot throughout before use
Microwaving reaches temperatures well above 140°F, killing most pathogens effectively without chemicals.
Microwaving doesn't prevent future bacterial growth, so repeat every 2-3 days and dry the sponge properly between uses.
Bleach Solution Approach
Bleach is a powerful disinfectant that kills pathogens by breaking down bacterial cell walls without damaging the sponge material.
Mix a bleach solution using this ratio:
- 1 teaspoon of bleach per 1 quart of water
- Soak the sponge for 5-10 minutes
- Rinse thoroughly under running water
- Squeeze out excess water and let dry completely
The bleach solution penetrates the sponge's porous structure, reaching bacteria deep inside the cellulose material.
Bleach is more effective than vinegar or baking soda for heavy contamination and kills mold spores, but the smell can linger and repeated use may weaken fibers.
Natural Alternatives: Vinegar and Baking Soda
White vinegar and baking soda offer gentler disinfection: vinegar's acidity inhibits bacterial survival, and baking soda absorbs odors with mild antimicrobial properties.
Vinegar method:
- Soak the sponge in undiluted white vinegar for 30 minutes
- Rinse thoroughly with water
- Squeeze out excess liquid
- Air dry completely
Baking soda method:
- Sprinkle baking soda directly onto a damp sponge
- Let it sit for 15-20 minutes
- Rinse thoroughly with water
- Squeeze and air dry
These methods are safer for sensitive skin and leave no chemical residues, but are less effective than heat or bleach for stubborn pathogens.
Combine both methods for better results: soak in vinegar first, then sprinkle baking soda to tackle bacterial growth and odor simultaneously.
How to Dry Kitchen Sponges Properly
Drying is just as important as sanitizing. A wet sponge will smell again within hours, and inadequate drying allows pathogens to survive and multiply, creating cross-contamination risk.
Why Moisture Enables Pathogen Survival
Bacteria require moisture to survive. Pathogens like Salmonella, E. coli, Staphylococcus aureus, and Listeria thrive in moist cellulose material. A sponge wet for more than 12 hours develops bacterial populations exceeding 1 billion cells per square inch. Thorough drying removes the moisture pathogens need.
Air Circulation as the Primary Drying Mechanism
Air circulation is key to effective drying. Moving air carries away water vapor through evaporation, while still air becomes saturated and cannot absorb additional moisture. Sponges dry faster near fans, open windows, or in well-ventilated kitchens.
Squeeze the sponge firmly after each use to remove excess water. Lay it flat on a rack or caddy with open sides to allow air circulation around the entire surface, rather than standing it upright where moisture traps at the bottom.
Drying Time Variables and Humidity Factors
Drying typically takes 6-12 hours depending on humidity, temperature, and air circulation. Humid climates (above 60%) extend drying to 18-24 hours, while dry climates (below 40%) reduce it to 4-6 hours. A sponge laid flat on a sloped caddy dries 40% faster than one standing upright; hanging vertically on a hook dries fastest.
UV Disinfection During Drying
UV rays kill bacteria naturally through DNA damage. Direct sunlight reduces bacterial populations by 90% or more within 2-3 hours, providing both evaporative drying and UV disinfection. Position your sponge where it receives at least 2-3 hours of direct sunlight daily, or near a window with a fan if sunlight is limited.
Monitoring Dryness and Preventing Regrowth
A sponge is fully dry when it feels slightly stiff and releases no water when squeezed. Once dry, bacteria cannot immediately recolonize, but growth resumes when you use the sponge. Daily sanitizing combined with thorough drying is more effective than occasional deep sanitizing.
Sinkelle FlexiDrain Sink Caddy →
Storage Solutions to Prevent Musty Odor
Where you store your sponge matters as much as how you dry it. Poor storage undoes all your sanitizing and drying work. The wrong storage location creates conditions for bacterial regrowth within hours.
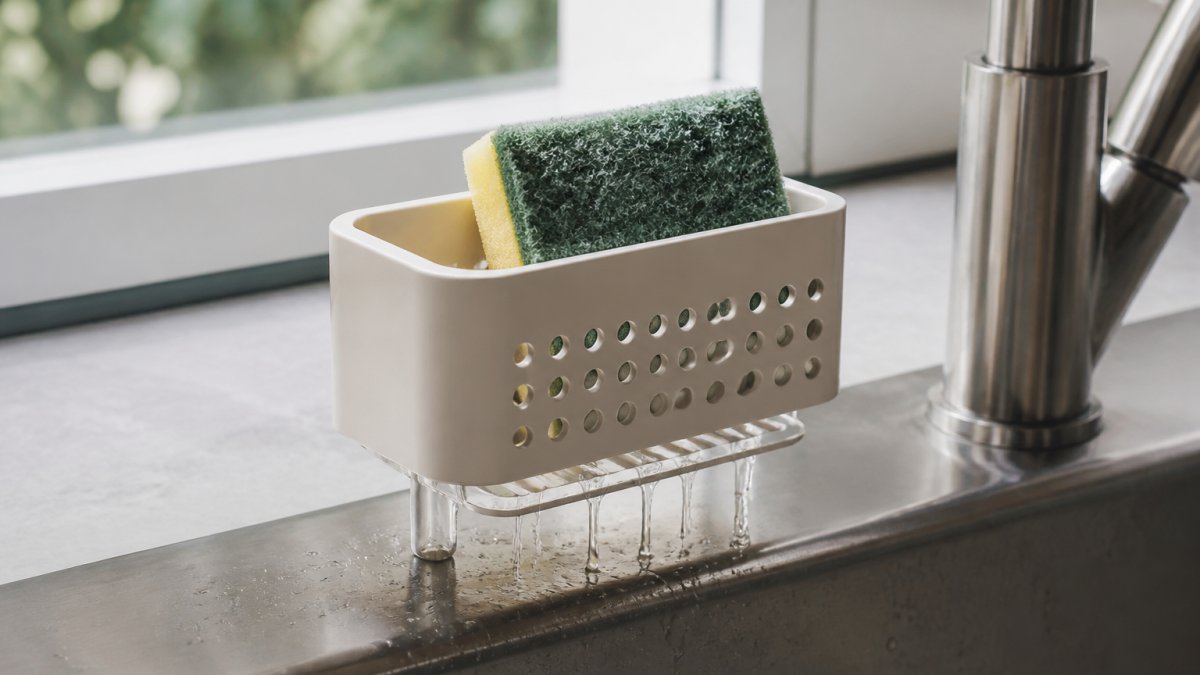
Never store a sponge in a closed drawer, cabinet, or container, dark, enclosed spaces trap moisture where bacteria thrive, causing odor within 24 hours.
The Science Behind Airflow and Drainage
Bacterial growth accelerates in still, moist environments. Closed storage prevents water evaporation, allowing pathogens like Salmonella, E. coli, and Staphylococcus aureus to reach 10 billion per square inch within 48 hours. Proper airflow promotes evaporation and prevents moisture accumulation.
Effective Storage Options by Material Type
Different sponge materials benefit from different storage approaches:
Cellulose sponges: Store in an open caddy with drainage holes positioned above the sink basin. Elevation is critical to prevent reabsorbing standing water. Position near a window or well-ventilated area.
Microfiber sponges: Use wall-mounted suction cup holders with open sides or hang vertically on hooks. Avoid enclosed magnetic strips or closed containers.
Natural sea sponges: Store in a breathable mesh bag or open rack, never sealed in plastic.
Silicone sponges: Use standard open caddies. They dry quickly and tolerate less airflow than cellulose, but ventilation still prevents odor.
Storage Solutions That Promote Drainage and Ventilation
The best storage solutions provide drainage and ventilation: sink caddies with open sides and drainage holes, wall-mounted suction cup holders, over-the-sink caddy racks, hooks near a window, elevated dish rack sections, or vertical magnetic strips. Avoid horizontal magnetic strips and closed containers.
Environmental and Economic Trade-offs of Storage Choices
Storage decisions affect both odor prevention and environmental impact. Frequent sponge replacement due to poor storage creates waste, the average household discards 52 sponges per year.
The key is choosing a solution that provides airflow from all directions and positions the sponge away from standing water. Avoid anything that traps moisture or blocks air circulation.
How Often to Replace Kitchen Sponges
Even with perfect care, sponges eventually need replacing.
Replace your sponge when it shows these signs:
- Persistent odor that doesn't improve with sanitizing
- Visible mold or dark spots that won't wash away
- Sponge material breaking down or falling apart
- Discoloration that deepens despite cleaning
- Sponge feels slimy even after sanitizing
The cellulose material degrades over time. Repeated sanitizing, squeezing, and scrubbing wear down the fibers.
Some people replace sponges weekly for maximum hygiene. Others stretch them to 4-6 weeks.
Track when you sanitize. If you're sanitizing more than twice per week, the sponge probably needs replacing soon.
Material-Specific Care for Different Sponge Types
Different sponge materials require different care approaches.
Cellulose sponges: These are the most common kitchen sponges.
Microfiber sponges: These are gentler on dishes but more delicate.
Natural sea sponges: These are expensive and require careful maintenance.
Silicone sponges: These are non-porous and resist bacterial growth better than traditional sponges.
Bamboo fiber sponges: These are eco-friendly and biodegradable.
Kitchen sponges smell because they trap moisture where bacteria thrive. Sanitizing kills existing bacteria, but proper drying and storage prevent regrowth. The most effective approach combines regular disinfection with excellent airflow. Microwave sanitizing works fastest. Bleach solutions work strongest. Natural alternatives work gentler. Whichever method you choose, pair it with a storage solution that promotes drainage and ventilation. SinkElle's FlexiDrain Sink Caddy provides exactly that, keeping your sponge organized, dry, and odor-free. When your sponge stops responding to sanitizing, replace it. Fresh sponges work better and smell cleaner. With these practices, you'll keep kitchen sponges from smelling and maintain a hygienic sink area that looks as clean as it functions.

Frequently Asked Questions
What causes that mildew smell in kitchen sponges?
Bacterial growth and mildew thrive in moist, porous materials. Kitchen sponges trap food residue, grease, and moisture, creating an ideal environment for microorganisms to multiply. The cellulose structure of most sponges retains water even after rinsing, and without proper airflow and drying, pathogens produce the musty odor. Sanitizing regularly and ensuring complete drying between uses prevents biofilm buildup that causes the smell.
How often should you replace a kitchen sponge?
Replace your sponge every 1-2 weeks with regular use, or sooner if it develops persistent odor despite sanitizing. High-traffic kitchens may need weekly replacement. However, once a sponge shows visible mold, deterioration, or odor that won't disappear after sanitizing, it's time to discard it and use a fresh one for food safety.
Can I microwave my dish sponge to sanitize it?
Yes, the microwave method is one of the most effective ways to sanitize a sponge. Wet your sponge thoroughly, place it in the microwave, and heat on high for 2 minutes. The heat kills most pathogens and bacteria. Let it cool before handling. This method works best for cellulose sponges but avoid microwaving sponges with metal scrubbing pads. For best results, sanitize your sponge this way 2-3 times per week to prevent odor-causing bacterial growth.
What's the environmental impact of frequently replacing sponges?
Frequent replacement still generates waste. To reduce environmental impact, sanitize and reuse your sponge as long as possible. Store it in a well-ventilated caddy like the Sinkelle FlexiDrain Sink Caddy to maximize its lifespan through proper drying and airflow, reducing how often you need to replace it.