


Table of Contents
- Why Corner Cabinet Pull Out Shelves Solve the Blind Corner Problem
- Measuring Corner Cabinets for Pull-Outs: Getting the Numbers Right
- Best Tools for Cabinet Shelf Installation
- Choosing the Right Drawer Slides for Corner Cabinets
- Step-by-Step: Mounting Slides and Building the Drawer Box
- How Long Does It Take to Install Pull-Out Shelves?
- Retrofitting vs. New Construction: What to Know Before You Start
- Maintenance, Lubrication, and Keeping Your Pull-Outs Working
- Frequently Asked Questions
Last Updated: September 22, 2026
Why Corner Cabinet Pull Out Shelves Solve the Blind Corner Problem
A blind corner cabinet wastes more usable kitchen space than almost any other feature in the room. The back half sits in darkness, and anything pushed there is effectively gone. Learning how to install pull out shelves in corner cabinets fixes that problem directly: the shelf slides toward you, so the deep corner becomes reachable instead of dead.
Measuring Corner Cabinets for Pull-Outs: Getting the Numbers Right
Measuring corner cabinets for pull-outs is the step that decides whether your installation works or fails. Get these numbers wrong and the slide will bind, the drawer will hit the door, or the whole unit will not fit.
Measuring the Cabinet Opening and Interior Depth
Start with a measuring tape and a pencil. Record four numbers for every shelf position:
- Interior width: Measure side to side at the back of the cabinet, not the front.
- Interior depth: Measure from the back wall to the inside edge of the face frame.
- Opening height: Measure between shelves, top to bottom.
- Clearance to the door: Measure how far the door swings and where it stops.
Accounting for Face Frame vs. Frameless Cabinet Carcass
Face frame cabinets have a narrow wooden frame around the opening. Frameless cabinets, sometimes called European style, have no frame at all.
This difference changes your mounting approach:
| Cabinet Type | Mounting Method | Clearance Note |
|---|---|---|
| Face frame | Side-mount with spacer blocks | Frame reduces usable width |
| Frameless | Side-mount directly to carcass | Full interior width available |
| Face frame, tight space | Bottom-mount slides | Avoids frame interference |
Best Tools for Cabinet Shelf Installation
The best tools for cabinet shelf installation are a measuring tape, a power drill, a level, and a small combination square. You do not need a full workshop. A basic drill and a steady hand cover most of the job.
Essential Measuring and Marking Tools
- Measuring tape: A 16-foot tape with a locking mechanism.
- Combination square: For marking 90-degree lines on the cabinet wall.
- Pencil: A carpenter's pencil holds a sharper line than a standard one.
- Painter's tape: Wrap it around your drill bit to mark depth.
- Level: A 9-inch torpedo level fits inside a cabinet.
Drilling, Mounting, and Leveling Equipment
- Power drill: A cordless 18-volt drill handles pilot holes and screws.
- Pilot hole bits: Match the bit to your screw shank size.
- Spacer blocks: Scrap wood cut to the thickness you need behind the slide.
- Installation template: Most slide kits include one. Use it.
- Screwdriver: A manual driver gives better feel for the final tighten.
A common mistake is skipping the pilot hole. Cabinet carcasses are often particle board or plywood, and both split easily. Drill a pilot hole slightly smaller than your screw shank every time.
Choosing the Right Drawer Slides for Corner Cabinets
Full-extension, soft-close slides are the best choice for most corner cabinet pull-outs. Full extension brings the tray completely out of the cabinet, and soft-close prevents the slam that damages the mechanism over time.
Full-Extension vs. Soft-Close Slides
Full-extension slides let the drawer travel its full length out of the cabinet. For a blind corner, this matters more than anywhere else. A three-quarter extension slide leaves the back of the tray stuck inside the cabinet, which defeats the purpose.
Weight Capacity and Hardware Compatibility
Slide load capacity is rated in pounds per pair. Match the rating to what you plan to store.
- Light loads (under 30 lbs): Spices, small containers, baking sheets.
- Medium loads (30-75 lbs): Pots, pans, mixing bowls, canned goods.
- Heavy loads (75 lbs and up): Cast iron, large appliances, bulk storage.
Compatibility matters too. Check three things before you buy:
- Slide length: Must match or be shorter than your cabinet depth.
- Mounting type: Side-mount, bottom-mount, or under-mount. Match your cabinet.
- Side clearance: Most side-mount slides need a half inch on each side.
Step-by-Step: Mounting Slides and Building the Drawer Box
Mounting slides and building the drawer box takes about 45 minutes per shelf for a first-timer. The order matters: brackets and slides go in first, then the box gets built to fit the slides you installed.
Sinkelle 2 SlideNest Organizer →
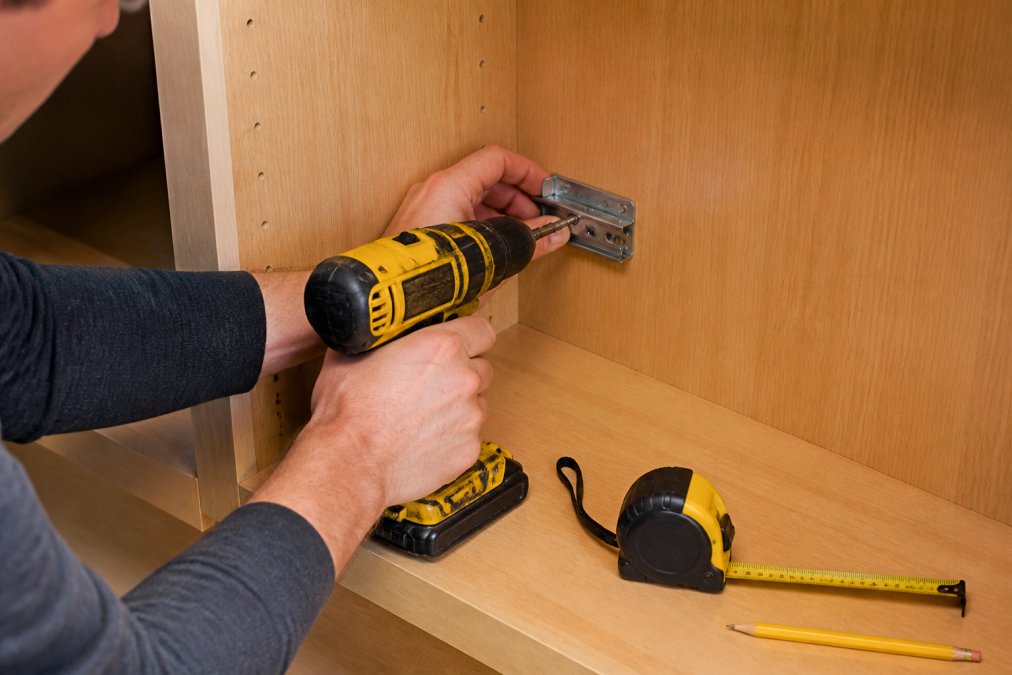
Installing the Mounting Brackets and Slides
- Mark the slide height on both cabinet walls with your combination square.
- Check the marks with a level. Adjust until both sides match.
- Drill pilot holes at each mounting screw location.
- Attach the mounting bracket to the cabinet wall with screws.
- Clip or screw the cabinet member of the slide to the bracket.
- Pull the slide out fully and confirm it travels without binding.
If you are working with a face frame, install a spacer block behind the bracket first. The block pushes the slide inward so the drawer box clears the frame.
Assembling and Securing the Drawer Box
Build the box to the interior width you measured, minus the slide clearance on each side. A simple box needs four sides and a bottom.
- Cut the front and back panels to the interior width.
- Cut the side panels to your chosen depth.
- Drill pilot holes and assemble with screws or dowels.
- Attach the bottom panel to the box frame.
- Mount the drawer member of the slide to the box side.
- Set the box onto the cabinet slides and push until it clicks or seats.
How Long Does It Take to Install Pull-Out Shelves?
Installing pull-out shelves takes about 45 minutes per shelf for a first-time installer and 20 to 30 minutes per shelf once you have done a few. A single corner cabinet with two shelves runs roughly 90 minutes from start to finish.
The time breaks down like this:
| Phase | First-Time Estimate | Experienced Estimate |
|---|---|---|
| Measuring and marking | 15 minutes | 5 minutes |
| Mounting slides | 20 minutes | 10 minutes |
| Building the drawer box | 25 minutes | 10 minutes |
| Alignment and testing | 10 minutes | 5 minutes |
Retrofitting vs. New Construction: What to Know Before You Start
Retrofitting pull-out shelves into an existing cabinet is harder than installing them during new construction. In new construction, you mount slides to a bare carcass with full access. In a retrofit, you work around existing shelves, plumbing, and a finished cabinet interior.
Here is what changes in a retrofit:
- Access: You reach through a narrow opening instead of an open frame.
- Existing holes: Old shelf pin holes can interfere with new mounting screws.
- Plumbing and wiring: Under-sink cabinets often have pipes in the slide path.
- Shelf removal: You may need to remove fixed shelves to create space.
Maintenance, Lubrication, and Keeping Your Pull-Outs Working
Pull-out shelves need very little maintenance, but the small amount they do need extends their life by years. Most failures come from grit in the slide track or a loose mounting screw, not from worn-out hardware.
A simple maintenance routine:
- Monthly: Wipe the slide track with a dry cloth to remove dust and crumbs.
- Every six months: Check the mounting screws and tighten any that have loosened.
- Yearly: Apply a dry lubricant to the slide mechanism. Skip wet oils, which attract dust.
- As needed: Re-level the drawer box if it starts to rub.
Frequently Asked Questions
How do you measure a corner cabinet for a pull-out shelf?
Measure the cabinet opening width at the front, then measure the interior width at the back where the slides will mount. For blind corners, measure the depth from the face frame to the back wall and note any plumbing or obstructions. Account for face frame or frameless construction, as this determines whether you need side-mount or bottom-mount slides. Always measure twice and subtract at least 1/2 inch from the interior width to allow clearance for slide travel and alignment.
Can I install pull-out shelves without professional help?
Yes, most homeowners can install pull-out shelves with basic tools like a measuring tape, power drill, and level. The key is accurate measuring and choosing slides that match your cabinet type. If your cabinet has unusual plumbing angles or a garbage disposal, check clearance first.
What are common problems with corner cabinet organizers?
The most frequent issues are insufficient clearance for full-extension slides, misaligned mounting brackets, and weight capacity overload. Blind corners can also block slide travel if the cabinet depth is too shallow. Another problem is hardware incompatibility: side-mount slides may not fit frameless cabinets without spacer blocks. Soft-close mechanisms can fail if not lubricated. Always verify load capacity and measure cabinet interior width before buying, and use pilot holes to prevent wood splitting during installation.
Are pull-out corner cabinet organizers worth the investment?
They are worth it if you use your corner cabinet daily and struggle to reach items stored in the back. Pull-out shelves improve cabinet accessibility, reduce clutter, and protect cookware from damage. For renters or those wanting a tool-free option, a ready-made organizer like the Sinkelle 2 SlideNest Organizer ($55.99) offers a 2-tier pull-out system with a durable metal frame that fits under sinks and inside cabinets. It requires no drilling and can be removed without marks, making it ideal for temporary setups.