


Table of Contents
- Why Your Kitchen Sink Area Gets Messy (and What to Fix First)
- Build a DIY Kitchen Sink Organizer Without Buying Anything
- No-Drill Kitchen Sink Organizer Options That Renters Can Use
- Under Sink Organization Ideas for Awkward Plumbing and Small Cabinets
- How to Declutter Under the Kitchen Sink in Four Steps
- Stop Moisture, Mold, and Leaks Before They Start
- Keeping the Dish-Drying Area Tidy Every Day
- Frequently Asked Questions
Last Updated: October 19, 2026
Why Your Kitchen Sink Area Gets Messy (and What to Fix First)
Most messy kitchen sink areas aren't caused by laziness. They're caused by design.
A kitchen sink organization system is a set of dedicated spots for soap, sponges, cloths, and cleaning supplies.
Here's the good news. You can fix most of it this weekend, often for free. Below, we'll show you exactly how to build, declutter, and maintain a sink area that stays tidy.
The three things that create sink clutter
Almost every messy sink traces back to one of these:
- No drying spot. Wet sponges and cloths get left on the counter.
- No landing zone. Soap, brushes, and scrubbers live wherever they get set down.
- No barrier against water. Splashes spread, then everything nearby gets damp and sticky.
Fix those three and the clutter mostly stops. The rest of this guide walks through each one.
Build a DIY Kitchen Sink Organizer Without Buying Anything
You can build a working sink organizer from items already in your home. The trick is choosing materials that drain and dry, not just contain. A DIY kitchen sink organizer is any arrangement that holds soap, sponges, and cloths off the counter while letting water escape. Below are three builds with real dimensions, materials, and steps so you can finish each in under 15 minutes.
Build 1: The mason jar soap rest (5 minutes, $0)
Materials: one wide-mouth mason jar ring (the screw band, not the flat lid), one wide-mouth jar, a rubber band.
Steps:
- Invert the screw band so the open center faces up and the lip rests on the counter.
- Set the bar of soap across the open center. Water drains through the hole instead of pooling under the bar.
- If the band slides, stretch a rubber band around its outer edge for grip.
- Keep the jar nearby to hold the band when you wipe the counter.
Why it works: the open center gives the soap full airflow on the bottom face, which is the side that usually stays wet and turns soft.
Build 2: The wire basket caddy (10 minutes, $0)
Materials: one small wire basket (roughly 8 x 5 x 3 inches works for most sinks), two small adhesive hooks or suction hooks, a zip tie.
Steps:
- Measure the gap between your faucet base and the sink edge. The basket must clear the faucet handle swing.
- If the basket has a handle, bend it flat with pliers so the basket sits level.
- Attach two hooks to the backsplash or sink edge, spaced to match the basket's top rim.
- Hang the basket so its bottom sits about 1 inch above the counter. Drips fall to the counter, not into the basket.
- Optional: zip-tie a small sponge to the basket side so it dries vertically.
Trade-off: wire baskets rust over time in a wet zone. A coated or plastic-coated basket lasts longer; check the coating before you commit.
Build 3: The tension-rod towel rail (10 minutes, $0-$5)
Materials: one small tension rod (12 to 18 inches, the kind used for curtains), two S-hooks or binder clips.
Steps:
- Measure the inside width of the sink cabinet opening or the space between two upper cabinet stiles above the sink.
- Extend the tension rod to fit and twist to lock it in place.
- Hang S-hooks or clip dishcloths directly to the rod.
- Keep the rod at least 6 inches above the counter so wet cloths don't touch the surface.
Why it works: hanging a cloth doubles its drying surface compared with folding it on a counter, and the rod needs no screws.
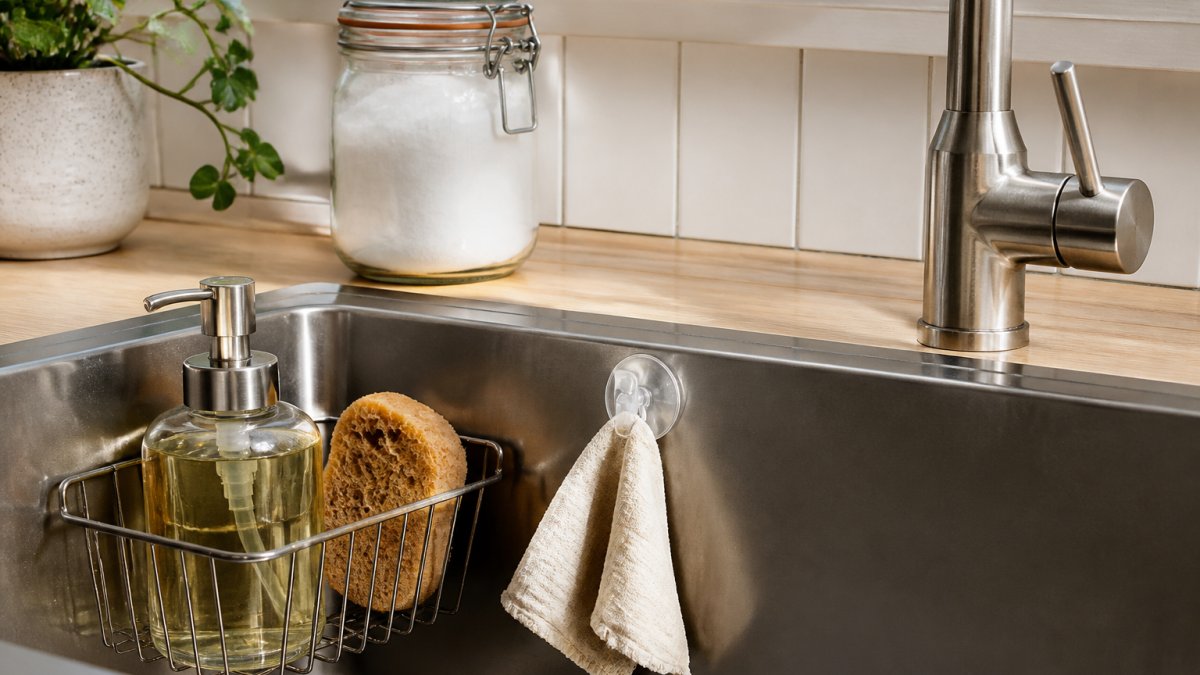
No-purchase fixes for soap, sponges, and towels
Match the fix to the item:
- Dish soap: Decant into a small pump bottle. Fewer bottles, less counter clutter. A 12-ounce pump bottle fits most sink corners better than the original 32-ounce jug.
- Sponges: Rest them on a slotted surface, never flat on the counter. Air needs to reach both sides. A small wire rack or a repurposed cooling rack works.
- Dishcloths and towels: Hang them, don't stack them. A towel hook above the sink works better than a drawer. Rotate two cloths so one dries while the other is in use.
The rule is simple. Anything that gets wet needs airflow. Anything that sits in a puddle will smell within days.
No-Drill Kitchen Sink Organizer Options That Renters Can Use
Renters need sink organization that leaves no marks. A no-drill kitchen sink organizer solves this by relying on suction, tension, or weight instead of screws.
Three renter-safe approaches:
- Suction-cup caddies. These grip smooth countertops or the sink edge and lift right off.
- Over-sink racks. Tension-style racks rest across the basin and hold dishes or produce.
- Freestanding holders. A weighted or flat-bottomed holder needs no fixing at all.
If you want a ready-made option, our Sinkelle FlowRack Pro Caddy uses suction-cup feet with no drilling and a built-in spout that drains straight back into the sink.

For a freestanding pick, the Sinkelle DryStand Utensil Holder sits on the counter with a removable drain tray. No tools, no wall damage.
Under Sink Organization Ideas for Awkward Plumbing and Small Cabinets
Under sink organization ideas fail when they ignore the pipes. The cabinet isn't a box, it's an obstacle course of plumbing and a garbage disposal. The fix is to measure first, choose storage that fits the gaps, and protect the cabinet from the moisture that comes with the territory.
Sinkelle HookNest Kitchen Sponge Holder →
Start by measuring. Note the height from shelf to pipe, the width between the cabinet walls, and where the drain trap hangs lowest. Then choose storage that fits around those gaps, not through them.
Working around a garbage disposal and U-shaped pipes
The U-shaped pipe under most sinks eats the center of the cabinet. Work around it:
- Use the sides. Narrow bins slide into the gaps beside the disposal. Measure the gap first; many cabinets give 6 to 9 inches on each side.
- Go low in front. A shallow drawer unit fits in front of the trap. Keep the drawer under 6 inches tall so it clears the pipe.
- Add a lazy Susan. A round turntable spins around the pipe instead of fighting it. A 10- to 12-inch turntable fits most cabinets.
Clear containers help here. You can see what's inside without pulling everything out.
| Under-Sink Zone | Best Storage | Why It Works |
|---|---|---|
| Beside the disposal | Narrow bins | Fits tight gaps |
| In front of the trap | Shallow drawer unit | Clears the U-pipe |
| Around the pipes | Lazy Susan | Spins past obstacles |
| Back corners | Stackable clear boxes | Uses dead space |
| Cabinet floor | Waterproof mat | Catches leaks |
Layout-specific advice: small cabinets, double sinks, and renters
Generic tips don't fit every cabinet. Use these decision rules:
- Small cabinet (under 24 inches wide): skip bins and use a single stackable drawer unit plus a lazy Susan. Vertical stacking beats horizontal spread.
- Double sink: the plumbing often splits into two traps. Measure both sides separately and keep the center clear for the disposal.
- Renters: avoid adhesive liners that leave residue. Use a removable waterproof mat and freestanding bins so you can take everything with you.
Stop moisture, mold, and leaks under the sink
Moisture is the quiet cause of most under-sink mess. Standing water warps shelves, feeds mold, and makes everything feel grimy. Three layers of defense work best:
- Line the cabinet floor. A waterproof, washable mat protects the wood and makes leaks visible. Choose one with a raised lip so a slow drip stays contained.
- Check the pipes monthly. Run your hand along the trap and supply lines. A damp spot now is a cheap fix later. Look for rust rings or white mineral crust, both early leak signs.
- Dry the cabinet after every spill. Wipe up splashes from stored bottles before closing the door. A cabinet that stays damp will smell within weeks.
Safe and reachable storage
Placement matters as much as containment:
- Daily items at the front. Soap, sponges, and dish towels belong within arm's reach of the sink.
- Chemicals in a latched bin. Keep drain cleaner and harsh sprays in a bin with a child-resistant latch, separated from dish soap and sponges.
- Heavy items low. Store large refill jugs on the cabinet floor, not on a shelf where they can fall.
How to Declutter Under the Kitchen Sink in Four Steps
Learning how to declutter under the kitchen sink takes about 30 minutes. The process is the same whether your cabinet is packed or nearly empty.
- Empty everything out. Pull it all onto a towel. You can't organize what you can't see.
- Sort into three piles. Keep, relocate, and toss. Most people relocate more than they expect.
- Clean and check for leaks. Wipe the cabinet dry and look for drips or rust. Fix leaks before storing anything.
- Put back only daily items. Store refills and seasonal supplies elsewhere. Keep the cabinet for what you actually reach for.
Stop Moisture, Mold, and Leaks Before They Start
Moisture is the quiet cause of most sink-area mess. Standing water warps shelves, feeds mold, and makes everything feel grimy.
Three layers of defense work best:
- Catch splashes at the source. A sloped mat around the faucet sends drips back into the basin.
- Line the cabinet floor. A waterproof mat protects the wood and makes leaks visible.
- Dry the tools daily. A sponge that never dries is a sponge that smells.
Our Sinkelle DryFlow Splash Mat uses a sloped silicone surface to channel water back into the sink. The Sinkelle AquaShield Faucet Guard does the same job right at the faucet base.


Check under the sink monthly. Run your hand along the pipes. A damp spot now is a cheap fix later.
Keeping the Dish-Drying Area Tidy Every Day
The dish-drying area is where good organization goes to die. Dishes pile up, the rack fills, and the counter disappears.
The fix is a two-rule system. First, the drying area gets cleared every night. Second, nothing dries on a flat surface.
A rack that drains over the sink beats a rack that drains onto the counter. Our Sinkelle ExtendDry Retractable Sink Rack adjusts across different sink sizes and lets water fall straight through. For a countertop setup, the Sinkelle DryStone Quick-Dry Kitchen Mat absorbs drips in seconds so the counter stays dry.
A simple daily routine:
- Morning: rinse and wring the sponge.
- Evening: empty the rack and wipe the counter.
- Weekly: wash the mat and check the cabinet for damp.
A tidy sink isn't about willpower. It's about a system that does the work for you.
Frequently Asked Questions
How do I organize the area around my kitchen sink without spending much?
Start with what you already own. A small mug or bowl can hold dish soap and a sponge, and a suction hook on the sink edge gives dishcloths a place to dry. Group items by how often you use them: daily sponges and soap stay on the counter, while backup scrubbers and cleaning supplies go under the sink. If you want a dedicated holder, the Sinkelle HookNest Kitchen Sponge Holder ($29.99) keeps sponges, scrubbers, and cloths in one spot with a built-in hanging hook.
What should I keep under the kitchen sink?
Keep only items you use weekly: dish soap refills, sponges, scrubbers, a small cleaning caddy, and trash bags. Store them in clear containers or stackable bins so you can see what's there without digging. Avoid storing food, paper goods, or anything sensitive to moisture directly on the cabinet floor. A waterproof liner protects the cabinet base from drips and small leaks, and it makes the space easier to wipe clean during your monthly check.
How can I keep dish soap and sponges organized by the sink?
Give each item one dedicated spot. A countertop caddy with a drainage spout keeps sponges from sitting in water, which is what causes that sour smell. The Sinkelle FlowRack Pro Caddy ($39.99) has a built-in spout that drains back into the basin, a towel bar for your dishcloth, and suction-cup feet so no drilling is needed. Pair it with a splash mat under the faucet to catch drips before they reach the counter.
How often should I clean and reorganize the area under my kitchen sink?
Wipe the cabinet floor and check for leaks once a month, and do a deeper declutter every three months. Pull everything out, toss expired or unused products, wipe the liner, and put back only what you used since the last check. If you spot warped wood, peeling liner, or a musty smell, check the pipes and drain connection right away. A quarterly reset takes about 15 minutes and prevents the slow buildup that turns a small mess into a weekend project.
A messy sink area rarely fixes itself, and the clutter usually comes back within a week. SinkElle builds minimalist, Scandinavian-inspired organizers that make the tidy version the easy version. Our waterproof materials, tool-free installation, and space-optimized designs fit tight apartment kitchens and awkward under-sink layouts alike. Get started with SinkElle and turn your sink area into a space that stays organized.