


Table of Contents
- 1. Separate Lids From Containers for Easy Access
- 2. Stack Containers by Size to Maximize Vertical Space
- 3. Store Lids Vertically With a Food Container Lid Organizer
- 4. How to Organize Food Storage Containers and Lids by Drawer
- 5. Pan Lid Storage Ideas Using Cabinet Space
- 6. Declutter and Match Your Container Sets First
- 7. Maintain Your System Long-Term
- Frequently Asked Questions
Last Updated: October 17, 2026
Cluttered kitchen cabinets waste time and space. The best ways to store kitchen lids and containers transform chaos into order, making mealtime prep faster and your kitchen look intentional. Below, we'll show you exactly how to separate, stack, and store your food storage containers and lids so everything stays visible and accessible.
1. Separate Lids From Containers for Easy Access
The single biggest mistake is storing lids attached to containers. Mismatched sets take up twice the space, and finding the right lid becomes a frustrating hunt every time you grab a container. Separating them immediately cuts your storage footprint in half.
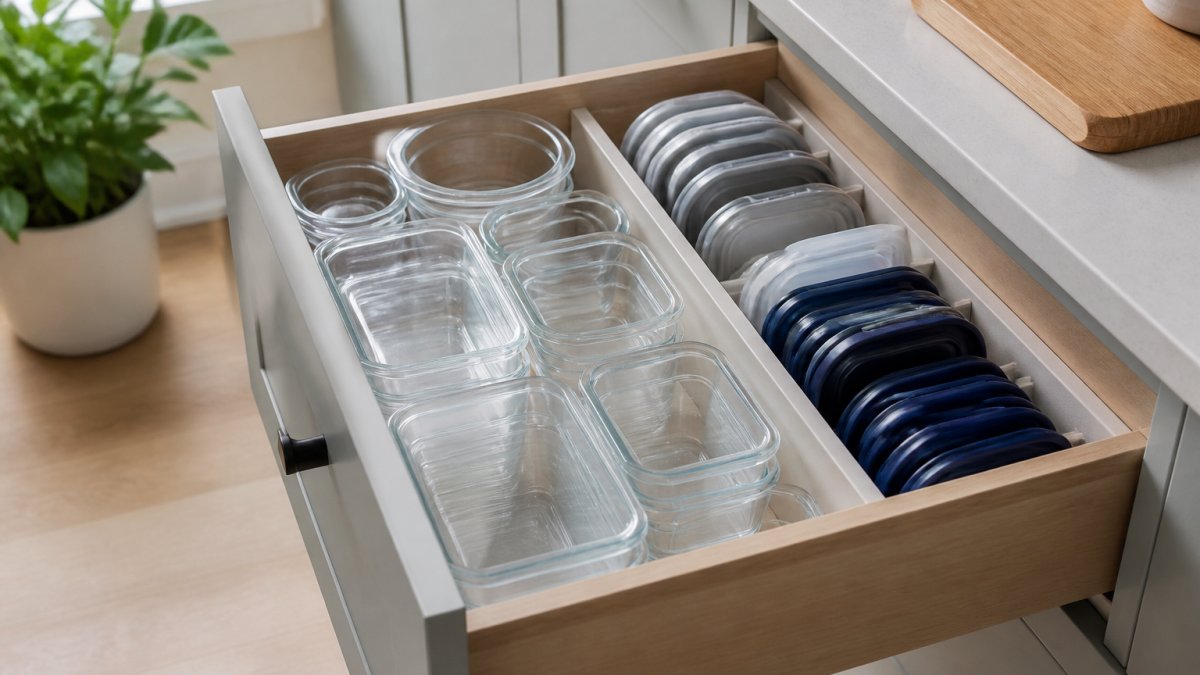
Here's how to do it:
- Empty your cabinet and lay out all containers and lids on the counter
- Match each lid to its container and set aside any orphaned pieces
- Store containers in one location (stacked by size, covered next)
- Place lids in a dedicated vertical organizer or rack
When lids are separated and visible, you'll actually use matching sets. You'll also spot damaged containers and mismatched lids you can discard, which creates space for the containers that matter.
2. Stack Containers by Size to Maximize Vertical Space
Vertical stacking is the most efficient use of cabinet space. Containers stored flat waste room; stacked by size, they fit into tight cabinets and deep shelves without toppling.
Stack containers this way:
- Measure your cabinet height and available shelf space
- Arrange containers from largest at the bottom to smallest on top
- Place heavier containers (glass or ceramic) on lower shelves for stability
- Stack no more than 4-5 containers high to prevent crushing the bottom ones
This method works in deep cabinets, under-sink spaces, and pantry shelves. The key is placing the heaviest items lowest and ensuring each stack is stable before adding another layer.
For families with many containers, consider the Sinkelle FreshSeal Pantry Storage Canister at $39.99.

3. Store Lids Vertically With a Food Container Lid Organizer
Vertical lid storage is the game-changer most people overlook. Lids stored flat in a pile become a tangled mess; stored upright, you grab the right one in seconds.
Your options for vertical lid storage:
- Mail organizer or file holder: Repurpose a desk organizer to hold lids upright in slots
- Tension rod in a cabinet: Install a tension rod horizontally and hang lids on it using small hooks
- Plate rack: A small dish rack designed for plates works perfectly for lids
- Dedicated lid organizer: Purpose-built organizers have slots sized for standard food storage lids
- Drawer divider: Use adjustable dividers to create vertical slots in a shallow drawer
The goal is keeping lids visible and reachable without stacking. When lids stand upright, you see your full collection at a glance and grab what you need instantly.
For a minimalist approach that complements modern kitchens, the Sinkelle 2 SlideNest Organizer at $55.99 includes a 2-tier metal frame with pull-out drawers.

4. How to Organize Food Storage Containers and Lids by Drawer
Drawer storage is the right call for some kitchens and the wrong call for others. Before you commit drawer space, run this quick decision check so you do not waste a deep drawer on a system that fights your container collection.
Choose a drawer when:
- Your containers are mostly shallow (under 4 inches tall) or nest tightly
- You have at least one drawer 18 inches wide and 12 inches deep
- You reach for containers daily and want them at hip height
- Your cabinet shelves are deep and dark, making visibility poor
Choose a cabinet or pull-out instead when:
- You own mostly tall stockpots or 8-cup rectangular containers
- Your drawers are narrower than 15 inches
- You store heavy glass sets that would make a drawer sag or jam
- You need to store lids and containers in the same zone without mixing them
Once you have confirmed a drawer is right, organize by container shape and material, not just by size. Shape drives how a drawer packs:
- Measure the drawer's interior at its narrowest point (many drawers taper at the back) and note the usable height below the closed front.
- Group round containers together in one zone. Round bases waste corner space, so nest them smallest-inside-largest and stand them on edge if the drawer is deep enough.
- Group rectangular and square containers in a second zone. These tile efficiently and can be stacked two high without sliding if you use a non-slip liner.
- Keep glass in the lowest, most forward zone. Glass is heavier and chips when it slides into plastic; a rubberized liner or a shallow bin keeps it from migrating.
- Give silicone collapsible containers their own shallow zone. They collapse flat but spring back, so they need a bin with a lid or a divider tall enough to contain them.
- Arrange lids upright in an adjustable divider in a third zone, sorted by diameter so the largest lids sit at the back.
- Keep daily-use pieces in the front third of the drawer and reserve the back for holiday or bulk containers.
A common pattern among professional organizers is the "one-glance rule": if you cannot identify a container's size without lifting it, the drawer is packed too densely.
Drawer storage hides clutter but also hides mismatches. Take a photo of the organized drawer and keep it on your phone so you can check a container's footprint before buying a new set.
Sinkelle FreshSeal Pantry Storage Canister →
5. Pan Lid Storage Ideas Using Cabinet Space
Pan lids and food storage container lids are not the same problem, and treating them alike is why cabinets end up unstable.
Match the storage method to the lid's material and shape:
- Glass pan lids with knobs: Store upright in a sturdy file rack or on a cabinet-door rack rated for the weight. Never stack more than three flat, and never place them above plastic container lids.
- Metal pan lids: These dent and warp under weight. Hang them on S-hooks from a tension rod or a cabinet-door rack rather than stacking.
- Round plastic container lids: File upright in a slotted organizer sorted by diameter. Round lids roll when stacked flat, so vertical is the only stable option.
- Square and rectangular container lids: These nest and stack predictably. Keep them in a shallow bin sorted by footprint, largest at the bottom.
- Silicone lids and stretch covers: These are lightweight and cling to each other. Give them a small bin with a lid or a divided pocket so they do not migrate into the pan lid zone.
A cabinet layout that keeps the two lid types apart:
- Reserve the lowest shelf or the cabinet-door rack for pan lids, because weight belongs low.
- Give container lids the middle shelf in a vertical organizer, where you can see and reach them.
- Keep a clear gap of at least 2 inches between the top of the tallest upright lid and the shelf above so nothing catches when you pull a lid out.
- Use a cabinet-door rack only if the door hinges are rated for the load; a loaded rack can pull hinges out of alignment over time.
For a no-tool option that handles both, the Sinkelle CabinetFlow Hanging Organizer at $44.99 mounts under a cabinet or inside a door and holds pot lids, cutting boards, and container lids on metal construction.
Safety and care notes:
- Store lids bone-dry before filing them; trapped moisture between stacked lids encourages odor and, in glass lids with metal rims, rust at the rim.
- Do not stack glass lids above the rim height of the rack; a lid that overhangs can slide out when the cabinet door closes.
- Check plastic container lids for warping every few months. A warped lid no longer seals, and keeping it in the rotation wastes space.
Keeping pan lids and container lids in separate, clearly labeled zones protects the lighter pieces, keeps stacks stable, and makes both collections faster to use.
6. Declutter and Match Your Container Sets First
Before organizing, declutter ruthlessly. Most kitchens have orphaned lids, damaged containers, and mismatched sets taking up space.
Do this before any storage method:
- Empty everything onto a clean counter or table
- Match lids to containers, set aside anything without a match
- Discard damaged items: cracked containers, warped lids, missing seals
- Donate extras you haven't used in 6 months
- Keep only what you use regularly, aim for 10-15 container sets maximum for most households
- Group by size and shape so similar containers stack together
This process typically cuts your collection by 30-50%. You'll have fewer containers to organize, making any storage system more effective.
A practical tip: keep one "miscellaneous" container for leftover portions too small for regular storage. This prevents accumulating dozens of nearly-empty containers in your fridge.
7. Maintain Your System Long-Term
Organization fails when maintenance stops. Build habits that keep your system working.
Maintenance checklist:
| Task | Frequency | Why It Matters |
|---|---|---|
| Match orphaned lids and containers | Monthly | Prevents new clutter from accumulating |
| Check for damaged containers | Quarterly | Removes broken items before they spread |
| Reorganize as needed | As seasons change | Adapts storage to your current container collection |
| Clean drawer/cabinet interiors | Quarterly | Prevents moisture and mold in stored items |
| Review unused containers | Annually | Donates items you've outgrown |
The best system is one you maintain without thinking. That means:
- Keep the decluttering basket visible and accessible
- Store containers you use daily in the most convenient spot
- Use clear containers so you see contents without opening
- Label shelves or drawers so family members return items correctly
- Resist buying new containers until you've used existing ones
When you're tempted to buy more containers, pause. The Sinkelle 2-Tier Pantry Storage Rack at $71.99 offers eco-friendly bamboo construction that works in cabinets, on countertops, or inside pantries, helping you maximize vertical space without adding more containers.

Organizing kitchen lids and containers doesn't require expensive systems or complicated methods. Separation, vertical storage, and ruthless decluttering solve the problem. The challenge is maintaining the system once it's built.
Frequently Asked Questions
Should containers be stored with lids on or off?
Store containers and lids separately. Lids take up less space when organized vertically or in a dedicated organizer, while stacking containers without lids lets you nest them efficiently. Keeping them apart also makes it easier to find matching pairs and reduces frustration when you need a specific size. Once you've matched sets, store completed containers with lids on in your pantry or refrigerator.
What is the best way to organize lids for food storage containers?
The most effective method is vertical storage using a food container lid organizer, drawer divider, or tension rod system. Stand lids upright so you can see all options at once without stacking. Group lids by size and shape, and keep frequently used sizes at eye level. The Sinkelle CabinetFlow Hanging Organizer ($44.99) works well for this, holding pot lids and container lids within easy reach under cabinets.
How can you store kitchen containers in a small cabinet?
Use nesting and vertical stacking. Stack containers by size from largest to smallest to save space. Store matching lids separately using a vertical organizer. The Sinkelle 2 SlideNest Organizer ($55.99) maximizes cabinet depth with pull-out tiers, letting you access containers at the back without removing everything in front. Dividers and bins also help group similar-sized containers together.
What are clever storage ideas for pan lids in a small kitchen?
Hang pan lids on a tension rod inside a cabinet, use a vertical lid rack on the inside of a cabinet door, or store them in a deep drawer with dividers. The Sinkelle CabinetFlow Hanging Organizer holds pot lids and keeps them visible and accessible. For drawer storage, use adjustable dividers to create slots so each lid stands upright and stays in place without shifting.